background image


10 

Power button for 5 seconds to implement power-on order. 
Turn off the device 
Under the status of starting up, long press Power button for over 
seconds and release, then the screen illuminates and an interface 
pops out: 
●      power-off: the device will be turned off if choosing this. 
        turn off phone function: turn off phone and then quit the   

procedure according to the current phone status; 

●      Cancel: quit the interface after choosing. Turn off the device 

after taking out the battery. 


  Notice: 1. If short press the Power button, the device will be in 

the status of deactivation instead of turning off phone function. 

          2. Click the signal icon 

  and the wireless 

supervisor function is entered but phone function is turned off. 
 

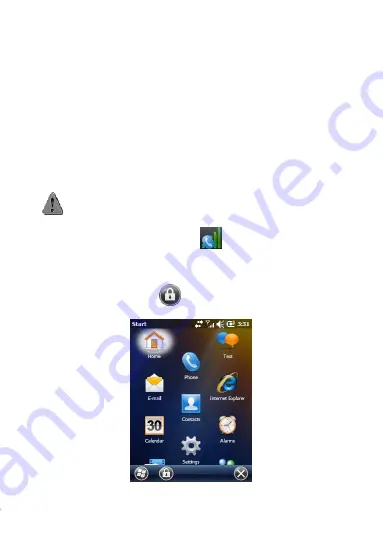
Screen lock and Release Screen lock 

In the Start interface, click 

  button at the bottom left side, the 

terminal enters into screen lock status. 


Summary of Contents for gSmart8900

Page 1: ...Quick View Guide...

Page 2: ...1 Appearance Introduction...

Page 3: ...2...

Page 4: ...3...

Page 5: ...through navigation key the FN button can switch over letters and numbers the S button is the scan button 4 Left and Right Scan Button When enabling the scanning application focus the scanning lens at...

Page 6: ...ove and rubber plug of USB port 14 pin port 19 Screw of Battery Locker Support It fixes the battery locker support 20 Locker of Battery Cover It fulfills switch on off the locker of the battery cover...

Page 7: ...belt 3 Installation of TF card push the locker of SIM card to the left and uplift the locker of SIM card from the right side then push the locker of TF card to the upside and uplift the locker of TF c...

Page 8: ...al contactor at the terminal finally put down the locker of SIM card and push the locker to the downside 5 Installation of PSAM card push the locker of PSAM card to the right and uplift the locker of...

Page 9: ...the locked position 7 Installation of the back cover close the back cover and push the locker of the back cover of the battery to the right side and finally lock the back cover Plug in and pullout of...

Page 10: ...ll the battery into the device correctly 2 Plug one end of the adaptor into the USB port of the device according to the picture and plug the other end to the outlet of the standard alternating power s...

Page 11: ...quit the procedure according to the current phone status Cancel quit the interface after choosing Turn off the device after taking out the battery Notice 1 If short press the Power button the device...

Page 12: ...ording to the tip Today Interface When you turn on the device each time the device enters into Today Interface It is shown in the below picture Today Interface shows all important information related...

Page 13: ...u can change the contents shown in Today Interface by setting up in set up main screen Start Menu menu uses the icons aligned in hexagon to browse software and respond to the stylus pen such as click...

Page 14: ...function key on the body of the device Icons of the function keys represent the default programs You can change the function keys associated to the programs Please set up in Set Up Individual Keys Too...

Page 15: ...l bar will appear The tool bar includes search feedback synchronization phone voice battery clock and alarm clock The tool bar is shown in the following picture Meanings of all the icons in the status...

Page 16: ...ing wired Ethernet and lower cost in networking Basic Usage 1 Wi Fi Connection Wi Fi Wireless Configuration wireless network view the available network list Tickle the network you want to connect and...

Page 17: ...16 2 To establish connection with the encrypted AP Select MobileXP Dlink Connection to start setting AP with strong signal is recommended Next...

Page 18: ...Wi Fi is automatically connected to MobileXP Dlink if the connected AP connects with the external network you can use IE to browse websites 3 If establishing connection with unencrypted AP select buff...

Page 19: ...18 Application of General Scan Select GeneralScan in the application programs or click explorer programs file ScanDemo GeneralScan then the screen will show the following picture...

Page 20: ...tents of the label Click Clear and information in the interface will be cleared Click Exit and quit the application and then return to the main interface RFID Scanning Select MifareDemo in the applica...

Page 21: ...the lower triangular then press Read to read the label and finally card information will be shown in the windows of Hex and Text If the card information is empty you can write the card Input digits le...

Page 22: ...s of phone SMS contact email multi media and Internet listed in the software after clicking to enter into the corresponding application General Precautionary Measure If the device cannot work normally...

Reviews: