


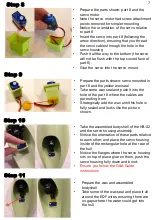


Step 13
•
Prepare the parts shown: parts 11 and 12
•
Notice the orientation of parts in the picture
•
Part 12 has a sligth curve which matches
part 11 perfectly,
make sure you have the
correct orientation
•
Test fit the faces which are to be bonded
together bond them together.
•
Ensure you follow the G&A Guide
instructions
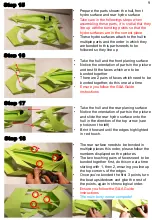
Step 14
•
Prepare the parts shown: parts 9, 10 and
the bonded rear hydro surface
•
Notice the orientation of parts in the picture
and test fit the faces which are to be
bonded together.
•
Begin by bonding part 10 to the left sede of
thre rear hydro surface.
•
Once the left side is bonded, take part 9
and bond it to the right side of the rear
hydro surface.
•
Ensure you follow the G&A Guide
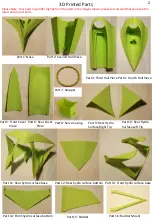
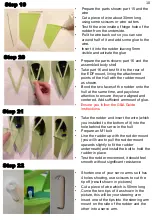
Step 12
•
Prepare the parts shown: part 13 and 14
•
Notice the orientation of parts in the picture
and test fit the faces which are to be
bonded together bond them together
•
Ensure you follow the G&A Guide
instructions
8


