Synaps 11010223Y3 Installation & User Manual Download Page 9

Troubleshooting your DVI monitor connection 

Caution! 

Turn off your computer before connecting this monitor. 


If your monitor is connected to your computer with the DVI cable, but no image appears on the screen: 

  The cable plugs may be damaged or connected incorrectly. Check both ends of the power cable 

and DVI cable, and make sure that there are not bent pins and that the cables are securely 
connected to the monitor, power outlet, and computer.


  If the monitor’s power LED is not blue, the monitor is not turned on. To turn the monitor on, press 

the monitor power button.


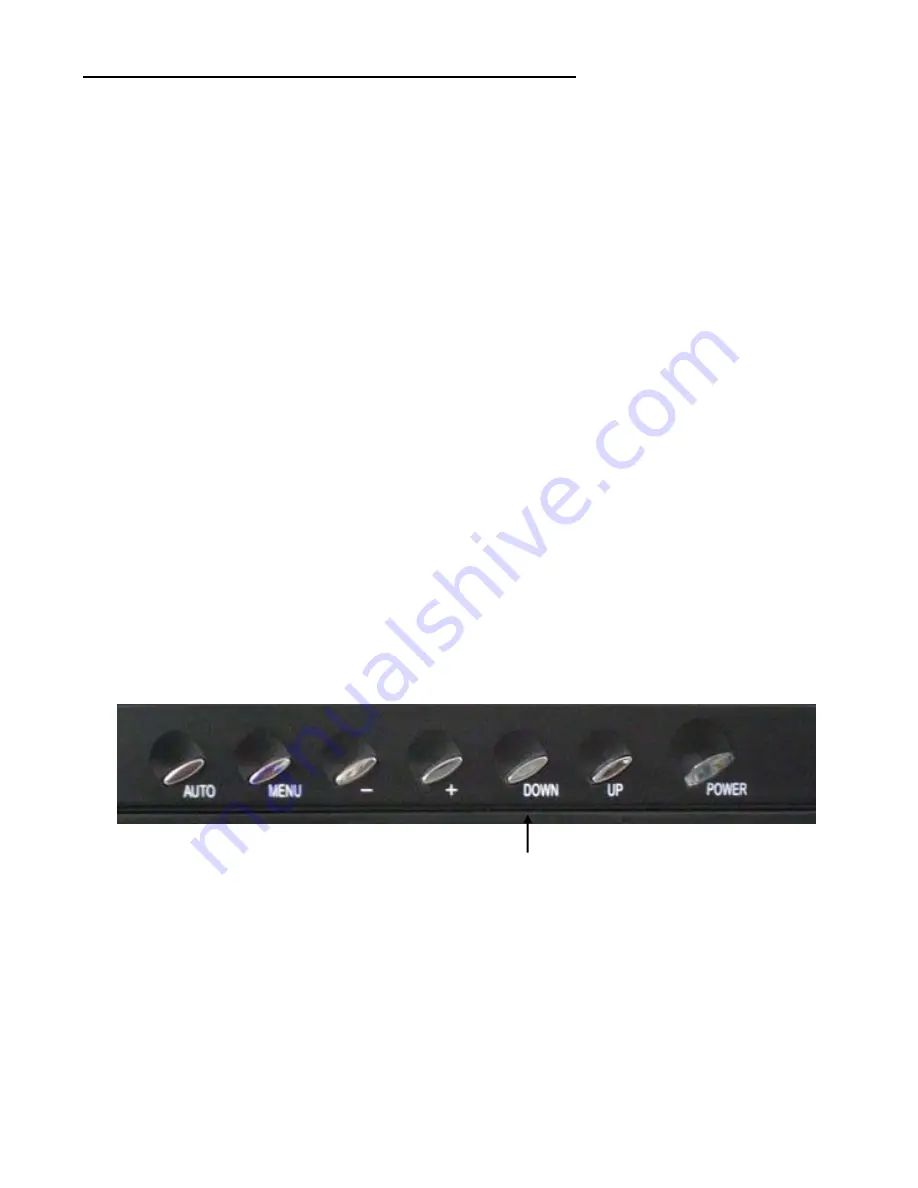
  If there is still no signal, an invalid video input may have been selected. To select DVI Input mode, 

press the DOWN button located on the front of the monitor and select DIGITAL INPUT.


  The video card in your computer may have two types of connectors: VGA and DVI (Digital Visual 

Interface). Many cards have both types of connectors. Plug the monitor cable into the appropriate 
port and tighten the thumbscrews to secure it. Some cards simply give you a choice of connectors, 
while others can run both DVI and VGA monitor at the same time. Read the video card’s 
documentation to find out your model’s capabilities. This monitor has both DVI and VGA inputs, 
use the DVI port (and a DVI cable) –it will provide more accurate color and a sharper image. You 
may have to switch your video card from VGA to DVI.


  If you do not receive a DVI signal, try disconnecting the VGA cable as your video card may not 

allow both cable types to be connected simultaneously.


            DOWN              


Important!


If you unplug the monitor while using DVI input, you may need to repeat these troubleshooting steps.


9

Summary of Contents for 11010223Y3

Page 1: ...6 in widescreen LCD Monitor Item Number 11010223Y3 Installation User s Manual Important Notice Please read this manual carefully All brand names and trademarks are the property of their respective own...

Page 2: ...Setup 4 Hardware Installation 5 Menu Control Buttons 6 On Screen Display OSD Menu Mode 7 8 Troubleshooting your DVI monitor connection 9 Display Modes 10 Specifications 11 Troubleshooting 12 Maintenan...

Page 3: ...tact with the LCD monitor screen that may cause damage to the screen 2 Align the pedestal with the easel stand of the monitor and attach the pedestal using the 3 thumb screws included Screwdriver Adju...

Page 4: ...0V 50 60Hz Pedestal Pedestal Screws with Screwdriver Hardware Setup Handle the LCD monitor with care Turn off the monitor s and computer s power before beginning setup Follow the installation instruct...

Page 5: ...mation 3 Carefully position your LCD monitor so that you can see all of the connection ports on the bottom of the monitor 4 A Plug one end of the 15 pin D Sub signal cable into the VGA connector e on...

Page 6: ...through the menu option selection 2 When not in the OSD Menu changes the signal source to from VGA DVI 6 UP 1 To navigate up right through the menu option selection 2 When not in the OSD Menu toggles...

Page 7: ...nitor is in sleep mode to save power please move the mouse or press any key on your keyboard to wake the monitor and return to working mode 4 Please check input diagrams and make sure the monitor has...

Page 8: ...ode BRIGHTNESS Adjusts the brightness of the display AUTO SETUP Automatically adjusts to the factory default settings Note This function is not available in DVI mode COLOR TEMPERATURE Adjusts the colo...

Page 9: ...the monitor and select DIGITAL INPUT The video card in your computer may have two types of connectors VGA and DVI Digital Visual Interface Many cards have both types of connectors Plug the monitor cab...

Page 10: ...75 03 79 98 1680x1050 60 00 65 30 1 We offer you 15 available modes compatible with Windows 2 Interference on your screen while you are modulating your PC or OSD is normal 3 For best quality resoluti...

Page 11: ...resistors Frequency FH 31 5 82 KHz FV 60 75 Hz Compatibility PC MAC Up to 1680X1050 60Hz Non interlaced Connector RGB Analog Audio Power Digital DVI D sub 15 pin Stereo Phone Jack External Universal...

Page 12: ...e A Make sure the power button is ON B Check whether the LCD monitor and computer power cords are connected and that there is a supply of power 4 No Signal Input A Check the signal connection between...

Page 13: ...or these chemicals can damage the LCD monitor 5 Screen To clean your LCD monitor screen or case use water or a mild cleaner as listed above Moisten a soft clean cloth or if possible use a special scre...

Page 14: ...extended period of time 6 Do not attempt to service this product yourself as opening or removing the cover may expose you to potential electric shock Only a qualified technician should service this p...

Page 15: ...ill not occur in television reception which can be determined by turning the equipment on and off Interference may be corrected by one or more of the following measures Reorient or relocate the receiv...

Page 16: ...complete unit including power cord and adapter in the original carton to the address below Include a copy of the original receipt for proof of purchase within 3 years Write the RA number on the outsi...

Page 17: ...iable for any costs such as lost profits or revenues cost of temporary replacements loss of data loss of equipment or use of equipment or any claims by third parties After 30 days from purchasing the...

Reviews: