background image

AUX

VOLUMEN 20

C        C        C        C        C    C        

C        C        C        C        C        C        C        C        C        C        

31

1

Presione 

[POWER]

para encender la

unidad.

NOTES:

Si la pantalla del televisor

muestre interferencias “de nieve”
y no funcione bien durante más
de 10 segundos, aparecerá
“SUGERENCIAS ÚTILES”.

•Compruebe si la antena o el

cable están conectados correctamente. (Consulte
“CONEXIONES DE ANTENA/CABLE” en página
29).

• Ajuste “AUTOPROGRAMACIÓN DE CA.” en el menú

de AJUSTE DE CANAL. (Consulte “AJUSTE DE
CANAL” en página 32).

• Si pese a todo esos ajustes no funcionan

correctamente, llame a nuestro teléfono de asistencia
(en la página frontal en este manual del usuario).

2

Utilice 

[CH.

K

L

]

los botones numéricos

para seleccionar el número de canal deseado.

3

Utilice 

[VOL.

X

Y

]

para ajustar el volumen.

Presione 

[MUTE]

para silenciar

al instante el sonido. Presione de
nuevo para restaurar el nivel de
sonido anterior.

NOTA:

• Incluso aunque apague la unidad en el modo DVD,

la unidad estará en el modo TV cuando vuelva a
encenderse.

PARA VER UN CANAL DE CABLE O SATÉLITE

Si la unidad está conectada a una caja de cable o de
satélite, utilice 

[CH.

K

L

]

para seleccionar CH3 o

CH4 según el ajuste de canal de salida del dispositivo
y seleccionar el canal deseado en dicho dispositivo.

PARA VER UNA ENTRADA EXTERNA

Cuando un equipo externo esté
conectado a las tomas de entrada
frontales AUDIO/VIDEO, presione

[SELECT]

[CH.

K

L

]

repetidamente hasta que aparezca
"AUX" en la pantalla.

FUNCIONAMIENT

Y AJUSTES DEL 

TELEVISOR

SECCIÓN TV

PARA VER UN PROGRAMA DE TELEVISIÓN

Para utilizar los botones numéricos

•Canales de un dígito: (Ej.: 02, 03, 04, etc.)

Presione primero 

[0]

para seleccionar un canal de un

dígito.

•Canales de dos dígitos: (Ej.: 12, 38, 95 ...)

Presione dos dígitos directamente.

•Canales de tres dígitos: (Ej. 115, 125 ...)

Presione primero 

[+100]

, y luego presione los últimos

dos dígitos.

SECCIÓN TV

F

UNCIONAMIENTO Y AJUSTES DEL TELEVISOR

INSTALACIÓN INICIAL

Cuando se enciende la unidad por primera
vez, se muestra la pantalla de IDIOMA
INICIAL. Seleccione el idioma de visualización de
pantalla y ejecute la autoprogramación del canal.

1

Después de finalizar la conexión de la 
antena o del cable, conecte el cable de 
alimentación a una toma estándar de CA.

2

Presione 

[POWER]

para encender la unidad.

3

Presione cualquier tecla para 
seleccionar el idioma del menú 
de pantalla.

• ENGLISH:

[VOL.

Y

]

• ESPAÑOL:

[VOL.

X

]

• FRANÇAIS:

[CH.

K

]

4

Confirme la conexión de la 
antena (o del cable) y presione 

[PLAY 

B

B

]

.

• El sintonizador explora y 

memoriza todos los canales 
activos de su zona.

5

Cuando la exploración ha 
finalizado, el sintonizador se 
detiene en el canal 
memorizado más bajo.

NOTAS:

• Puede salir del menú INSTALACIÓN INICIAL

presionando 

[SET-UP]

. Si el botón se presiona durante

la exploración de canales, el sintonizador interrumpe la
exploración y se muestra el canal memorizado más bajo.

El menú INSTALACIÓN INICIAL se muestra cada
vez que usted enciende la unidad a menos que la
exploración se haya finalizado.

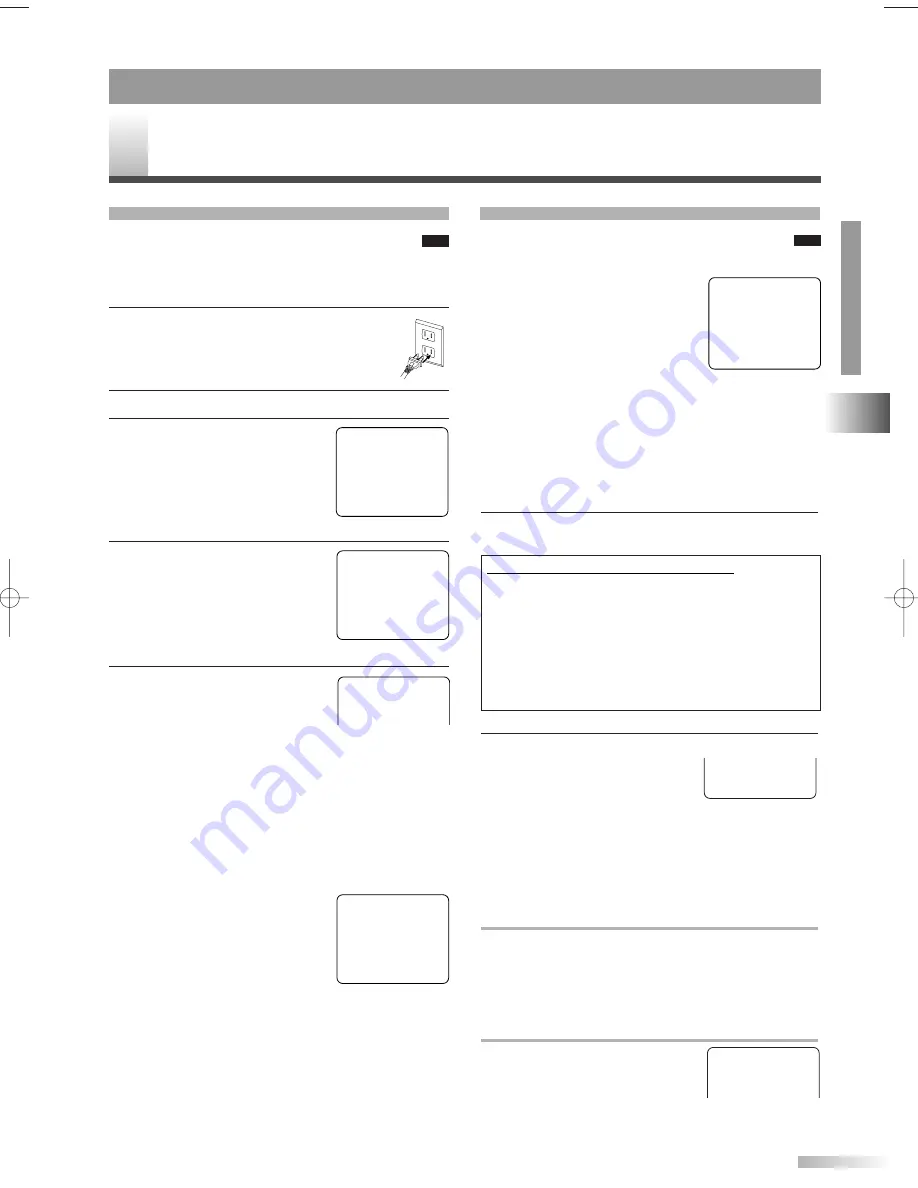
• En caso de que no pueda

recibirse ningún canal mediante la
exploración de canales, “NO HAY
SEÑAL DE TV” aparece en
pantalla. Apague la unidad y
compruebe la conexión de la
antena; a continuación, siga los pasos 1 a 5 otra vez.

Puede cambiar el después de finalizar la
INSTALACIÓN INICIAL mediante el menú IDIOMA o
el menú AJUSTE DE CANAL. (Consulte “IDIOMA
DE MENÚ DE PANTALLA” o “AJUSTE DE CANAL”
en página 32).

SELECT LANGUAGE

ENGLISH

NEXT:PRESS VOL

Y

H

ESPAÑOL

DESPUÉS:PRESIONE VOL

X

H

FRANÇAIS

APRÈS:PRESSEZ CH.

K

H

– INSTALACION INICIAL –

CONECTE LA ANTENA O
CABLE O SATELITE EN
ESTA UNIDAD.
PRESIONE PLAY,
PARA REALIZAR EL
“AUTOPROGRAMACIÓN
DE CA.”.

TV

TV

NO HAY SEÑAL DE TV 

CA15

TV

TV

ES

(Ejemplo)

- SUGERENCIAS ÚTILES -

1.VERIFIQUE ANTENA/CABLE/

SATÉLITE ESTÁ BIEN

CONECTADO.

2.VERIFIQUE

“AUTOPROGRAMACIÓN DE CA.”

ESTÁ BIEN AJUSTADO.

3.LEA LA PÁGINA FRONTAL

DEL MANUAL DEL USUARIO

O PANEL TRASERO PARA EL

NO.TEL.DE AYUDA A LOS

CLIENTES.

T9202UC(ES).QX3  06.2.6  0:47 PM  Page 31

Summary of Contents for SC520FDG

Page 1: ... DVD INSTRUCCIONES EN ESPAÑOL INCLUDAS FEATURES Auto Channel Programming Screen Saver Auto Power Off Parental Lock Resume Play Closed Caption Decoder Virtual Surround PLEASE READ BEFORE USING THIS EQUIPMENT P Owner s Manual 1EMN21536 P Remote Control NF100UD P AA batteries x 2 Owner s Manual SUPPLIED ACCESSORIES This unit comes with the following accessories Please confirm that all the accessories...

Page 2: ... Un arrêt brusque l utilisation d une force excessive et des sur faces irrégulières risquent de déstabiliser l ensemble et de le renverser 9 Ventilation Slots and openings in the cabinet and the back or bottom are provided for ventilation and to ensure reliable operation of the unit and to protect it from overheating and these openings must not be blocked or covered The open ings should never be b...

Page 3: ...na or cable system This will prevent damage to the unit due to lightning and power line surges 15 Power Lines An outside antenna system should not be located in the vicinity of overhead power lines or other elec tric light or power circuits or where it can fall into such power lines or circuits When installing an outside antenna system extreme care should be taken to keep from touching such power ...

Page 4: ... before carrying the unit TO AVOID THE HAZARDS OF ELECTRICAL SHOCK AND FIRE Do not handle the power cord with wet hands Do not pull on the power cord when disconnecting it from an AC wall outlet Grasp it by the plug If by accident water is spilled on your unit unplug the power cord immediately and take the unit to our Authorized Service Center for servicing Do not put your fingers or objects into ...

Page 5: ...6 FUNCTION TABLE 16 AUDIO MENU 17 SUBTITLE LANGUAGE 17 ANGLE MENU 17 ZOOM 17 BLACK LEVEL MENU 18 V S S Virtual Surround System 18 SEARCH MENU 18 REPEAT PLAYBACK 19 PROGRAMMED PLAYBACK 20 RANDOM PLAYBACK 20 ON SCREEN INFORMATION 20 CHANGING THE DVD SET UP ITEMS 21 CUSTOM MENU 21 INITIALIZE 23 TROUBLESHOOTING GUIDE 24 MAINTENANCE 26 APPENDIX 27 CABLE CHANNEL DESIGNATIONS 27 LANGUAGE CODE LIST 27 SPE...

Page 6: ...am recorded on another source VCR or video camera use the AUDIO VIDEO input jacks on the front of the unit Connect the Audio Video output jacks of another source to the AUDIO L R and VIDEO jacks of this unit Then use SELECT or CH K K L L until AUX appears on the screen POWER VOLUME CH SELECT STOP PLAY OPEN CLOSE VIDEO HEADPHONE L AUDIO R OPEN CLOSE VIDEO HEADPHONE L AUDIO R ex VCR or video camera ...

Page 7: ...vices to be connected to the unit To connect to a MD or DAT deck set DOLBY DIGITAL to PCM for the audio output in the setup mode and to con nect to a Dolby Digital decoder set to BITSTREAM Refer to AUDIO SETTING on page 22 Playing a unit using incorrect settings may generate noise distortion and may also damage the speakers 2 1 3 INSTALLING THE BATTERIES IN REMOTE CONTROL 1 Open the battery compar...

Page 8: ...Button DVD P 15 FWD D Button DVD P 15 29 STOP C Button DVD P 15 30 DISC MENU Button DVD P 15 31 ENTER Button TV P 10 DVD P 17 32 K L B Buttons TV P 10 DVD P 15 33 RETURN Button DVD P 17 NOTES We do not recommend the use of universal remote con trols as it does not control all the functions Note that the code number given by universal remote controls may not program to this unit For more details co...

Page 9: ...L SET UP When you turn on the power for the first time the INITIAL LANGUAGE screen is displayed Select the language for screen display and perform auto programming of the channels 1 After antenna or cable connection is completed connect the power cord into a standard AC outlet 2 Press POWER to turn on the unit 3 Press one of the keys listed below to select the language of on screen menu ENGLISH VO...

Page 10: ... TO CANCEL THE CLOSED CAPTION SYSTEM 1 Press SET UP Use K K L L to point to CAPTION 2 Press ENTER repeatedly to select OFF 3 Press SET UP to exit the menu 10 EN TV SECTION TV OPERATION AND SETTINGS TV TV SLEEP 0 MINUTE C C C C C C C C C C C C BRIGHT P P P P P P P P P P P P P P C C P P P P P P P P P P P P P P SLEEP TIMER SETTING The Sleep Timer function is used to turn off the unit without pressing...

Page 11: ...added select it them using CH K K L L CHANNEL SET UP Channel presetting is necessary at the start or in case you moved the TV to a different area TV TV Example AUTO CHANNEL PROGRAMMING 1 Press SET UP Use K K L L to point to CHANNEL SET UP then press ENTER 2 Use K K L L to point to AUTO CH PROGRAMMING then press ENTER The tuner scans and memorizes all the active channels in your area 3 When the sca...

Page 12: ... you wish to block Press ENTER repeatedly to set it to BLOCK or VIEW NOTES When you select a rating and set it to BLOCK the higher ratings will be blocked automatically The lower ratings will be avail able for viewing When you set the lowest rating to VIEW all other ratings will be automatically avail able for viewing 5 The TV Y7 TV PG TV 14 and TV MA ratings have the option of sub rating categori...

Page 13: ... you turn off the power using a wall switch If you forget the code unplug the power cord for 10 seconds to restore the access code to 0000 C NEW CODE X X X X CONFIRM CODE _ _ _ _ MPAA RATING SET UP 4 Use K K L L to point to your desired item then press ENTER to select BLOCK or VIEW 5 Press SET UP to exit the menu Selection Rating Category Explanations G General Audience PG Parental Guidance sugges...

Page 14: ... the recording status of a disc the disc may not be played back at all or normally the picture or sound may not be smooth etc 9 If there is too much recording space left on a disc the used portion is less than 55mm across it may not play back properly 10 Do not glue paper or put stickers on to the disc These may damage the disc and the unit may not read it correctly 11 The number inside the symbol...

Page 15: ...navigate the disc and access special features 1 Press DISC MENU or TITLE The DVD main menu the title menu will appear You can call up the menu even during playback 2 Use K K L L s s B B to select an item and press ENTER NOTES If disc menu is available on the disc audio language subtitle options chapters for the title and other options will appear for selection Contents of menu and corresponding me...

Page 16: ...AUDIO STREAM 8 ANGLE 1 ANGLE 8 OFF SUBTITLE STREAM 1 SUBTITLE STREAM 32 OFF ON OFF 1 2 CHAPTER SEARCH TITLE SEARCH TIME SEARCH MARKER SEARCH OFF CHAPTER TITLE OFF A A B OFF ZOOM 1 1 3 ZOOM 2 2 0 ZOOM 3 4 0 STEREO L ch R ch OFF 1 2 TRACK SEARCH TIME SEARCH MARKER SEARCH OFF TRACK ALL OFF A A B DVD V Press MODE AUDIO MENU P 17 SUBTITLE MENU P 17 ANGLE MENU P 17 ZOOM MENU P 17 BLACK LEVEL MENU P 18 V...

Page 17: ...he TV screen it means this function is not available on the disc 3 Press RETURN to exit the menu STEREO SOUND MODE You can select sound output mode during CD playback 1 Press MODE during playback 2 Use K K L L to select the sound mode STEREO stereo sound with left and right channels L ch left channel sound only R ch right channel sound only 3 Press RETURN to exit the menu AUDIO MENU 1 ENG Dolby D ...

Page 18: ...on a disc TRACK SEARCH 1 During playback press MODE repeatedly until SEARCH menu appears 2 Within 60 seconds use the Number buttons to select the desired track number Playback will start from the selected track NOTES For single digits press 0 first if the total track of the disc is 10 tracks or more You can also skip tracks by using SKIP H G or entering the desired track number with the Number but...

Page 19: ...04 23 TOTAL REPEAT PLAYBACK REPEAT TRACK 1 During playback press MODE repeatedly until REPEAT menu appears 2 Use K K L L to select your desired repeat mode OFF Repeat function off TRACK Current track repeat ALL All track repeat NOTE Repeat Track setting will be cleared when moving to other track 3 Press RETURN to exit the menu REPEAT TITLE CHAPTER 1 During playback press MODE repeatedly until REPE...

Page 20: ...s DISPLAY again to show current Title The elapsed and remaining playing time of the current title will be displayed 3 Press DISPLAY again The bit rate and the current repeat setting will be displayed If you are playing a dual layered disc the layer number will also be displayed L0 Layer 0 is playing L1 Layer 1 is playing 4 Press DISPLAY again to exit 9 49 0 00 00 0 03 30 1 3 0 00 00 1 23 45 T L1 F...

Page 21: ...2 AUDIO P 22 PARENTAL P 22 OTHERS P 23 CUSTOM QUICK INITIALIZE Press SET UP twice LANGUAGE SETTING 4 Use K K L L to select the desired item then press ENTER AUDIO Sets the audio language SUBTITLE Sets the subtitle language DISC MENU Sets the language for DVD menu 5 Use K K L L to select your desired language from the list then press ENTER 6 Press SET UP to exit the menu NOTES If your desired langu...

Page 22: ...yback of DVD discs 4 Use K K L L to select an item then press ENTER repeated ly until your desired setting appears DRC Dynamic Range Control ON To compress the range of soft to loud sound default OFF Output the original sound DOWN SAMPLING ON Output in 48kHz default OFF Output the original sound NOTE When playing a disc with copyright protection the sound will be output at 48kHz even if the settin...

Page 23: ... with parental lock Be sure to check if the parental lock function operates in the way that you have set PASSWORD CHANGE 4 Enter current password with the Number buttons then press ENTER 5 Use K K L L to select PASSWORD CHANGE then press ENTER 6 Enter four digit password with the Number buttons then press ENTER 7 Press SET UP to exit the menu NOTE If you forget the current password enter 4737 firs...

Page 24: ...d signal output Select the correct mode to operate by pressing SELECT The operable range from the unit is 10 feet 3m within 15 Check if antenna or cable is connected properly Check for the broken pin or wire of antenna cable Check for source of reception disturbance Press SELECT to select the correct mode Perform channel scanning to memorize available TV channels Try another channel If OK then pos...

Page 25: ...This unit does not support DTS audio This is not a malfunc tion During the playback of a 2 layered disc pictures may stop for a moment This happens while the 1st layer is being switched to the 2nd layer This is not a malfunction This happens right after fast forwarding or rewinding The selected language is not available for audio or subtitle on the DVD The DVD does not contain sequences recorded f...

Page 26: ...ual the laser optical pickup unit may be dirty Consult your dealer or an Authorized Service Center for inspection and cleaning of the laser optical pickup unit CABINET CLEANING Wipe the front panel and other exterior surfaces of the unit with a soft cloth immersed in lukewarm water and wrung dry Never use a solvent or alcohol Do not spray insecticide liquid near the unit Such chemicals may cause d...

Page 27: ...8 Greenlandic 5758 Guarani 5360 Gujarati 5367 Hausa 5447 Hebrew 5569 Hindi 5455 Hungarian HUN 5467 I K Icelandic ICE 5565 Indonesian 5560 Interlingua 5547 Interlingue 5551 Inupiak 5557 Irish IRI 5347 Italian ITA 5566 Japanese JPN 5647 Javanese 5669 Kannada 5760 Kashmiri 5765 Kazakh 5757 Kinyarwanda 6469 Kirghiz 5771 Kirundi 6460 Korean KOR 5761 Kurdish 5767 L N Laothian 5861 Latin 5847 Latvian Let...

Page 28: ...rminals Antenna input VHF UHF CATV 75 ohm unbalanced F type Video input RCA connector 1 Audio L R input RCA connector 2 Headphone 1 8 stereo 3 5 mm Coaxial digital audio output One pin jack 500 m Vpp 75 ohm Remote control Digital encoded infrared light system Operating temperature 5 C to 40 C 41 F 104 F Power requirements AC 120 V 60 Hz Power consumption 80 W Maximum Picture tube 20 Dimensions H 1...

Page 29: ...o se indica a continuación Parte trasera de la unidad NOTA NO DESCONECTAR DE LA CAJA Algunos sistemas de TV por cable utilizan señales cifradas y requieren un convertidor especial para recibir estos canales Consulte con su empresa de cable local O Cable entrante desde antena casera empresa de cable sin caja de cable Cable entrante desde empresa de cable o antena de satélite Caja de cable o caja de...

Page 30: ... AUX CONEXIÓN A UN DISPOSITIVO EXTERNO FRONTAL Parte frontal de la unidad Cable de audio disponible en el mercado A las tomas de salida de audio A la toma de salida de vídeo Cable de vídeo disponible en el mercado SALIDA ENTRADA SALIDA ENTRADA Por ejemplo videograbadora o videocámara etc NOTA Cuando conecte una VIDEOGRABADORA monoaural otra fuente a esta unidad conecte la toma de salida de audio d...

Page 31: ...AMIENTO Y AJUSTES DEL TELEVISOR INSTALACIÓN INICIAL Cuando se enciende la unidad por primera vez se muestra la pantalla de IDIOMA INICIAL Seleccione el idioma de visualización de pantalla y ejecute la autoprogramación del canal 1 Después de finalizar la conexión de la antena o del cable conecte el cable de alimentación a una toma estándar de CA 2 Presione POWER para encender la unidad 3 Presione c...

Page 32: ...esaria cuando está conectado a una caja de cable o de satélite Simplemente seleccione el canal para entrada de caja de cable o de satélite ej CH3 o CH4 en la unidad y seleccione el canal deseado en la caja de cable o de satélite CA15 NO HAY SEÑAL DE TV AJUSTE DE CANAL AGREGAR BORRAR CATV B AUTOPROGRAMACIÓN DE CA AJUSTE DE CANAL TV TV Puede seleccionar el idioma del menú de pantalla entre inglés es...

Page 33: ...a funciones especiales 1 Presione DISC MENU o TITLE Aparecerá el menú principal menú de título del DVD Puede activar el menú incluso durante la reproducción 2 Utilice K K L L s s B B para seleccionar un elemento y presione ENTER NOTAS SI el disco tiene un menú de disco aparecerán distintas opciones de selección idioma de sonido subtítulos capítulos del título y otras El contenido del menú y las co...

Page 34: ...34 MEMO ...

Page 35: ...MEMO 35 ...

Page 36: ...mishandling misapplication alteration faulty installation improper maintenance commercial use such as hotel rental or office use of this product or damage which results from fire flood lightning or other acts of God THIS WARRANTY DOES NOT COVER PACKING MATERIALS ANY ACCESSORIES EXCEPT REMOTE CONTROL ANY COSMETIC PARTS COMPLETE ASSEMBLY PARTS DEMO OR FLOOR MODELS FUNAI CORP AND ITS REPRESENTATIVES ...

Reviews: