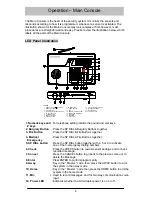
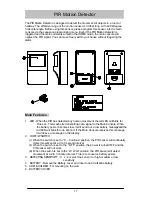
Sylvania SY4100 Owner'S Manual Download Page 8


13. Armed LED 

: When the light is ‘on’, the system is armed;  When the light is ‘off’,                          
the system is disarmed. 

14. LCD Panel 

: Displays messages 

15. Speaker 

: Sounds alarm and plays back messages 

16. Antenna 

: Used for  wireless reception 

17. Output Jack 

: Connects to the external siren 

18. Phone Jack  

: Connects to the phone set 

19. Line Jack  

: Connect to the Telephone line from the wall 

20. DC Power Jack  

: DC supply input 


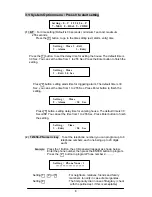
3.0:  Function for Installer Menu – Factory Default Password :123456 


 1.   Enter the password to start the menu setting as shown below   


       (i)  An incorrect password entered will show “ Access Denied” and will emit a beep 
           sound  warning.  


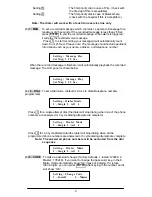
       (ii) If 3 incorrect passwords are entered, the keyboard will become disabled and 
            locked (LCD shown below). Try it again after one minute or use the Remote 
            Control Handset (   DISARM  button) to unlock the system. 
            

Note: The remote control handset can be used to unlock the system,  

                      however, if It is not programmed into the system, it can not be used 
                      to unlock the system. Please make sure to enter the correct password 
                      when the system is turned “ON” for the first time. 


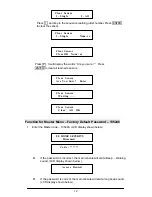
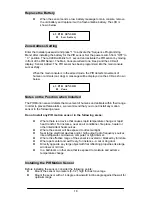
     (iii)  If 9 incorrect passwords are entered, and 3 consecutive “Keyboard Lock” occurs,  
           then the system will trigger the alarm for a set duration and will be 
           locked/disabled. The LCD will display as shown below. The dialer will not dial out 
           any of the phone numbers programmed. The disarm button on the remote control  
           handset can be used to disarm/unlock the system. 


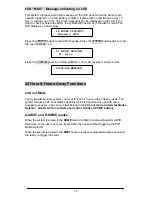
2.  If the password is correct (default 123456), the system will emit a beeping sound  
    and the LCD panel will look like this (shown below).  


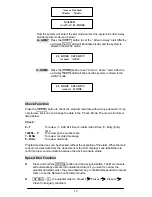
3.  Select the System Menu Number  

Access Denied 

System Lock  

SYS_OPTS:  0-SYS_OPTS     
1 – SEQ   2 – REPLAC   3 - CLR 

Access Granted 

Install  Mode


Code : ****** 

Home Security 

Keyboard Locked 

Summary of Contents for SY4100

Page 1: ...Table of Contents WIRELESS HOME SECURITY SYSTEM OWNER S MANUAL INSTALLATION AND OPERATION BEFORE INSTALLING OR OPERATING THE SYSTEM PLEASE READ THIS MANUAL MODEL SY4100...

Page 2: ...Installer Menu System Option Menu Sequence Programming Menu Replacement Menu Clear Menu Function for Master Menu Check Function Speed Dial Function Arm or Disarm via the Telephone Line Auto Dialer Pr...

Page 3: ...ct and Liquid Entry Take care not to drop objects or liquids on any part of the equipment Damage Requiring Service The alarm should be serviced by a qualified service personnel when The power supply c...

Page 4: ...ability You can add different types of accessories to the system to create a more complex system as your future needs may require Flexibility You can choose the type of sensors and response actions fo...

Page 5: ...Before installation you should have the sensors programmed on the Main Console via the systems learning mode on the Main Console This system allows you to install a maximum of 63 wireless sensors Inst...

Page 6: ...follow these steps 1 Remove the two top black rubber pads and store them away for future use 2 Measure and fix screws into the wall so that the two screws fit into the grooves left under the removed p...

Page 7: ...Check Press the CHECK button to review sensor settings and to check recorded message 7 Cancel Press the CANCEL button to go back to the previous menu or to delete the Message 8 Enter Press ENTER to co...

Page 8: ...Remote Control Handset DISARM button to unlock the system Note The remote control handset can be used to unlock the system however if It is not programmed into the system it can not be used to unlock...

Page 9: ...ult time is 30 Seconds You can set the time from 1 to 255 Sec Press Enter button to finish the setting 2 123456 P Numeric key To set the telephone number you can program up to 6 telephone numbers each...

Page 10: ...he LCD panel is shownbelow 4 8 DIAL To set a Dial mode default is 2 ALL to dial all telephone numbers programmed Press 1 for a single attempt dial the dialer will stop dialing when one of the phone nu...

Page 11: ...ght for 1 Sec This means that the sensor will transmit a 1sec signal You can also move in the front of the PIR It will detect your movement and transmit a 1 sec signal The sensor will learn into the m...

Page 12: ...ger the sensor and the newsensor will learn into the main console Note Please use the same type of sensor to replace the old one Press 2 to go into the replace sensor mode Once replaced It will go bac...

Page 13: ...er code 135246 LCD display shown below l If the password is incorrect the main console will emit a Beep Warning sound LCD display shown below l If the password is correct the main console will emit a...

Page 14: ...ime 3 Entry Entry time 123456 P To review phone number sets 7 MSG To review recorded message 8 DIAL To review dial mode Programmed devices can be checked without the activation of the alarm When the m...

Page 15: ...will hear two Beep sounds through the phone l Pressing 3 indicates that the system is Disarmed You will hear three Beep sounds through the phone If the system has been programmed in the Armed Away or...

Page 16: ...isplay is shown below 24 Hour Home Away Functions 24 Hour Mode The Sylvania security system can work for you 24 hours a day 7 days a week The system features a 24 hour status capability which is impor...

Page 17: ...y Zone Address Setting Enter the Installer code and press 1 to activate the Sequencing Programming Menu Press the PANIC button for 1 sec the red LED will also light for 1 sec The main console will emi...

Page 18: ...al to the Main Console When the battery power becomes low it will send out a lowbattery messageandthe red LED will blink for one second If the Main Console receives this message it will leave a messag...

Page 19: ...recommend that you do not install any motion sensor in the following areas Do not install any PIR motion sensor in the following areas l Where there is a device that causes rapid temperature change o...

Page 20: ...d The magnetic Door Window detector is a contact sensor and should be applied on a door or window When the magnetic contact is opened broken or the battery is low the sensor will send out a message to...

Page 21: ...p greater than 1 4 inch 5 mm between the magnet sensor and the magnet otherwise the sensor will not work properly Enter the installer password and press the 1 button to activate the Sequence Programmi...

Page 22: ...bossed on the sensor just below the LED light Find a similar arrow on the magnet Before exposing the adhesive backing align the two arrows on the surface where you want them installed Check that both...

Page 23: ...be hidden and discreetly out of reach of potential intruders or anyone likely to tamper with the system When the siren is installed and the system is set to Arm it will emit a piercing 110 decibel si...

Page 24: ...ns Install Code Master Code Exit Time Alarm Time Entry Time Auto dialing Mode Preset Telephone No for Auto dialing No 1 Name Tel No No 2 Name Tel No No 3 Name Tel No No 4 Burglary Emergency Name Tel N...

Page 25: ...ne Label 05 2F xx room Window 1 Learning Number Place of Installation Zone Label Learning Number Place of Installation Zone Label 01 33 02 34 03 35 04 36 05 37 06 38 07 39 08 40 09 41 10 42 11 43 12 4...

Page 26: ...AC adaptor Temperature Range 0 C 40 C RF Range 100 feet in open air space Security Code Hopping code Alarm Activation Time 1 255 seconds available alarm time setting Dialing Type Tone Voice Message Pl...

Page 27: ...and install the plastic wall anchors supplied 3 Install the mounting screws into the plastic wall anchors so that the heed of the screw extends approximately 1 4 from the wall 4 Remove the rubber plug...

Page 28: ...27...

Reviews: