background image

CARE AND MAINTENANCE

SPECIFICATIONS

TROUBLESHOOTING GUIDE

Symptom

Possible Caus

S

e

olution

Noise or sound 

distorted on radio

Station not tuned properly

FM: Antenna is not fully extended.

Fine tune the FM

broadcast station.


.

a

n

n

e

t

n

a


M

F

e

h

t

d

n

e

t

x

e

y

ll

u

F

:

M

F

FM: Reposition the unit until the 

best reception is obtained.

FM no sound

Volume at minimum

Increase Volume

6

1. Clean the unit with a soft, damp (never wet) cloth. Solvent or detergent should never

 be used.

2. Avoid operating your unit under direct sunlight or in hot, humid or dusty places to

reduce the risk of fire or electric shock. 

3. Keep your unit away from heating appliances and sources of electrical noise such

as fluorescent lamps or motors.

4. For better clock display clarity, avoid operating the unit under direct sunlight or in

strong room illumination.

5. Unplug the AC adapter from the unit and the electrical power outlet immediately in

case of malfunction.

USB Charging....................................... DC 5V, 1A

Switching Adapter................................. INPUT:  100-240V~ 50/60Hz 

OUTPUT: 5V        1000mA 

Battery Size (For Backup Only)............. 2 x AA

A

 SIZE (LR

03

)

Radio Frequency................................... FM: 87.5 - 108MHz

USB CHARGE


1. Make sure the unit is plugged into the wall

, Make sure the unit plugged into the AC adapter.

2. Using the appropriate USB charging cable (not included), connect one end to the device

and the other to the USB Charger on the unit.

Refer to the user’s manual for your specific device for manufacturers required 

charging amperage as well as determining the appropriate cable for your device 

before charging.

Note: This device uses a USB charging port with a 1000mA maximum charging 

capacity, making it unsuitable for charging iPads.

3. The device will now charge.

TIME PROJECTION


1. Press the PROJECTOR ON/OFF BUTTON to turn “On” or “Off” the projector.

2. Project the time onto a light/flat surface such as the ceiling or wall behind the unit.

3. Swivel the projector to position the projected time, and adjust the focus if needed.

4. If necessary, you may tap the 180° FLIP BUTTON to invert the projected time 180º.

Note : The optimal projection distance is 3-9 feet.

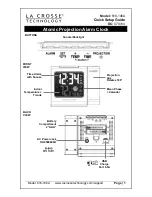
Summary of Contents for SCR1245-USB

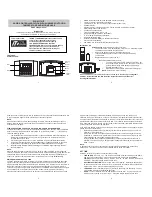
Page 1: ...PLEASE READ BEFORE OPERATING THIS EQUIPMENT INSTRUCTION MANUAL USB CLOCK RADIO WITH PROJECTOR MODEL NO SCR1245 USB ...

Page 2: ...e instructions Heed all warnings Follow all instructions Do not use this apparatus near water Clean only with dry cloth Do not block any ventilation openings Install in accordance with the manufacturer s instructions Do not install near any heat sources such as radiators heat registers stoves or other apparatus including amplifiers that produce heat Do not defeat the safely purpose of the polarize...

Page 3: ...P BUTTON 9 10 PROJECTOR LENS PROJECTOR ON OFF BUTTON LOCATION OF CONTROLS 3 1 2 3 4 5 6 7 8 9 10 11 12 11 PM INDICATOR 12 ALARM ONE INDICATOR 13 SLEEP INDICATOR 14 ALARM TWO INDICATOR 15 LED DISPLAY POWER JACK DC 5V 1A 17 18 19 FM ANTENNA BACKUP BATTERY COMPARMENT 2 X 1 5V AAA BATTERIES Not Include 16 USB CHARGER DC 5V 1A only for charging PRESET CLOCK SET BUTTON 13 14 15 16 17 18 19 ...

Page 4: ...ss and hold the PRESET CLOCK SET BUTTON 2 The hours will blink Press TUNING DOWN HOUR BUTTON to set the current hour 3 Press the TUNING UP MINUTE BUTTON to set the current minute 4 Press PRESET CLOCK SET BUTTON once and the current time is set NOTE The PM indicator will light when the hour is set in the PM SETTING SLEEP TIMER When listening to radio press SNOOZE SLEEP DIMMER BUTTON to enter sleep ...

Page 5: ... cycle through preset radio stations ALARM Setting the Alarm 1 If in radio mode press the POWER AUTO SCAN BUTTON to turn the unit off 2 Press and hold the VOLUME DOWN ALARM ONE BUTTON or VOLUME UP ALARM TWO BUTTON 3 Press the TUNING UP HOUR BUTTON to adjust the hour The PM indicator will light when the hour is set in the PM 4 Press the TUNING DOWN MINUTE BUTTON to adjust the minute The Alarm One o...

Page 6: ... malfunction USB Charging DC 5V 1A Switching Adapter INPUT 100 240V 50 60Hz OUTPUT 5V 1000mA Battery Size For Backup Only 2 x AAA SIZE LR03 Radio Frequency FM 87 5 108MHz USB CHARGE 1 Make sure the unit is plugged into the wall Make sure the unit plugged into the AC adapter 2 Using the appropriate USB charging cable not included connect one end to the device and the other to the USB Charger on the...

Page 7: ...ded Save as herein provided C I Service Dept Canada or C I Service Dept USA shall not be responsible for any damages to persons or property including the unit itself howsoever caused or any consequential damages arising from the malfunction of the unit and by the purchase of the unit the purchaser does hereby agree to indemnify and save harmless C I from any claim for damages to persons or propert...

Reviews: