background image

1-7-2

E6E22FW

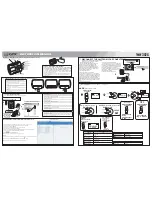
10. Press [CLEAR] button on the remote control unit. 

Fig. h appears on the screen.

When “OK” appears on the screen, the factory 
default will be set. Then the firmware renewal 
mode is complete.

11. To exit this mode, press [POWER] button.

   MODEL : *******
      Version : *.**
      Region  : *

   EEPROM CLEAR : OK

EXIT: POWER

EEPROM CLEAR : CLEAR

"*******" differs depending on the models.

Fig. h

Summary of Contents for DP170SL8

Page 1: ...SERVICE MANUAL DVD PLAYER DP170SL8 POWER SKIP SKIP PLAY STOP OPEN CLOSE...

Page 2: ...has not undertaken any such broad evaluation Accordingly a servicer who uses a service procedure or tool which is not recommended by Funai must first use all precautions thoroughly so that neither his...

Page 3: ...00 k load Audio Output 4 Room Ambient 25 C Item Conditions Unit Nominal Limit 1 Video Output 75 load Vpp 1 0 0 1 2 Coaxial Digital Out 75 load mVpp 500 50 3 Audio PCM 3 1 Output Level 1 kHz 0 dB Vrms...

Page 4: ...en the diode is turned on Do not look directly at the laser beam CAUTION Use of controls and adjustments or doing procedures other than those specified herein may result in hazardous radiation exposur...

Page 5: ...cal for safety Replace only with part number specified B In addition to safety other parts and assemblies are specified for conformance with regulations applying to spurious radiation These must also...

Page 6: ...ug prongs and externally exposed accessible parts RF terminals antenna terminals video and audio input and output terminals microphone jacks earphone jacks etc is lower than or equal to the specified...

Page 7: ...achine then apply hot air to the Flat Pack IC about 5 to 6 seconds Fig S 1 1 2 Remove the flat pack IC with tweezers while applying the hot air 3 Bottom of the flat pack IC is fixed with glue to the C...

Page 8: ...by one using a sharp pin or wire to which solder will not adhere iron wire When heating the pins use a fine tip soldering iron or a hot air desoldering machine Fig S 1 4 3 Bottom of the flat pack IC i...

Page 9: ...s Fig S 1 6 Note When using a soldering iron care must be taken to ensure that the flat pack IC is not being held by glue When the flat pack IC is removed from the CBA handle it gently because it may...

Page 10: ...ed to remove any static electricity that may be charged on the body 2 Ground for Workbench Be sure to place a conductive sheet or copper plate with proper grounding 1 M on the workbench or other surfa...

Page 11: ...button to open the tray 2 Remove the Tray Panel by releasing two locking tabs L 1 3 Press the A OPEN CLOSE button again to close the tray 4 Press the POWER button to turn the power off 5 Unplug an AC...

Page 12: ...laser diode of pickup will be destroyed Fig D5 2 Disconnect the Connectors CN301 CN401 and CN601 Remove screw S 6 and lift the DVD Main CBA Unit Fig D5 3 CAUTION 3 When reassembling confirm the FFC c...

Page 13: ...rce Plate S 5 S 3 S 2 S 2 Fig D4 S 3 S 4 S 6 7 DVD Main CBA Unit CN401 CN301 A Fig D5 View for A Short the three short lands by soldering Either of two places FPC Cable CN601 CN201 Fig D6 8 DVD Mechan...

Page 14: ...straightly into the opening as shown 3 Turn the shaft along with the opening clockwise 4 Repeat steps 2 and 3 until the tray will open 5 Pull the tray slowly manually S 11 10 Plate Holder S 10 11 Mai...

Page 15: ...n that order Fig a appears on the screen 2 Press CLEAR button on the remote control unit Fig b appears on the screen When OK appears on the screen the factory default will be set 3 To exit this mode p...

Page 16: ...ig e appears on the VFD Fig f At this time no button is available 6 Remove the disc on the tray 7 Unplug the AC cord from the AC outlet Then plug it again 8 Turn the power on by pressing the POWER but...

Page 17: ...ppears on the screen When OK appears on the screen the factory default will be set Then the firmware renewal mode is complete 11 To exit this mode press POWER button MODEL Version Region EEPROM CLEAR...

Page 18: ...9 8 10 12 6 7 5 124 FD OFST 123 TD OFST DRIVE CBA DVD MAIN CBA UNIT TO DIGITAL SIGNAL PROCESS BLOCK DIAGRAM 122 SL ADS RESET IC462 1 3 3 3V RESET IC461 2 1 3 3V 1 12 7 8 9 10 11 REMOTE SENSOR RM2001...

Page 19: ...4 105 103 79 GND DVD PD 63 GND CD PD 62 DEBUG BCU INST CACHE DATA CACHE D A 131 139 Y I P C VIDEO Y I P VIDEO C 146 AUDIO R 144 AUDIO L SDRAM ADDRESS 0 10 VIDEO SIGNAL SDRAM DATA 0 15 PICK UP UNIT TO...

Page 20: ...ER 4dB AMP 2dB AMP LPF DRIVER 11 4dB AMP 2dB AMP LPF DRIVER 6 10 4dB AMP 2dB AMP LPF DRIVER 8 3 1 15 5 6 6 VIDEO Cb Pb VIDEO Cb Pb 4 4 VIDEO Cr Pr VIDEO Cr Pr VIDEO OUT COMPOSITE VIDEO Cb Pb OUT VIDEO...

Page 21: ...CHING SWITCHING IC1002 1 2V REG Q1015 SWITCHING Q1006 Q1007 SWITCHING CAUTION Fixed voltage or Auto voltage selectable power supply circuit is used in this unit If Main Fuse F1001 is blown check to se...

Page 22: ...in the schematic diagram and the parts list Before replacing any of these components read the parts list in this manual carefully The use of substitute replacement parts that do not have the same saf...

Page 23: ...were prepared 2 To maintain original function and reliability of repaired units use only original replacement parts which are listed with their part numbers in the parts list section of the service m...

Page 24: ...1 9 3 DVD Main 1 4 Schematic Diagram E6E22SCD1 1 NOTE Either IC461 or IC462 is used for DVD MAIN CBA UNIT...

Page 25: ...1 9 4 DVD Main 2 4 Schematic Diagram E6E22SCD2...

Page 26: ...1 9 5 DVD Main 3 4 Schematic Diagram E6E22SCD3...

Page 27: ...1 9 6 DVD Main 4 4 Schematic Diagram E6E22SCD4...

Page 28: ...supply Otherwise it may cause some components in the power supply circuit to fail NOTE The voltage for parts in hot circuit is measured using hot GND as a common terminal Ce symbole repr sente un fusi...

Page 29: ...1 9 8 AV 2 3 Schematic Diagram E6E22SCAV2...

Page 30: ...PEAT TITLE GROUP VCR CHP REC SACD TRK A ALL B PSCAN DVD PM HDVCD A 7G 6G 5G 4G 3G 2G 1G a b c d e f g c d e f f g c d e f g c d e f g c d e f g c d e f g h i i a b a b a b a b a b FL2001 MATRIX CHART...

Page 31: ...d using hot GND as a common terminal Ce symbole repr sente un fusible fusion rapide CAUTION For continued protection against fire hazard replace only with the same type fuse ATTENTION Pour une protect...

Page 32: ...it to fail NOTE The voltage for parts in hot circuit is measured using hot GND as a common terminal Ce symbole repr sente un fusible fusion rapide CAUTION For continued protection against fire hazard...

Page 33: ...1 9 12 Function CBA Top View Function CBA Bottom View BE6E20F01012 B...

Page 34: ...601 Pin 8 of CN1601 C1402 PLUS LEAD Pin 12 of CN1601 Pin 14 of CN1601 Pin 10 of CN1601 20 s 0 2V VIDEO Y VIDEO C 0 2V 20 s VIDEO CVBS 0 5V 20 s AUDIO L 0 5V 0 5ms AUDIO R 0 5V 0 5ms SPDIF 1V 0 1 s NOT...

Page 35: ...01 K2 1 1 K1 2 2 KEY 2 3 3 KEY 3 4 4 KEY 1 5 5 KEY 4 6 6 FUNCTION CBA CN2101 is soldered directly to the PCB EV 1 2V 4 EV 1 2V 5 EV 3 3V 7 EV 3 3V 8 P ON 3 3V 9 P ON 5V 10 EV 10V 11 EV 10V 12 GND 13 G...

Page 36: ...TIMING CHARTS Tray IN TL221 Sled Drive TP303 Disc Drive TP301 Focus Drive TP304 Tracking Drive TP302 0V 3 3V 0V 1 65V 0V 0V 0V 1 65V 1 65V 1 65V Tray Close Play Play Tray Open Tray Close Disc Rotatio...

Page 37: ...pply 7 OUT a KEY 1 Segment Output Key Source 1 8 OUT b KEY 2 Segment Output Key Source 2 9 OUT c KEY 3 Segment Output Key Source 3 10 OUT d KEY 4 Segment Output Key Source 4 11 OUT e Segment Output 12...

Page 38: ...E C B E C B 1 2 3 Note A Anode K Cathode E Emitter C Collector B Base R Reference G Gate D Drain S Source KIA4558P P KTA1266 Y AT P KTC3203 Y AT P KTA1267 Y AT P KTC3199 GR AT P KTC3205 Y AT P KRA110...

Page 39: ...ark Some Ref Numbers are not in sequence A13 A15 A13 2B3 A17 A21 A22 AC1001 2L041 2L071 2L051 F1001 2L105 2L021 2L021 2L021 DVD Main CBA Unit 2L021 2L051 2B38 2L011 2L011 2L011 2L011 2L011 A16 2L031 2...

Page 40: ...1 15 2 E6E22PEX Packing A22 S1 S2 S4 Unit S2 X10 X5 X2 X4 X1...

Page 41: ...B1 DVD MECHA E7 HDMi N79F1KVM N79F1KVM 2B3 MAIN PCB HOLDER E5932UD 0VM204593D 2B5 REINFORCE PLATE E6A60UD 1VM321919 2B38 PLATE HOLDER E6A35UD 1VM322595 2L011 SCREW C TIGHT M3X5 BIND HEAD GBCC3050 2L02...

Page 42: ...CAP CH J 220pF 50V CHD1JJ3CH221 C1207 CHIP CERAMIC CAP 1608 CH J 68pF 50V CHD1JJ3CH680 C1208 CHIP CERAMIC CAP 1608 CH J 68pF 50V CHD1JJ3CH680 C1221 ELECTROLYTIC CAP 10 F 16V M H7 CE1CMASSL100 C1222 E...

Page 43: ...P NQSZKRA110MP Q1016 NPN TRANSISTOR KRC103M AT P NQSZKRC103MP Q1031 FET 2SK3498 T6L1FUNANQ QF1Z02SK3498 Ref No Description Part No Q1201 TRANSISTOR KTC3199 GR AT P NQS4KTC3199P Q1202 TRANSISTOR KTC319...

Page 44: ...S 1 6W J 10 RCX6JATZ0100 R2002 CHIP RES 1 10W J 68k RRXAJR5Z0683 R2012 CHIP RES 1 10W J 1k RRXAJR5Z0102 R2013 CHIP RES 1 10W J 1k RRXAJR5Z0102 R2014 CHIP RES 1 10W J 1k RRXAJR5Z0102 R2015 CHIP RES 1 1...

Page 45: ...erein without the obligation to notify any person or organization of such changes with the design is a registered trademark of Funai Electric Co Ltd and may not be used in any way without the express...

Reviews: