


11
By keeping the [Cancel] button pressed for at least two seconds, you can always navigate to the home screen. From
the home screen, the menu is launched by simply pushing the [OK] button.
The following notation is used to describe locations in the menu:
Home > Menu > Sub menu >
…
For example, the manual could say “navigate to
Home > Menu > Device Settings
”. This can be read as follows:
Keep [Cancel] pressed for 2 seconds to reach the home screen.
Then, press [OK] to get to the menu.
Select
“
Device Settings
”
using the encoder wheel.
After pressing [OK] again to confirm the selection, the two items of the device settings menu
are shown.
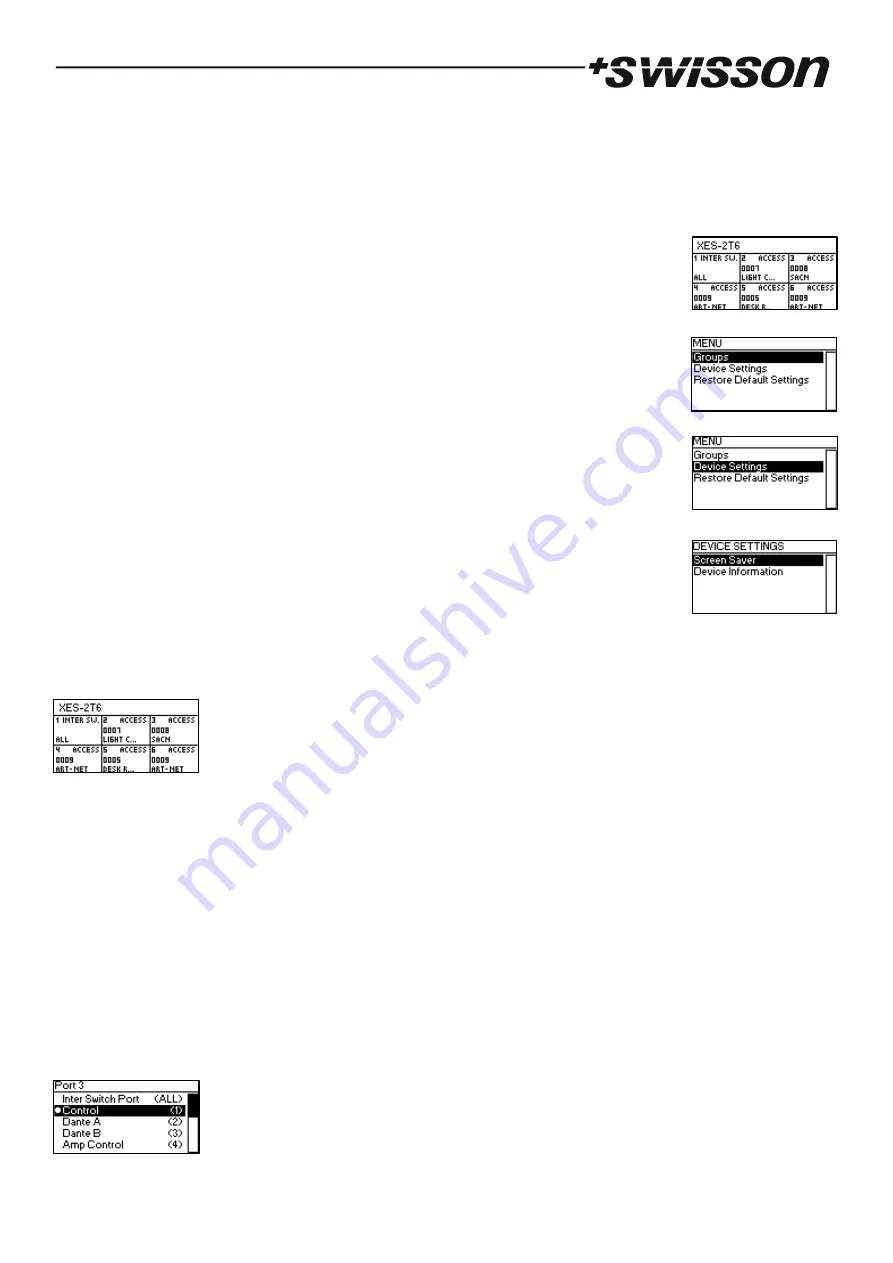
Home Screen
The home screen displays the title XES-2T6, the area below is arranged into 6 cells. Each cell shows the number of its
associated numbered Ethernet port (see page 7, item 11). Th
e small text next to the port number is either “INTER SW.”
or “ACCESS”. “INTER SW
.
” is displayed, if the corresponding port is configured to be connected to another IEEE 802.1Q
enabled switch and “ACCESS” is shown if the port is configured to connect an e
nd device. More details on the differ-
ence between inter switch and access ports are given on page 9 under Groups (IEEE 802.1Q VLANs).
If the port is configured as an access port, the corresponding cell on the home screen shows the VLAN ID associated
with that port on the second line and on the bottom line, the beginning of the group label is displayed.
The cells associated with inter switch ports simply display “ALL” on the bottom left as a reminder that those ports pass
on and receive all groups (any VLAN ID).
Ethernet Port Configuration
To configure a numbered Ethernet port (see page 7, item 11), press the button next to it marked as item 13 on page
7. After that, the display will show the configuration screen for the selected port as shown below.


