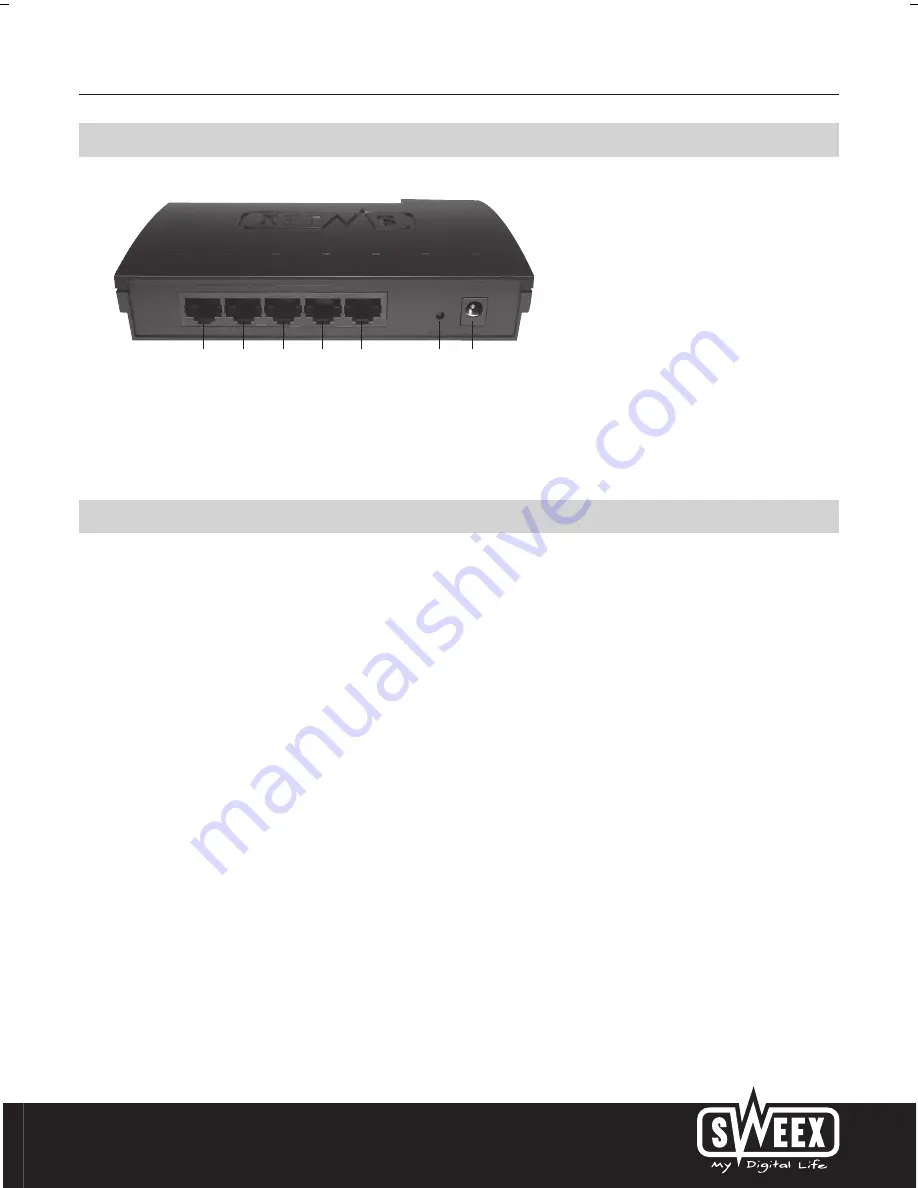
SWEEX RO003 - QUICK_START_GUIDE Introduction Manual Download Page 2

English version

3

Rear view

1

2

3

4

WAN

RESET

AC 9V

1.   LAN ports 1, 2, 3 and 4 for connecting computers by means of an RJ-45 UTP Ethernet network cable. 
2.   WAN port for connecting a modem by means of a RJ-45 UTP Ethernet network cable. 
3.   Reset button to return to the factory settings. 
4.   Power connector for connecting the power adaptor.

Connecting the Sweex Broadband Router

1.   Connect the power adaptor (included) to the rear of the router and the mains socket. The light next to “Power” is lit. In the event the LED is not lit, check 

the connections of the power adaptor to the router and the mains socket. 

2.   Switch on the computer and connect it to the rear of the modem using a network cable (RJ-45 UTP). You can select any of the ports 1, 2, 3 and 4. The 

corresponding light at the front will be lit. In the event the light fails to light up, check whether the network cable is properly connected to the computer and 
the router.

3.   Switch on the modem* again. Note: Here we do not refer to the Sweex router. Connect the modem to the rear of the router using a network cable (RJ-45 

UTP). Do this via the WAN port The WAN light at the front of the router will light up. In the event the light fails to light up, check whether the network cable 
is properly connected to the router and the modem. 

*   In order to use the Sweex Broadband Router you need an active Internet connection, which is established through a modem. This modem is usually supplied 

by the provider. 

Summary of Contents for RO003 - QUICK_START_GUIDE

Page 1: ...or in the direct vicinity of heating elements Do not use the Sweex Broadband Router in extremely dusty or moist surroundings Protect the product against powerful shocks or jolts they may damage the i...

Page 2: ...ter and connect it to the rear of the modem using a network cable RJ 45 UTP You can select any of the ports 1 2 3 and 4 The corresponding light at the front will be lit In the event the light fails to...

Page 3: ...the router Windows Vista In the bottom left of your screen go to Start Start Control Panel Control Panel Click on View network status and tasks View network status and tasks Left in the column click...

Page 4: ...LAN Connection LAN Connection or Wireless Network connection Wireless Network connection and select Properties Properties The following screen appears Now select Internet Protocol Version 4 TCP IPv4 a...

Page 5: ...o to Start Control Panel Then go to Network and Internet Connections Open Network Connections Or if the Windows classic style is used Start Settings Network Connections Right click LAN Connection or W...

Page 6: ...automatically Click OK twice The network settings for Windows 2000 have now been configured correctly The correct settings for the Internet browser will be discussed later in this manual Internet brow...

Page 7: ...If this login screen fails to appear recheck the settings of your Internet browser as described above Also check the IP address of your computer In this IP address only the digits after the last dot...

Page 8: ...riptions The applicable settings are listed for each subscription form In the event that your subscription is not listed consult your Internet provider for the router settings which correspond to your...

Page 9: ...ch on the modem and wait until it is fully started up and all the correct lights are lit 5 Reconnect the network cable between the modem and the router via the WAN port of the router The WAN light sho...

Page 10: ...s to appear You have now completed the configuration and are ready to surf the Internet i If your IP address continues to be displayed as 0 0 0 0 click on Renew If after 1 minute your IP address still...

Page 11: ...password 6 Click on Next Click Save to save the settings 7 In order to check whether the Internet connection has been set up successfully go to the status screen by clicking Status left in the column...

Page 12: ...use a PPTP connection 4 Under PPTP Account enter the user name you received from your provider 5 Under PPTP Password enter the corresponding password and click on Next 6 In the next window click Next...

Page 13: ...e Internet connection has been set up successfully go to the status screen by clicking Status left in the column The WAN IP section will display your Internet IP address It can sometimes take up to 1...

Page 14: ...me IP address as registered in the router The router may assign a different IP address to the computer so that the forwarding or DMZ command no longer applies to that computer 1 The port settings can...

Page 15: ...computers for which you want to open ports by means of the Forwarding or DMZ feature Complete the steps in chapter Configuring the computer to connect to the router Instead of selecting Obtain an IP...

Page 16: ...can be changed by clicking System Tools and then Change Password left in the column In order to change the user name and password settings enter your new user name under Username and your current pas...

Page 17: ...nfigured After the reset the router will restart During start up the factory settings are reloaded and the computer will lose connection with the router for around 30 seconds After this the router can...

Reviews: