English version
English version
Hardware
Take the following precautionary measures prior to installing the hardware:
1. Ensure the PC is switched off and disconnected from the mains.
2. Also, disconnect the printer and monitor cables (they have their own power supply) to be absolutely sure that the PC is not live.
3. Now unscrew the computer casing.
4. After having unscrewed the computer casing, you must ensure that you are free of any static electricity. Do this by touching a (neutral) pipe
of the central heating system or an unpainted water pipe. Please note that you must not use magnetic screwdrivers. Before you proceed any
further, briefly touch the iron frame of the PC casing. Furthermore, make sure that you minimise contact with any contact points of the PC, PCI
card or the memory.
5. Find a vacant PCI slot and remove the metal guard plate part of the computer casing in front of the relevant slot. On occasion the card does not
allow for it to be inserted in the PCI slot smoothly. Should this be the case, do not force anything, but try another available slot.
6. Once the card has been successfully installed, check whether all other cards are still properly inserted in the PCI slots. It is possible that the
other PCI cards are lifted up slightly when installing a new PCI card; as a result, the relevant cards or even the entire PC may no longer operate
correctly.
7. You can now replace the casing on the computer base and correctly reconnect all cables to and from the PC.
8. Now switch on the PC again.
9. Windows will now detect the card.
Installation under Windows 98SE
We advise you to ensure the operating system is up-to-date before starting the installation. This can be easily checked by starting up Internet Explorer
and selecting the option “Windows Update” in the “Extra” menu.
In order to install the LAN PCI card gigabit, you need the Windows 98 CD-ROM. We advise you to have this ready. Once the hardware has been
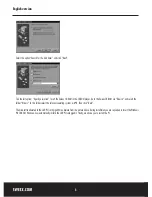
detected, Windows shows the following screen:
Click “Next”.


