background image

INSTRUCTION BOOKLET

INSTRUCTION BOOKLET

INSTRUCTION BOOKLET

INSTRUCTION BOOKLET

7

cut-offs.

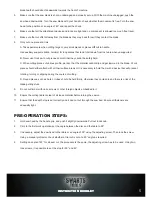
25.  Always use stands to provide support for long work pieces that overhang the turntable.

26.  Feed workpiece into a blade/cutter against the direction of rotation of the blade/cutter, not with it.

WARNING! 

We recommend the use of a residual current rating of 30mA or less

1. Wear goggles.

2. Wear earmuffs.

3. Wear a breathing mask. 

WARNING! 

For your own safety read instruction manual before operating Mitre Saw

1. Wear eye protection.

2. Keep hands out of path of saw blade.

3. Do not operate the saw freehand.

4. Never reach around saw blades.

5. Turn off tool and wait for saw blade to stop before moving workplace or changing settings.

6. When changing the blade, replace and secure all guarding to its original position correctly before starting tool

7. Disconnect power (or unplug as applicable) before changing blade or servicing.

8. Do not expose to rain or use in damp locations.

9. To reduce the risk of injury, return carriage to the full rear position after each crosscut operation. The tool must be used 

only for its prescribed purpose.

10. Any use other than those outlined in the manual will be considered a case of misuse.

11. The user and not the manufacturer shall be liable for any damage or injury resulting from such cases of misuse.

12. The manufacturer shall not be liable for any changes made to the tool or for any damage resulting from such 

changes.

13. Even when the tool is used as prescribed it is not possible to eliminate all residual risk factors.


WARNING!

 The following hazards may arise in connection with the tool’s construction and design:


Damage to the lungs if an effective dusk mask is not worn.

Damage to hearing if effective ear protection is not worn.

Summary of Contents for SW1045

Page 1: ...INSTRUCTION BOOKLET PLEASE READ CARE AND SAFETY INSTRUCTIONS BEFORE USE 305mm Double Bevel Sliding Compound Mitre Saw Part No SW1045 ...

Page 2: ...onths of purchase of goods This warranty is limited to the repair or replacement at the manufacturers discretion of parts and shipping prepaid to the original dispatch destination We regret that no liability can be accepted for consequential or special damages of any kind howsoever arising in connection with products supplied by the seller This warranty is in lieu of all other warranties expressed...

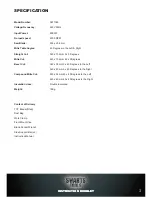
Page 3: ...t 340 x 102mm 0 x 0 Degrees Mitre Cut 240 x 102mm 45 x 0 Degrees Bevel Cut 340 x 55mm 0 x 45 Degrees to the Left 340 x 40mm 0 x 45 Degrees to the Right Compound Mitre Cut 240 x 55mm 45 x 45 Degrees to the Left 240 x 40mm 45 x 45 Degrees to the Right Insulation class Double Insulated Weight 18Kg Content of Delivery TCT Blade fitted Dust Bag Work Clamp Front Mount Vice Blade Socket Wrench Side Suppo...

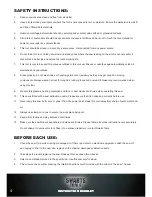
Page 4: ...ways wear a hair net for long hair rubber gloves and non skid footwear are recommended when using this tool 9 Wear safety glasses hearing protection and face or dust masks at all times when operating this saw 10 This saw is fitted with a dust extraction nozzle Please ensure that it is hooked up correctly before use 11 Never carry this saw by its cord or yank it from the power point Keep this cord ...

Page 5: ...jammed in the blade Work pieces should either attach with all their surface areas or it is necessary to hold them with a device that will prevent rotating turning or slipping during the course of cutting D Round pieces such as bars or tubes should be held firmly otherwise they could spin and there is a risk of the blade getting stuck 9 Do not cut timber with nails screws or other foreign objects e...

Page 6: ...should never be left around the work area 14 Avoid cutting nails in the proximity of the Mitre Saw Inspect the workplace and remove all nails and other foreign objects before beginning sawing 15 Support the work properly 16 Never reach over the blade to remove waste or off cuts 17 Do not attempt to free a jammed blade before first switching off the machine and disconnecting the power supply 18 Do ...

Page 7: ...ion correctly before starting tool 7 Disconnect power or unplug as applicable before changing blade or servicing 8 Do not expose to rain or use in damp locations 9 To reduce the risk of injury return carriage to the full rear position after each crosscut operation The tool must be used only for its prescribed purpose 10 Any use other than those outlined in the manual will be considered a case of m...

Page 8: ... reflect the laser back at the operator 5 Do not change the laser light assembly with a different type Repairs must be carried out by the laser manufacturer or an authorized agent CAUTION Use of controls or adjustments or performance of procedures other than those specified herein may result in hazardous radiation exposure 1 Laser assembly 2 Laser light on off switch 3 Laser cover 4 Laser pitch co...

Page 9: ...INSTRUCTION BOOKLET INSTRUCTION BOOKLET 9 2 26 29 27 6 24 30 32 31 ...

Page 10: ...e sure that the square contacts the flat part of the saw blade not the teeth Rotate the blade by hand and check the blade to table alignment at several points 8 The edge of the set square and the saw blade should be parallel 9 If the saw blade angles away from the set square use an 8mm wrench or adjustable wrench to loosen the lock nut securing the 0 degrees bevel adjustment screw 34 Also loosen t...

Page 11: ...aser beam on when the work piece is on the mitre saw table 1 Mark the line of the cut on the work piece 2 Adjust the angle of mitre and bevel of the cut as required 3 Switch on the laser light on off switch 2 4 Clamp the work piece in position using the laser lines to align the blade with the pencil mark on the work piece TRENCH DEPTH ADJUSTMENT In its normal position the trenching stop 31 permits...

Page 12: ...not necessary to use the slide mechanism In these cases ensure that the slide lock 29 is screwed down to prevent the saw arm from sliding 1 A crosscut is made by cutting across the grain of the work piece A 90 crosscut is made with the mitre table set at 0 degrees Mitre crosscuts are made with the table set at some angle other than zero Pull on the release knob 6 and lift the saw arm 5 to its full...

Page 13: ...ide it towards you Hold the handle firmly and squeeze the switch trigger 24 Allow the blade to reach maximum speed Press the release latch 35 and slowly lower the blade into the work piece and slide it away from you at the same time until the work piece is cut Release the switch trigger 24 and allow the saw blade to stop rotating before raising the blade out of the work piece Wait until the blade ...

Page 14: ...ks 6 Use the wrench provided to loosen and remove the blade bolt Loosen in a clockwise direction as the blade screw has a left handed thread 7 Remove the flash washer and outer blade washer and the blade 8 Make sure all contact points are clean and wipe a drop of oil onto the inner blade washer and the outer blade washer where they contact the blade 9 Fit the new blade onto the spindle taking care...

Page 15: ...horised service centre in order to avoid a safety hazard 2 Cleaning Keep the tool s air vents unclogged and clean at all times Remove dust and dirt regularly Cleaning is best done with a soft brush or rag Re lubricate all moving parts at regular intervals Never use caustic agents to clean plastic parts CAUTION Do not use cleaning agents to clean the plastic part of the saw A mild detergent on a da...

Page 16: ...PLEASE READ CARE AND SAFETY INSTRUCTIONS BEFORE USE PLEASE READ CARE AND SAFETY INSTRUCTIONS BEFORE USE ...

Reviews: