Vehicle care
301
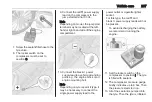
Raise the vehicle by pressing the
wheel wrench until the wheel is
clear of the ground.
4. Unscrew wheel bolts / nuts
completely and wipe clean with a
cloth.
Put wheel bolts / nuts somewhere
where the threads will not be
soiled.
5. Change the wheel.
6. Screw in the wheel bolts / nuts.
Separately supplied bolts must be
used for the temporary spare
wheel. These are allowed only for
the temporary spare wheel. Refer
to an label on the temporary spare
wheel.
7. Lower vehicle.
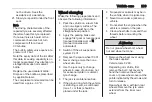
8. Install the wheel wrench
(depending on vehicle, attach
wheel wrench to adapters)
ensuring that it is securely located
and tighten each wheel bolt / nut
in a crosswise sequence.
Tightening torque is: 172 Nm
(Front-wheel drive), 235 Nm
(Rear-wheel drive with twin rear
wheels), 264 Nm (Rear-wheel
drive with single rear wheels).
9. Refit wheel cover.
Rear-wheel drive, with twin rear
wheels: Install the tyre valve
extender to the inner rear wheel
before refitting the wheel cover.
Note
If applicable, fit anti-theft bolts
nearest the tyre valve (otherwise it
may not be possible to refit the wheel
cover).
10. Stow the replaced wheel
and the vehicle tools
290.
11. Have the new wheel balanced on
the vehicle. Check the tyre
pressure of the installed tyre
nut torque as soon as possible.
Have the defective tyre renewed or
repaired.
Spare wheel
The spare wheel can be classified as
a temporary spare wheel depending
on the size compared to the other
mounted wheels and country
regulations. In this case a permissible
maximum speed applies, even
though no label at the spare wheel
indicates this.
Caution
The use of a spare wheel that is
smaller than the other wheels or in
combination with winter tyres
could affect driveability. Have the
defective tyre replaced as soon as
possible.
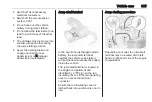
The spare wheel is held under the
vehicle frame using a winch and
secured by tightening a cable using
the wheel wrench and adapters
(depending on vehicle).
It may be necessary to jack the
vehicle up to gain access to the spare
wheel on a fully loaded vehicle with a
flat rear tyre.
Summary of Contents for Movano
Page 1: ...Owner s Manual ...
Page 2: ......
Page 4: ...2 Introduction Introduction ...
Page 7: ...Introduction 5 ...
Page 13: ...In brief 11 Instrument panel overview ...
Page 15: ...In brief 13 ...
Page 98: ...96 Instruments and controls Control indicators in the instrument cluster ...
Page 124: ...122 Infotainment system Control elements overview Radio 15 USB ...
Page 126: ...124 Infotainment system NAVI 50 IntelliLink ...
Page 128: ...126 Infotainment system NAVI 80 IntelliLink ...
Page 324: ...322 Customer information ...


