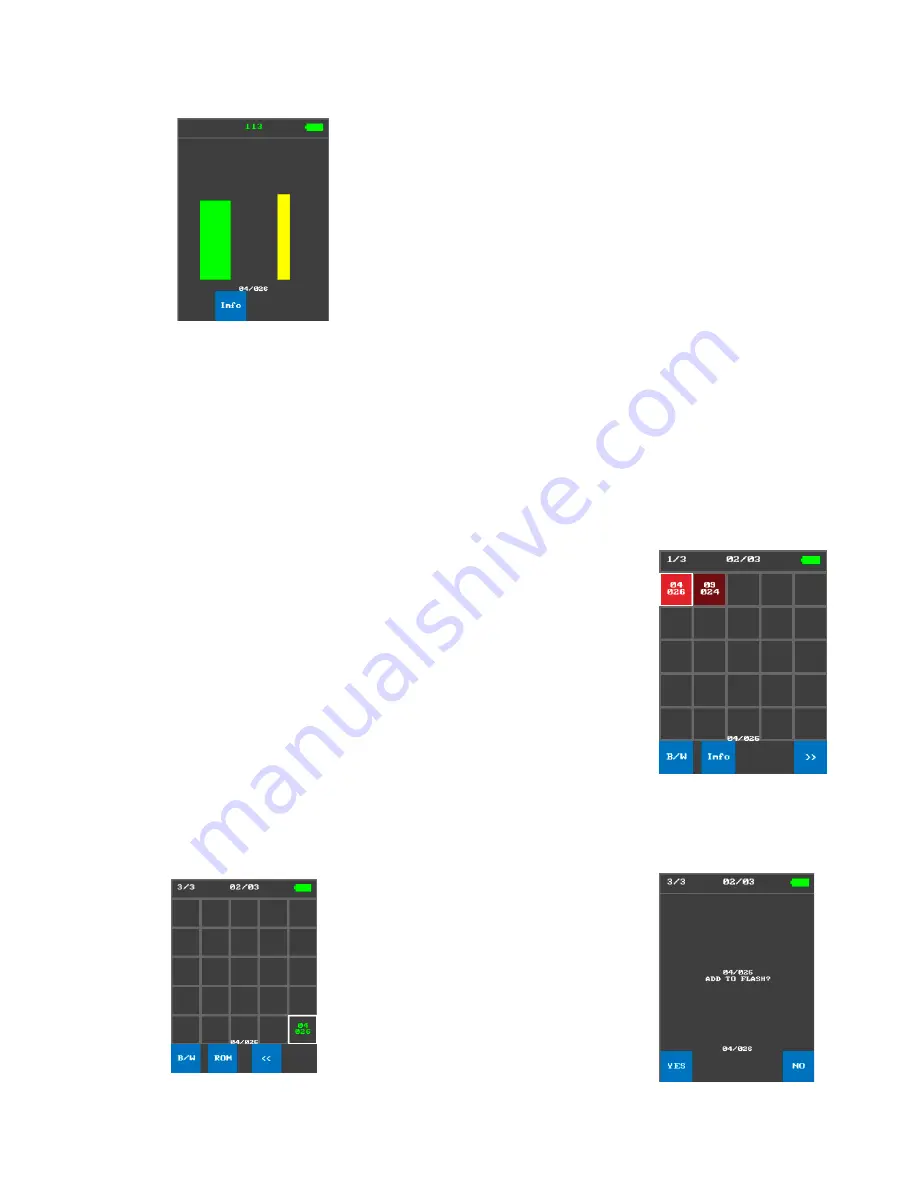
background image

Page 

5

 of 

7


Localization mode 


1.


This mode can be accessed by choosing the 

«Info» 

option on 

a selected "cell".  
The screen will display two dynamic graphs of received signal level 

green (left) 

– integral. 

yellow (right) 

- instantaneous. 

At the top of the screen, a numerical value of received signal level is 
displayed in dB 


2.


In order to localize signal source, the operator should move around the premises with 
the device until one could find a spot with the highest received signal level. 
 
You can return to "main screen" by pressing the 

«Info» 

button again. 


Adding cell to «white list» 


1.


Select a cell, then press the 

«B/W

» option button. The cell will 

be transferred to the last page to the end of the array and will 
be marked by green-coloured font. 

Note! 

Maintaining  a  proper  «white  list»  of  signals  that  were 

identified as non-suspicious will greatly increase the efficiency 
and speed of your  ARCAM  during further search sessions. 
Please  note  that  «white  list»  will be erased from ARCAM's 
memory upon turning it off (if you want to keep the white 
listed cells add them to permanent memory). 
 

Adding white-listed cell to permanent memory 

If you want a white-listed cell to be kept in ARCAM's memory even after it will be turned 
off, you will need to add this cell to permanent memory. 


1.


Navigate through pages of the "main 

screen" and select desired white-listed cell. 
Upon selecting, option buttons 

«B/W» 

and


«ROM» 

will appear at the bottom of the 

screen. 

«B/W» - 

will remove selected cell from white 

list and move it back to first page of the main 
screen. 

Summary of Contents for ARCAM

Page 1: ...ARCAM Spy Camera Detector USER S MANUAL ...

Page 2: ...der to find stray emission spurious signals that is unique for video camera circuits Upon detection such signals are then evaluated and correlated with the spectral images database that is stored in ARCAM s memory Note Stray emission from some digital circuits commonly used in portable media players laptops automobile on board media systems et cetera can match camera images To remedy such false po...

Page 3: ...ver sensitivity 148 dBm Dynamic range 80 dB Detection time average 3 s Analysis time average 10 s Continuous operating time not less than 4 hrs Battery full recharge time not more than 3 5 hrs Antenna type whip broadband Antenna pattern type circular Touch screen type colour 74 mm Battery Li Pol 4100 mAh Physical dimensions 85 х 140 х 30 mm Weight with antenna not more than 300 g Operating tempera...

Page 4: ...robabilities Main screen consists of 3 pages of 25 cell arrays which limits the number of simultaneously detectable signal to 75 Page number is displayed in a top left corner You can navigate through pages by pressing either or buttons which can be found at the bottom of the main screen Battery charge level is displayed at the top right corner of the main screen 2 You can select any detected signa...

Page 5: ...page to the end of the array and will be marked by green coloured font Note Maintaining a proper white list of signals that were identified as non suspicious will greatly increase the efficiency and speed of your ARCAM during further search sessions Please note that white list will be erased from ARCAM s memory upon turning it off if you want to keep the white listed cells add them to permanent me...

Page 6: ...manently stored cells Turning off and charging 3 You can turn ARCAM off by pressing and holding the on off button located on the right side You can release the button as soon as you see the Power Off message 4 Before charging always detach the antenna from your ARCAM The mini USB charging port is located at the left side Whenever you plug in the USB power supply to your ARCAM it will automatically...

Page 7: ...ncluded in the set by pressing the center of the targets that will appear in different parts of the screen Upon successful calibration the ARCAM will load the main screen You can access touch panel calibration screen by pressing and holding the screen during loading after turning ARCAM on ...

Reviews: