


4.
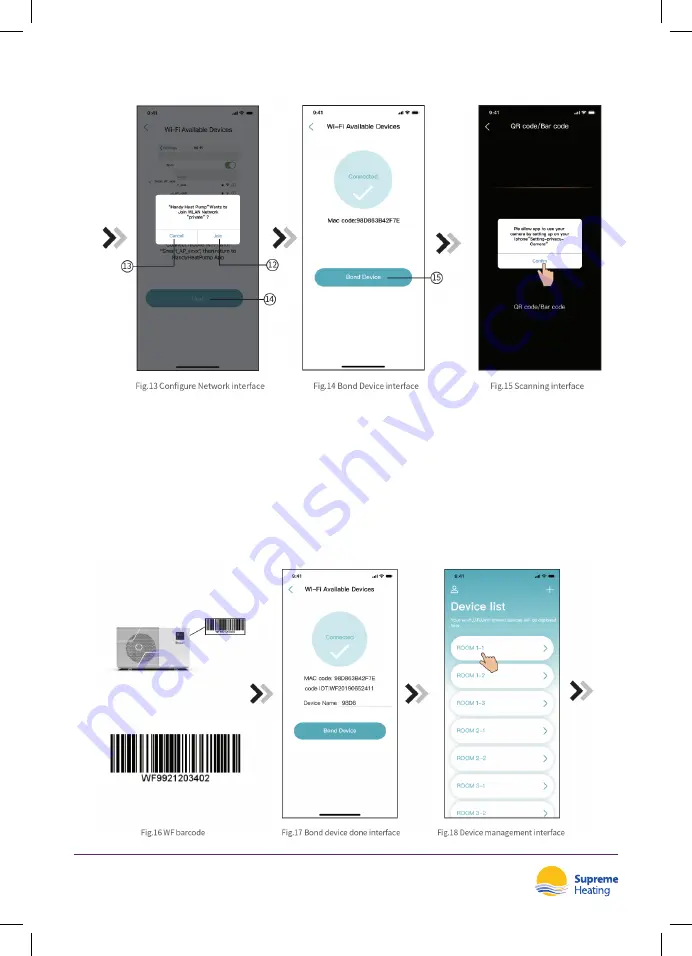
Slide the page back to configure network interface (Fig. 12), click 13 to cancel, Click 12 to
popup window (Fig. 10), connect to the available WIFI network, and slide back to the page to
configure the network, click 14 to turn next page (Fig. 13); click 15 to bond device (Fig. 14);
5.
Click "OK" (Fig.15) to allow the App to use the camera for scanning the WH barcode on the
heat pump unit (Fig.16);
6.
Click “OK”, device bond is done (Fig.17);
7.
After WIFI and DTU bonding is done, and jump back to My Device (Fig. 18).
Heatseeker NovaS Heat Pump
Installation & User Manual
34
Summary of Contents for Heatseeker NovaS
Page 37: ...10 9 Device Management Heatseeker NovaS Heat Pump Installation User Manual 35...
Page 38: ...Heatseeker NovaS Heat Pump Installation User Manual 36...
Page 42: ...NOTES Heatseeker NovaS Heat Pump Installation User Manual 40...
Page 43: ...Heatseeker NovaS Heat Pump Installation User Manual 41...


