background image

mechanical ventilation system (C. M.V.)  It must have  a  minimum 
air passage of 1 dm². Do not operate the stove if a smoke 
extractor hood is operating. 

This air inlet must be non-blockable, and positioned in the room 
where the device is installed. 

FLUE PIPE 

Treat this point of the installation with great care and attention. 
This appliance must not be connected to a shared flue system.  
For ducts that are already in place: get it cleaned (mechanical 
chimney brush). Get an authorised stove-maker to check its 
condition (stability, air tightness, compatibility of materials, 
diameter, etc.). 
If the flue is not compatible (old, cracked, considerable blockage): 
contact a specialist so that it can be repaired in order to comply 
with the regulations in force. 

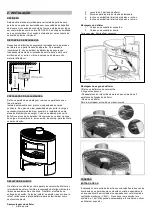
CONNECTING PIPES 

Use pipes made from enameled T450 stainless steel or 316 
stainless steel (available at your stockist), without reducing their 
length. 

The connection to the flue must be made in the room in which the 
appliance is installed. Provide access for chimney sweeping and to 
clean the flue pipe. The pipe must not stick out of the flue pipe and 
the connections must be removable and airtight. 

Maintain a minimum distance of 3 x diameter between the 
connecting pipe and the wall. 

Avoid having a long horizontal section in front of the flue. If this is 
inevitable, then give it a rising slope of 5 cm per metre. 


3. USE 


FUEL


Wood 

Only burn air-dried logs (2 to 3 years, stored in a sheltered and 
well-ventilated place) with a maximum humidity of 15 to 20%. 
Preferably hardwoods (birch, hornbeam, beech, etc.). 
Avoid softwoods (lime, chestnut, willow, poplar). 
It is strictly forbidden to permanently use softwoods (pine, fir, etc.) 
as well as the use of waste from processed wood (railway 
sleepers, woodworking waste, etc.) and household scraps 
(vegetables or plastics). 
Never use small wood, boxes, woodchips and vine shoots as 
these will lead to sudden overheating. 

 
Lignite  

Lignite briquettes can be used by themselves or with wood for 
slow burning. Place the briquettes in a single layer on a bed of 
embers, limited to the surface area of the grid. 


DRAUGHT 


The hot draught in the flue pipe of the appliance must never be 
greater than 20 Pa. Should it be more than this, then install a 
draught adaptor. Ask your dealer to measure the draught during 
the installation of the appliance. Controlled mechanical ventilation 
(CMV) may affect the draught and even reverse it. For this reason, 
the CMV must be connected during the measurement of the 
draught. 


LIGHTING THE FIRE FOR THE FIRST TIME


Remove the self-adhesive labels (except for the nameplate), any 
possible  blocking cards, and make sure that the ash tray is empty. 
Start with a small fire and gradually indcrease the load. This 
progressive heating allows the materials to expand slowly and to 
stabilise. There may be some fumes and odours, due to the 
paintwork. These will gradually disappear. Do this for a few days 
until normal use. Open the windows during the first hours of 
operation. 
When heating up for the first time, check the draught according to 
the technical specifications table. 
 

SERVICE


Lighting the fire 

To light your appliance, preferably follow the fire lighting procedure 
described above. This fire lighting technique makes it possible to 
heat up the flue and to remove any blockages (negative pressure) 
that may form when the weather is bad or cold, thereby preventing 
the air from blowing back into the room when the fire is lit. 


The procedure is as follows: 

- Put the air combustion control to the maximum setting. 
- Place 2 logs on the firebox grid.  
- Place the kindling wood in the shape of a tower on top of the 
logs.  
- Put 1 or 2 fire-lighter cubes on the wood and set alight.  
- Close the door. 
For further information, view the Supra video on youtube at: 

https://www.youtube.com/watch?v=ebOr4vMj2Jo


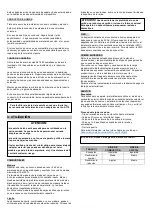
TABLE (*) 

COMBUSTION 

AIR 

WINDOW AIR 

Lighting the fire 

Left 

Left 

Nominal efficiency 

Medium 

Medium 

Reduced efficiency 

Adjust  

Medium 


To facilitate the adjustment of the stove in the event of a 

strong draught, the user is recommended to install an 

AT15 draught adaptor, as an option. 

TAKE NOTE: 

This wood burning stove is designed to be used with the 
door closed. The door must remain closed except for 
refuelling. 

To avoid burns, do not touch the appliance and use the 
grippers to operate the controls. 

The heat emitted through the glass makes it necessary to 
maintain a safety clearance with any material that could be 
damaged by the heat (furniture, wallpaper, woodwork, etc.). 
A 2 m clearance will avoid any risk. 

TAKE NOTE! 

The use of coal or its derivatives is strictly 

prohibited, even on an occasional basis. This appliance must 
not be used to burn domestic waste.


TAKE NOTE! Never use petrol, alcohol or fuel-oil, etc. 

Summary of Contents for PACCO

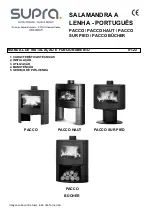
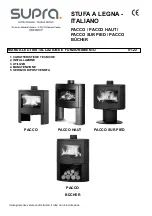
Page 1: ...PIED PACCO BÛCHER PACCO PACCO HAUT PACCO SUR PIED PACCO BÛCHER 1 CARACTÉRISTIQUES TECHNIQUES 2 INSTALLATION 3 UTILISATION 4 ENTRETIEN 5 SERVICE APRÈS VENTE Illustrations non contractuelles tuyau non fourni NOTICE D INSTALLATION ET D UTILISATION 01 22 ...

Page 2: ...droit d en attendre faites appel à un spécialiste de notre marque Il réalisera l installation dans les règles de l art et assurera les meilleures conditions de fonctionnement de sécurité et assumera l entière responsabilité de l installation finale Avant la première mise en service de votre poêle lisez attentivement la présente notice d installation et d utilisation Conserver la notice ainsi que l...

Page 3: ...ourniture de l appareil Elle ne saurait être recherchée en cas de non respect de ces prescriptions Sont spécialement interdits L installation de matières pouvant être détériorées ou altérées par la chaleur mobilier papier peint boiseries à proximité immédiate de l appareil La mise en place d un récupérateur de chaleur de quelque type que ce soit L utilisation de tout combustible autre que le bois ...

Page 4: ...ent nous recommandons la pose d un carrelage par exemple pour faciliter l entretien DÉFLECTEUR DE FUMÉES Le déflecteur de fumées est constitué de 2 plaques en vermiculite Il améliore l échange de chaleur efficace et facilite la récupération des suies lors du ramonage A la livraison il est monté dans l appareil Avant d installer définitivement l appareil monter et démonter le déflecteur à plusieurs...

Page 5: ...de tirage Consulter votre revendeur pour effectuer une mesure du tirage lors de l installation de l appareil La présence d une ventilation mécanique contrôlée VMC peut influencer le tirage jusqu à l inverser Pour cette raison la VMC doit être en marche lors de la mesure de tirage PREMIER ALLUMAGE Enlever les étiquettes autocollantes sauf signalétique les éventuels cartons de blocage et s assurer q...

Page 6: ...ENTRETIEN RECOMMANDATIONS DÉCENDRAGE Garder l accès libre pour le nettoyage de l appareil et du conduit Attendre que l appareil soit refroidi Nettoyer la grille foyère Vider régulièrement le cendrier L amas de cendres limite l arrivée d air sous la grille risque d entraîner sa déformation et perturbe la combustion Replacer le cendrier avant le chargement ENTRETIEN DE LA FAÇADE ET DES COTÉS Pour ne...

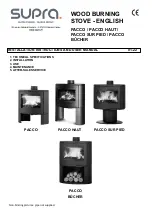
Page 7: ... PACCO SUR PIED PACCO BÛCHER PACCO PACCO HAUT PACCO SUR PIED PACCO BÛCHER 1 TECHNICAL SPECIFICATIONS 2 INSTALLATION 3 USE 4 MAINTENANCE 5 AFTER SALES SERVICE Non binding pictures pipe not supplied INSTALLATION INSTRUCTIONS AND USER MANUAL 01 22 ...

Page 8: ...ll its advantages we would advise you to request the services of one of our specialists This will ensure that the installation is made in accordance with good practices and will guarantee the best operating and safety conditions bearing all the responsibility for the final installation Before lighting the fire for the first time please read these installation instructions and user manual carefully...

Page 9: ...f the appliance The manufacturer is not liable for failure to comply with these instructions It is particularly forbidden to Position materials that could be damaged or affected by the heat furniture wallpaper woodwork etc close to the appliance Install any type of heat recovery system Use any fuel other than natural wood or lignite Make any changes to the appliance or installation not indicated b...

Page 10: ...ype of covering in the load bearing area BAFFLE PLATE The baffle plate comprises 2 vermiculate plates It ensures improved heat transfer and facilitates the recovery of the soot during sweeping The baffle plate is mounted when the appliance is delivered Before definitively installing the appliance the baffle plate should be mounted and dismounted a number of times in order to become familiar with i...

Page 11: ...o measure the draught during the installation of the appliance Controlled mechanical ventilation CMV may affect the draught and even reverse it For this reason the CMV must be connected during the measurement of the draught LIGHTING THE FIRE FOR THE FIRST TIME Remove the self adhesive labels except for the nameplate any possible blocking cards and make sure that the ash tray is empty Start with a ...

Page 12: ...rebox Call the fire brigade 4 MAINTENANCE RECOMMENDATIONS ASH REMOVAL Ensure that there is unobstructed access for cleaning the appliance and the flue pipe Wait for the appliance to cool down Clean the firebox grid Regularly empty the ash tray The build up of ashes hinders the air flow under the grid distorting the flow and affecting combustion Put the ash tray back before reloading CLEANING THE F...

Page 13: ...UR PIED PACCO BÛCHER PACCO PACCO HAUT PACCO SUR PIED PACCO BÛCHER 1 CARACTERÍSTICAS TÉCNICAS 2 INSTALACIÓN 3 UTILIZACIÓN 4 MANTENIMIENTO 5 SERVICIO POSTVENTA Imágenes no contractuales tubo no suministrado MANUAL DE INSTALACIÓN Y FUNCIONAMIENTO 01 22 ...

Page 14: ...itamos por su elección Este aparato ha sido cuidadosamente diseñado Para obtener todas las ventajas que espera le aconsejamos que recurra a uno de nuestros especialistas Realizará la instalación conforme a las buenas prácticas y garantizará las mejores condiciones de funcionamiento y seguridad asumiendo toda la responsabilidad de la instalación final Antes del primer encendido lea detenidamente es...

Page 15: ...ricante no se hace responsable del incumplimiento de estas instrucciones Queda especialmente prohibido La colocación de materiales que puedan verse dañados o alterados por el calor muebles papel pintado carpintería etc en las inmediaciones del aparato La instalación de cualquier tipo de recuperador de calor El uso de cualquier combustible que no sea madera natural y lignito Cualquier modificación ...

Page 16: ... DEFLECTOR DE HUMOS El deflector consta de 2 placas de vermiculita Mejora el intercambio de calor y facilita la recuperación del hollín durante el deshollinado El deflector se monta a la entrega del aparato Antes de instalar definitivamente el aparato monte y desmonte la placa deflectora varias veces para familiarizarse con su funcionamiento Desmontaje del deflector 1 Abra la puerta 2 Levante las ...

Page 17: ...olicite a su distribuidor la medición del tiro al instalar el aparato Una ventilación mecánica controlada VMC puede influir en el tiro e incluso invertirlo Por esta razón la VMC debe estar conectada cuando se mide el tiro PRIMER ENCENDIDO Retire las etiquetas autoadhesivas excepto la placa de características las posibles tarjetas de bloqueo y asegúrese de que no queda nada en el cenicero Comience ...

Page 18: ...RADA DE LA CENIZA Mantenga el acceso libre para la limpieza del aparato y del conducto de humos Espere hasta que el aparato se enfríe Limpie la rejilla del hogar Vacíe regularmente el cenicero La acumulación de cenizas obstaculiza el flujo de aire bajo la rejilla puede provocar su deformación y perturba la combustión Vuelva a colocar el cenicero antes de una nueva carga LIMPIEZA DE LA PARTE DELANT...

Page 19: ...PACCO SUR PIED PACCO BÛCHER PACCO PACCO HAUT PACCO SUR PIED PACCO BÛCHER 1 CARACTERÍSTICAS TÉCNICAS 2 INSTALAÇÃO 3 UTILIZAÇÃO 4 MANUTENÇÃO 5 SERVIÇO DE PÓS VENDA Imagens não contratuais tubo não fornecido MANUAL DE INSTALAÇÃO E FUNCIONAMENTO 01 22 ...

Page 20: ... escolha Este aparelho foi cuidadosamente projetado Para obter todas as vantagens esperadas aconselhamos a que recorra a um dos nossos especialistas Este irá efetuar a instalação em conformidade com as boas práticas e garantir as melhores condições de funcionamento e segurança assumindo toda a responsabilidade da instalação final Antes da acender o aparelho pela primeira vez leia atentamente este ...

Page 21: ...parelho O fabricante não se responsabiliza pelo incumprimento destas instruções É expressamente proibido A colocação de materiais que possam ser danificados ou alterados pelo calor móveis papel pintado carpintaria etc nas imediações do aparelho A instalação de qualquer tipo de recuperador de calor A utilização de qualquer combustível que não seja madeira natural e lenhite Qualquer modificação do a...

Page 22: ...azulejo para facilitar a sua manutenção DEFLETOR DE FUMOS O defletor é constituído por dois paneis de vermiculite Melhora o intercâmbio de calor e facilita a recuperação da fuligem durante a limpeza da salamandra e chaminé O defletor é instalado na entrega do aparelho Antes de instalar o aparelho deve colocar e retirar várias vezes a placa defletora para se familiarizar com o seu funcionamento Des...

Page 23: ...ntacte o seu distribuidor para a regulação da tiragem Uma ventilação mecânica controlada VMC pode influenciar a tiragem e invertê la Por esta razão a VMC deve estar conectada quando se medir a tiragem PRIMEIRA UTILIZAÇÃO Retire as etiquetas autoadesivas exceto a placa de características possíveis fitas de bloqueio e certifique se de que não ficou nada no cinzeiro Comece com um fogo lento e vá aume...

Page 24: ...ros 4 MANUTENÇÃO RECOMENDAÇÕES RETIRAR A CINZA Proporcione espaço de acesso para tirar a fuligem e limpar a conduta de fumos Espere até que o aparelho arrefeça Limpe a grelha da lareira Esvazie regularmente o cinzeiro A acumulação de cinzas obstrui o fluxo de ar por baixo da grelha podendo provocar a sua deformação e perturbar a combustão Volte a colocar o cinzeiro antes carregar novamente com len...

Page 25: ...CCO BÛCHER PACCO PACCO HAUT PACCO SUR PIED PACCO BÛCHER 1 CARATTERISTICHE TECNICHE 2 INSTALLAZIONE 3 UTILIZZO 4 MANUTENZIONE 5 SERVIZIO DI POSTVENDITA Immagini senza valore contrattuale il tubo non è in dotazione MANUALE DI INSTALLAZIONE E FUNZIONAMENTO 01 22 ...

Page 26: ...esto apparecchio è stato progettato accuratamente Per sfruttare tutti i vantaggi previsti le consigliamo di rivolgersi a uno dei nostri specialisti che eseguirà l installazione conformemente alle buone prassi e garantirà le migliori condizioni di funzionamento e sicurezza assumendosi la completa responsabilità dell installazione finale Previamente alla prima accensione legga attentamente questo ma...

Page 27: ...ttore non assume responsabilità in caso di inadempimento di queste istruzioni È vietato soprattutto Posizionare materiali che possano essere danneggiati o alterati dal calore mobili carta da parati carpenteria ecc nei pressi dell apparecchio L installazione di qualsiasi tipo di recuperatore di calore L utilizzo di qualsiasi tipo di combustibile che non sia legna naturale o lignite Qualsiasi modifi...

Page 28: ...di carica ad esempio delle piastrelle che semplifichino la manutenzione DEFLETTORE DEI FUMI Il deflettore è formato da 2 piastre di vermiculite Migliora lo scambio di calore e semplifica la raccolta della fuliggine durante le operazioni di pulizia Il deflettore deve essere installato al momento della consegna dell apparecchio Prima di installare definitivamente l apparecchio montare e smontare la ...

Page 29: ...ibutore la misurazione del tiraggio al momento di installare l apparecchio Una ventilazione meccanica controllata VMC può influire sul tiraggio e persino invertirlo Di conseguenza quando si misura il tiraggio la VMC deve essere collegata PRIMA ACCENSIONE Rimuovere le etichette adesive tranne la targhetta delle caratteristiche le eventuali schede di bloccaggio e assicurarsi che non rimanga nulla ne...

Page 30: ...OME ELIMINARE LA CENERE Tenere libero l accesso per la pulizia dell apparecchio e il condotto dei fumi Lasciare che si raffreddi Pulire la griglia del focolare Svuotare regolarmente il portacenere L accumulo di ceneri ostacola il flusso dell aria sotto la griglia di conseguenza può causarne la deformazione e compromettere la combustione Ricollocare il portacenere prima di una nuova carica PULIZIA ...

Page 31: ...O SUR PIED PACCO BÛCHER PACCO PACCO HAUT PACCO SUR PIED PACCO BÛCHER 1 TECHNISCHE EIGENSCHAFTEN 2 INSTALLATION 3 VERWENDUNG 4 WARTUNG 5 KUNDENDIENST Fotos unverbindlich Rohr wird nicht mitgeliefert INSTALLATIONS UND BEDIENUNGSHANDBUCH 01 22 ...

Page 32: ...Sie erwarten raten wir Ihnen einen unserer Spezialisten zu Rate zu ziehen Er wird den Einbau gemäss der Herstellerangaben vornehmen die besten Funktions und Sicherheitsbedingungen garantieren und die gesamte Verantwortung für die endgültige Installation übernehmen Lesen Sie vor dem ersten Anfeuern aufmerksam dieses Installations und Bedienungshandbuch durch Bewahren Sie das Handbuch und die Garant...

Page 33: ...er Hersteller macht sich nicht für die Nichtbeachtung dieser Anweisungen verantwortlich Insbesondere ist verboten Die Anbringung von Materialien die von der Hitze beschädigt oder verändert werden könnten Möbel Tapeten Holzgegenstände etc in der Nähe des Geräts Die Installation von jeglichen Wärmerückgewinnungsgeräten Die Verwendung von jeglichen Brennstoffen ausser Naturholz oder Braunkohle Jeglic...

Page 34: ...ungsplatte Stellen Sie den Ofen an seinen endgültigen Platz und nivellieren Sie ihm Es wird empfohlen den Befüllbereich z B mit Fliesen abzudecken so wird seine Wartung erleichtert RAUCHDEFLEKTOR Der Deflektor besteht aus 2 Vermiculitplatten Er verbessert den Wärmeaustausch und die Russaufnahme während der Reinigung Der Deflektor wird bei der Übergabe des Ofens installiert Bevor Sie den Ofen endgü...

Page 35: ...n ZUG Der heisse Unterdruck im Rauchabzug des Ofens darf nie 20 Pa übersteigen Sollte er höher sein installieren Sie einen Zugadapter Bitten Sie Ihren Händler um die Messung des Zuges bevor Sie die Vorrichtung installieren Ein mechanisches Belüftungssystem kann den Zug beeinflussen oder sogar umkehren Aus diesem Grund muss das System angeschlossen sein wenn der Zug gemessen wird ERSTER GEBRAUCH En...

Page 36: ...ie den Zugang zur Reinigung des Ofens und der Rauchleitung frei Warten Sie bis das Gerät abkühlt Reinigen Sie das Ofengitter Leeren Sie regelmässig den Aschenbehälter Die Anhäufung von Asche behindert den Luftstrom unter dem Gitter kann zu seiner Verformung führen und die Verbrennung stören Bringen Sie den Aschbehälter vor dem Nachlegen wieder an REINIGUNG DES VORDERTEILS UND DER SEITEN Verwenden ...

Page 37: ......

Page 38: ......

Page 39: ......

Page 40: ......

Reviews: