6-9
Saf
e
ty
Information
and
T
e
chnical
Sp
e
ci
fi
cations
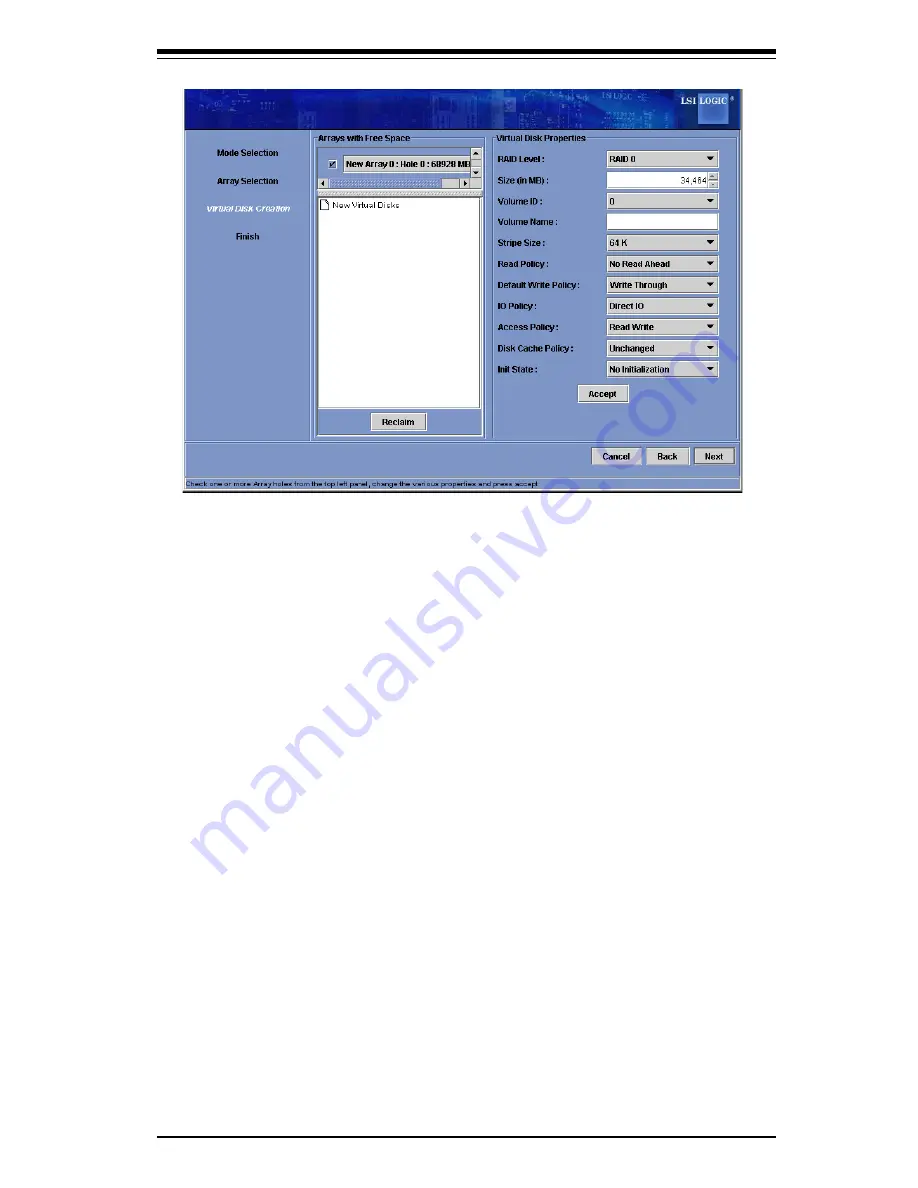
Figure 6-6: Manual Confi guration - Defi ning a Virtual Disk
Th
e
Arrays
with
Fr
ee
Spac
e
m
e
nu
lists
th
e
n
e
w
array
that
you
just
d
efi
n
e
d,
plus
any
e
xisting
arrays
with
hol
e
s
(fr
ee
spac
e
)
that
could
b
e
us
e
d
for
a
n
e
w
con
fi
guration
.
4
.
From
th
e
Arrays with Free Space
m
e
nu,
s
e
l
e
ct
th
e
array
to
us
e
for
th
e
n
e
w
v
irtual
disk
.
5
.
In
th
e
right
pan
e
l,
s
e
l
e
ct
RAID 0
as
th
e R
AID
l
eve
l
.
6
.
(Optional)
S
e
t
Siz
e
(in
MB)
to
a
low
e
r
numb
e
r
if
you
do
not
want
to
us
e
th
e e
ntir
e
a
v
ailabl
e
capacity
for
th
e
n
e
w
v
irtual
disk
.
7
.
(Optional)
Chang
e
th
e
oth
e
r
Virtual Disk
Prop
e
rti
e
s,
if
n
e
c
e
ssary
.
8
.
Click
Accept
to
acc
e
pt
th
e
con
fi
guration
of
th
e
n
e
w
v
irtual
disk
.
Note:
Click
th
e Re
claim
button
if
you
want
to
undo
a
v
irtual
disk
that
you
just
d
efi
n
e
d
.
9
.
Click
Next
to
continu
e
with
th
e
n
e
xt
con
fi
guration
st
e
p
.
Th
e
Virtual Disk Sum-
mary
window
app
e
ars
.
10. Rev
i
e
w
th
e
con
fi
guration
shown
in
th
e
Virtual Disk Summary
window
.
If
you
want
to
chang
e
som
e
thing,
click
Back
and
chang
e
th
e
con
fi
guration
param
e
t
e
rs
.
11.
Click
Finish
to
acc
e
pt
th
e
con
fi
guration
and
start
th
e
initialization
proc
e
ss
(un-
l
e
ss
you
s
e
l
e
ct
e
d
No
Initialization
e
arli
e
r)
.


