4-7
Chapter 4: Chassis Setup and Maintenance
4-5 Installing the Air Shroud
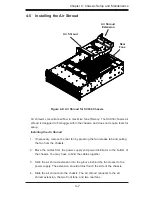
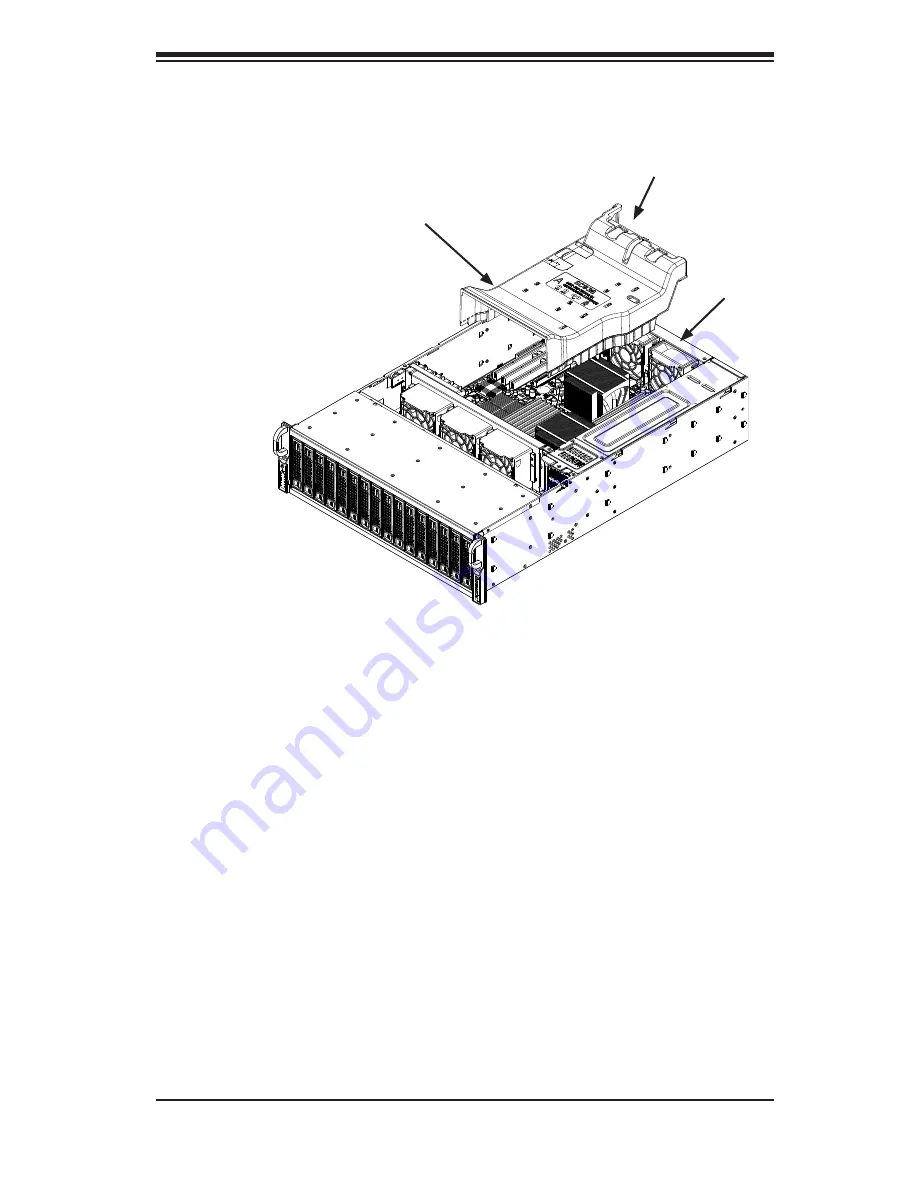
Air shrouds concentrate airflow to maximize fan efficiency. The SC936 chassis air
shroud is designed to fit snuggly within the chassis, and does not require tools for
setup.
Figure 4-6: Air Shroud for SC936 Chassis
Installing the Air Shroud
If necessary, remove the rear fan by pressing the fan release tab and pulling
1.
the fan from the chassis.
Move the cables from the power supply and power distributor to the bottom of
2.
the chassis. You may have to bind the cables together.
Slide the air shroud extension into the groove behind the fan closest to the
3.
power supply. The extension should almost touch the side of the chassis.
Slide the air shroud into the chassis. The air shroud connects to the air
4.
shroud extension, the two front fans, and two rear fans.
Rear
Fans
Air Shroud
Air Shroud
Extension
Summary of Contents for Supero SC936 Series
Page 18: ...SC936 Chassis Manual 3 4 Notes ...
Page 30: ...SC936 Chassis Manual 4 12 Notes ...
Page 40: ...SC936 Chassis Manual 5 10 Notes ...

