4-7
Chapter 4: Chassis Setup and Maintenance
4-5 Installing the Air Shroud
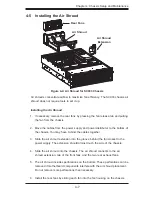
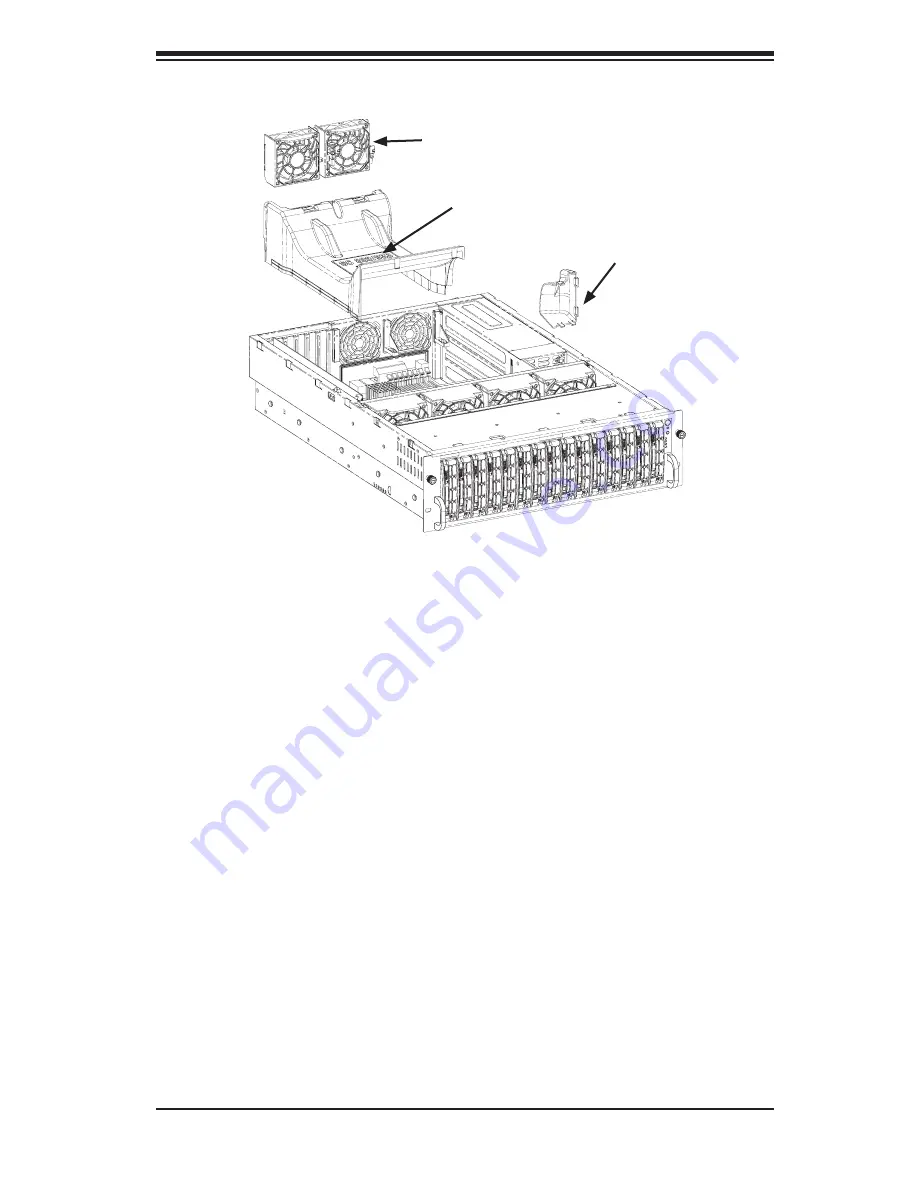
Air shrouds concentrate airflow to maximize fan efficiency. The SC933 chassis air
shroud does not require tools to set it up.
Installing the Air Shroud
1. If necessary, remove the rear fans by pressing the fan release tab and pulling
the fan from the chassis.
2. Move the cables from the power supply and power distributor to the bottom of
the chassis. You may have to bind the cables together.
3. Slide the air shroud extension into the groove behind the fan closest to the
power supply. The extension should almost touch the side of the chassis.
4. Slide the air shroud into the chassis. The air shroud connects to the air
shroud extension, two of the front fans, and the two rear exhaust fans.
5.
The air shroud includes perforations on the bottom. These perforations can be
removed if motherboard components interfere with the air shroud placement.
Do not remove more perforations than necessary.
6. Install the rear fans by sliding each fan into the fan housing on the chassis.
Figure 4-4: Air Shroud for SC933 Chassis
Rear Fans
Air Shroud
Air Shroud
Extension


