SC721 Chassis Manual
5-4
5-5
Chapter 5: Chassis Setup and Maintenance
Installing 3.5" Hot-Swap Hard Drives
1. Insert the new hard drive into the hard drive carrier as described on the previ-
ous page.
2. Insert the hard drive carrier into the hard drive cage, sliding it towards the
back of the the hard drive cage until it clicks into a locked position.
3. Use the drive carrier handle to push the hard drive and hard drive carrier into
the chassis hard drive bay and close the handle until the drive carrier clicks
into the locked position.
4. Close and lock the front bezel.
Installing a Hard Drive into the Hard Drive Carrier
1. Remove the six screws which secure the dummy drive into the hard drive
carrier.
2. Remove the dummy drive from the hard drive carrier.
3. Install a new hard drive into the hard drive carrier with the printed circuit
board side facing down so that the mounting holes in the drive align with
those in the carrier.
4. Secure the hard drive by tightening all six screws.
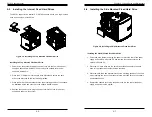
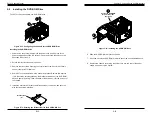
Figure 5-4. Installing the Hard Drive Carrier into the Hard Drive Cage
Figure 5-3. Installing a Hard Drive into Hard Drive Carrier
1
2
Hard Drive
Carrier
Dummy Drive
Hard Drive
Summary of Contents for PWS-251-1H
Page 1: ...SC721 CHASSIS SERIES SC721TQ 250B USER S MANUAL 1 0a ...
Page 7: ...SC721 Chassis Manual 1 4 Notes ...
Page 18: ...2 20 SC721 Chassis Manual Notes ...
Page 23: ...SC721 Chassis Manual 4 4 Notes ...
Page 33: ...SC721 Chassis Manual 5 18 Notes ...

