4-2
X7SPA-L/X7SPA-H/X7SPA-HF/X7SPE-H/X7SPE-HF
How to Start the Setup Utility
Normally, the only visible Power-On Self-Test (POST) routine is the memory test.
As the memory is being tested, press the <Delete> key to enter the main menu of
the AMI BIOS Setup Utility. From the main menu, you can access the other setup
screens. An AMI BIOS identification string is displayed at the left bottom corner of
the screen, below the copyright message.
Warning!
Do not upgrade the BIOS unless your system has a BIOS-related
issue. Flashing the wrong BIOS can cause irreparable damage to the
system. In no event shall Supermicro be liable for direct, indirect, special,
incidental, or consequential damages arising from a BIOS update. If you
have to update the BIOS, do not shut down or reset the system while the
BIOS is updating. This is to avoid possible boot failure.
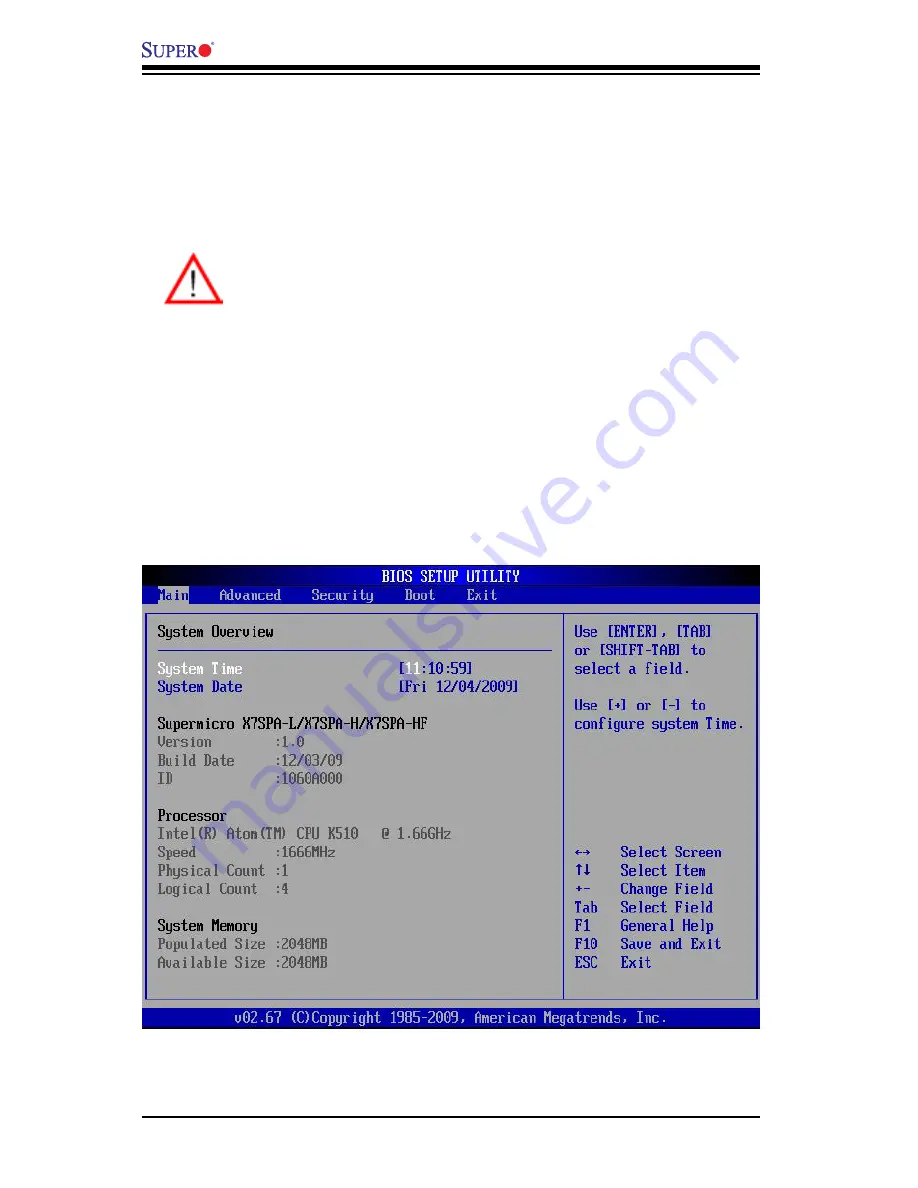
4-2 Main Setup
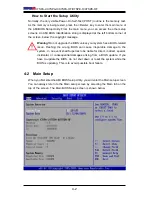
When you first enter the AMI BIOS Setup Utility, you will enter the Main setup screen.
You can always return to the Main setup screen by selecting the Main
tab on the
top of the screen. The Main BIOS Setup screen is shown below.
Summary of Contents for X7SPA-H
Page 1: ... X7SPA L USER S MANUAL Revision 1 1b X7SPA H X7SPA HF X7SPE HF X7SPE H ...
Page 10: ...Notes X7SPA L X7SPA H X7SPA HF X7SPE H X7SPE HF User s Manual ...
Page 32: ...1 22 X7SPA L X7SPA H X7SPA HF X7SPE H X7SPE HF User s Manual Notes ...
Page 64: ...2 32 X7SPA L X7SPA H X7SPA HF X7SPE H X7SPE HF User s Manual Notes ...
Page 70: ...3 6 X7SPA L X7SPA H X7SPA HF X7SPE H X7SPE HF User s Manual Notes ...
Page 96: ...A 2 X7SPA L X7SPA H X7SPA HF X7SPE H X7SPE HF User s Manual Notes ...
Page 100: ...B 4 X7SPA L X7SPA H X7SPA HF X7SPE H X7SPE HF User s Manual Notes ...

