background image

6.4


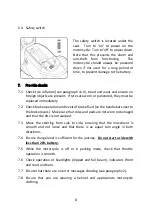
Safety switch 


The  safety  switch  is  located  under  the 
seat.    Turn  to  ‘on’  to  power  on  the 
motorcycle.  Turn to ‘off’ to power down.  
Note  that  this  prevents  the  alarm  and 
anti‐theft  from  functioning.    The 
motorcycle  should  always  be  powered 
down  if  not  used  for  a  long  period  of 
time, to prevent damage to the battery.  


7.


Pre‐ride checks 

7.1


Check tyre inflation (see paragraph 11.4), tread and wear and ensure no 
foreign objects are present.  If tyres are worn or punctured, they must be 
replaced immediately.   

7.2


Check brake operation and levels of brake fluid (on the handlebars next to 
the brake levers).  Make sure that discs and pads are not worn or damaged 
and that the disc is not warped.   

7.3


Move  the  steering  from  side  to  side,  ensuring  that  the  movement  is 
smooth  and  not  loose  and  that  there  is  an  equal  turn  angle  in  both 
directions. 

7.4


Ensure charge level is sufficient for the journey.  

Do not start a ride with 

less than 20% battery.  

7.5


While  the  motorcycle  is  off  or  in  parking  mode,  check  that  throttle 
operation is smooth.   

7.6


Check  operation  of  headlights  (dipped  and  full  beam),  indicators  (front 
and rear) and horn.  

7.7


Ensure that there are no error messages showing (see paragraph 12).   

7.8


Ensure  that  you  are  wearing  a  helmet  and  appropriate  motorcycle 
clothing.   

Summary of Contents for CUX 2019

Page 1: ...OWNER S MANUAL Soco CUX Version 1 0 January 2019...

Page 2: ...nfo vmoto uk com Address Vmoto UK Distribution Limited 105 Sumner Street London SE1 9HZ You should always follow the instructions maintenance and riding requirements set out in this manual and have af...

Page 3: ...ht and consideration for other road users Always keep both hands on the handlebars while riding and turn the throttle slowly 2 2 Never ride when under the influence of alcohol or drugs which may affec...

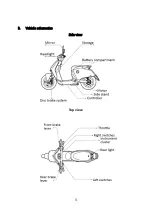
Page 4: ...3 3 Vehicle schematics Side view Top view...

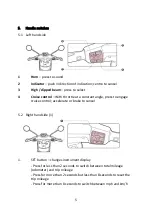
Page 5: ...e Shows the total mileage of the vehicle or the current trip 5 6 Battery state of charge Indicates current battery status in bars and as a percentage 7 Data connection shows whether a data connection...

Page 6: ...hrottle at a constant angle press to engage cruise control accelerate or brake to cancel 5 2 Right hand side 1 1 SET button changes instrument display Press for less than 2 seconds to switch between t...

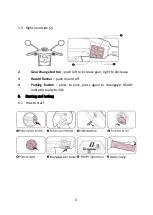
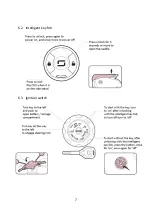
Page 7: ...2 Gear change button push left to increase gear right to decrease 3 Hazard flasher push on and off 4 Parking button press to park press again to disengage READY indicates ready to ride 6 Starting and...

Page 8: ...7 6 2 Intelligent key fob 6 3 Ignition switch...

Page 9: ...evels of brake fluid on the handlebars next to the brake levers Make sure that discs and pads are not worn or damaged and that the disc is not warped 7 3 Move the steering from side to side ensuring t...

Page 10: ...s 9 4 Riding with a battery less than 10 can cause the motorcycle to power off This is normal under voltage protection for the battery If this happens do not ride again until the battery is charged 9...

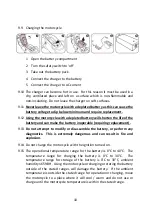
Page 11: ...ry and can make the battery inoperable requiring replacement 9 13 Do not attempt to modify or disassemble the battery or perform any diagnostics This is extremely dangerous and can result in fire and...

Page 12: ...way from corrosive substances fire and heat sources 10 7 Never charge the motorcycle in the wet or in damp conditions Never leave extension cables outside or on the ground Using any electrical applian...

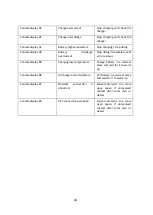
Page 13: ...instance turn the motorcycle off and then on again using the safety switch 12 Troubleshooting Fault Likely cause of fault Action The vehicle is dead and the start button does not light 1 The battery i...

Page 14: ...inal charger use of other chargers is dangerous 3 The battery is old or requires replacement 3 Replace the battery Console display 99 Controller communication failure Contact after sales care or deale...

Page 15: ...until error resolves Console display 89 Charging low temperature Charge battery in a warmer place and wait for it to warm up Console display 88 Discharge low temperature Put battery in a warmer place...

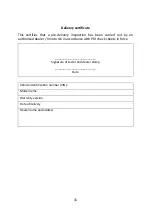
Page 16: ...ied out by an authorised dealer Vmoto UK in accordance with PDI check sheets in force _________________________ Signature of tester and dealer stamp _________________________ Date Vehicle identificati...

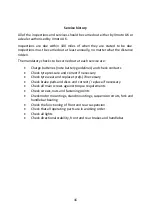
Page 17: ...eries note battery guidelines and check contacts Check tyre pressure and correct if necessary Check tyre wear and replace tyre s if necessary Check brake pads and discs and correct replace if necessar...

Page 18: ...stamp Inspection 9 500 miles miles ____________________ _________________________ Date signature stamp Inspection 12 500 miles miles ____________________ _________________________ Date signature stam...

Page 19: ...amp Inspection 33 500 miles miles ____________________ _________________________ Date signature stamp Inspection 36 500 miles miles ____________________ _________________________ Date signature stamp...

Page 20: ...amp Inspection 57 500 miles miles ____________________ _________________________ Date signature stamp Inspection 60 500 miles miles ____________________ _________________________ Date signature stamp...

Page 21: ...ture stamp Odometer changed miles ____________________ _________________________ Date signature stamp Odometer changed miles ____________________ _________________________ Date signature stamp Odomete...

Reviews: