Sunvision Scientific 28LX 2F Assembly And User'S Manual Download Page 13

9

Installation-Assembly Procedures
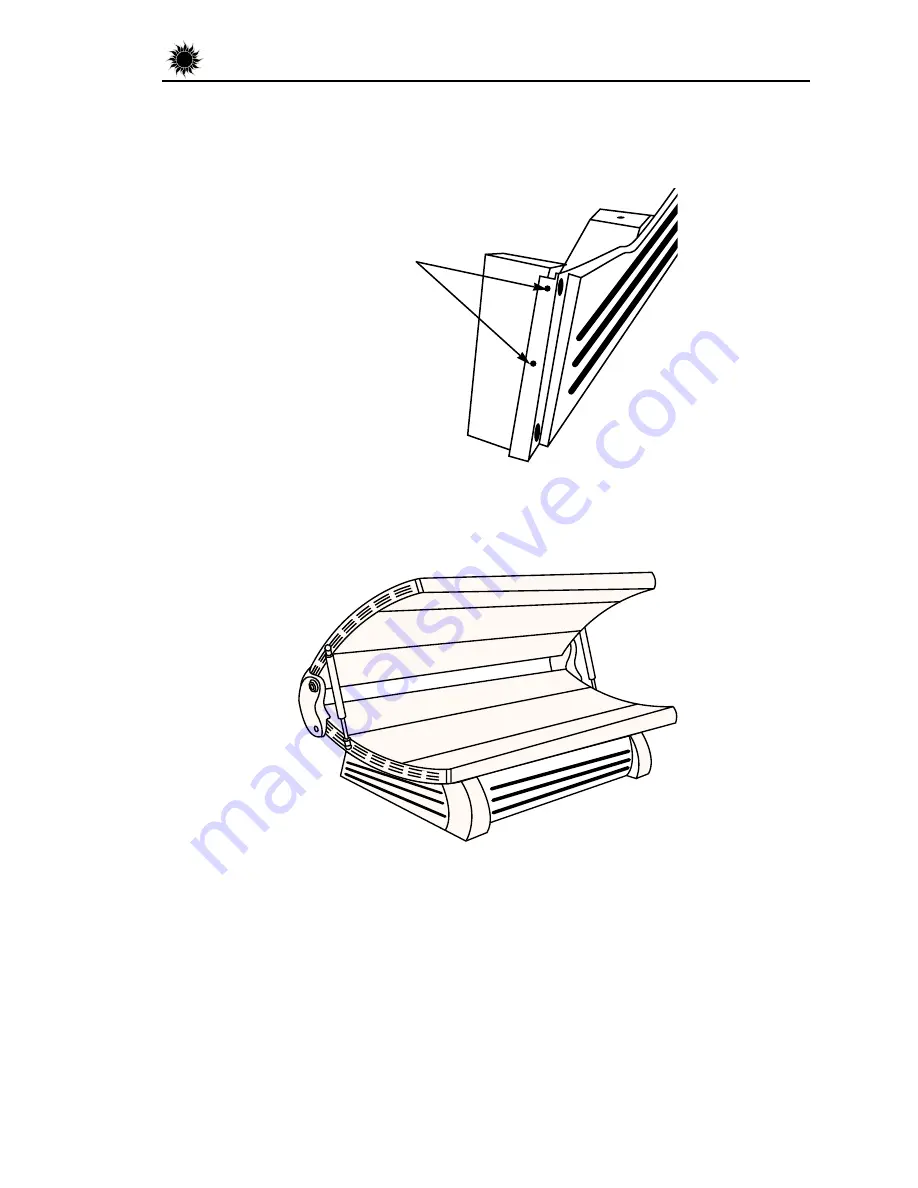
2.

Install two #8 x 1/2” screws through the pre-drilled holes of the side skirt into the

back of the leg support. Repeat for the other skirt.

3.

After installing, your sunbed should look like this. 

PRE-DRILLED HOLES

Summary of Contents for 28LX 2F

Page 1: ...M O D E L S P R O 2 4 S 2 4 S F 2 4 S T 2 8 L X 2 8 L X F 2 8 L X 2 F 2 8 L X T 21166A A S S E M B L Y A N D U S E R G U I D E...

Page 2: ...mage from misuse or abuse damage incurred in transit or damage done by unauthorized repairs or modifications are not covered by this warranty How to Obtain Service All warranty service must be perform...

Page 3: ...all safety precautions ontents C Safety Information Installation Unpacking and Inspection Tools Required Pre Installation Planning Assembly Procedures Making Electrical Connections Operation Before Y...

Page 4: ...iod WARNING Read the instructions booklet before using this sunlamp product To use lie down under canopy and pull down as far as adjustment will allow All persons in the room should wear protective ey...

Page 5: ...ssary to return your sunbed The canopy box contains the canopy unit and a pair of gas springs The bench box contains the following items Bench Unit Front and side skirts with mounting screws Box conta...

Page 6: ...2 Installation Tools Required Tools Required You ll need the following tools to assemble your sunbed Utility Knife 2 Phillips Screwdriver Allen Wrench Supplied in Hardware Box...

Page 7: ...FOR 28LX SERIES Make sure the room in which you intend to use your sunbed is well ventilated Air from the room is used to cool the sunbed and a poorly ventilated room may cause the unit to become hot...

Page 8: ...nd pillow make sure you have the following hardware items Allen Head Bolt 5 16 x 1 Quantity 8 6 bolts may be pre installed in bench bottom Bushing Quantity 2 5 16 Metal Washer Quantity 2 5 16 Metal Wa...

Page 9: ...ts and the six larger sized 5 16 washers attach the legs with the skirt mounting holes toward the back of the bed as shown Install cen ter bolt first You may have to gently push sides of legs in to al...

Page 10: ...1 Install the hinge bracket to the end of the bed such that the two bosses engage then secure using the 5 16 x 1 allen head bolt and 5 16 metal washer Tighten bolt snug then an additional half turn R...

Page 11: ...will require at least two people 1 Lift the canopy and hold it between the hinge brackets 2 Insert the 5 16 x 1 1 2 bolts with the nylon washers into both hinge brackets Tighten bolts into the endcap...

Page 12: ...ball joints with pivot studs and push into place Be sure spring cylinder is in up position as shown Repeat on other side DO NOT lower canopy until both gas springs are installed BALL JOINT GAS SPRING...

Page 13: ...ly Procedures 2 Install two 8 x 1 2 screws through the pre drilled holes of the side skirt into the back of the leg support Repeat for the other skirt 3 After installing your sunbed should look like t...

Page 14: ...without the bypass connect ed If remote operation is desired a remote cable assembly is required Contact ETS Inc as described in Obtaining Service in this guide 2 Connect the canopy to bench power cor...

Page 15: ...cations that increase sensitivity to light As with all electrical appliances do not operate this device near water or while you are wet Exposure Times We recommend that you tan every other day followi...

Page 16: ...o the desired number of minutes after first determining the proper time period from the table on page 11 The lamps will turn on as soon as you move the rotary dial from the 0 position Lift the canopy...

Page 17: ...crylic shields and lamps as described on page 14 Step 2 With a soft cloth wipe the entire length of each lamp to remove any film build up Step 3 Clean both sides of the acrylic shields with a non ammo...

Page 18: ...f the retainer near the middle of the bed with a screwdriver until the retainer releases its latching action See figure below Continue prying up the retainer throughout its full length until removed R...

Page 19: ...at begin to lose their effectiveness even though they will continue to light Pro 28LXF Pro 28LX2F Pro 24SF Pro 24ST Pro 28LXT Pro 24S Pro 28LX Lamp Model Number Diamondsun S Wolff Model 71T12100W Appl...

Page 20: ...towel Ensure that the lamp is firmly seated in the lamp holders Note Never take hold of the lamp such that your fingers are in contact with the lamp glass Finger oils will greatly reduce the lamp s o...

Page 21: ...OT perform these tests with a person in the sunbed Step 1 Obtain an accurate watch capable of measuring in seconds Set the timer to its maximum interval Using the watch time how long the lamps remain...

Page 22: ...w lamp lights and the old lamp still does not replace old lamp 3 If replacing lamp does not remedy problem con tact your service representative 1 Replace gas springs when they no longer have suf ficie...

Page 23: ...OR QUESTIONS 1 800 228 6292 6270 Corporate Drive Indianapolis IN 46278 2900 Have the following information ready when calling ETS to order parts or service for your bed Manufactured for SUNVISION by...

Reviews: