background image


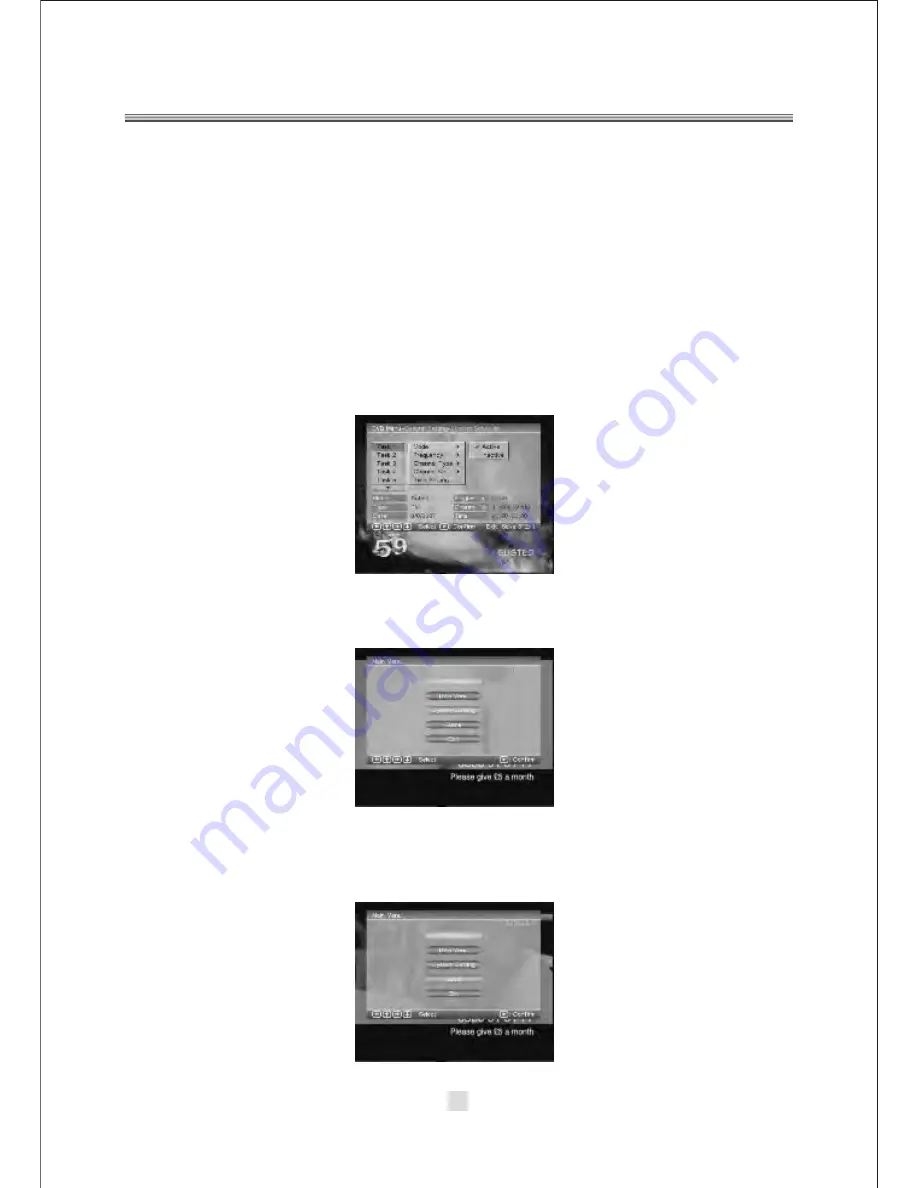
This feature allows the receiver to automatically switch on and tune  to a 

    pre-specified channel for a pre-set length of time. Up to10 tasks can be scheduled.
   a. In the 

Schedule 

pane, use the 

<UP / DOWN> 

key to select a task and use 

<RIGHT


 / LEFT >

 key to switch between 

Inactive 

and 

Active.


b.


Press <ENTER>


to enter the detail


page.

   c. Enter the following settings as required. Use the 

<UP / DOWN> 

key to move 

       between setting items, the 

<RIGHT / LEFT> 

key to switch between available 

       selections and numeric keys to enter numeric value. 

Mode: 

You can repeat the task 

       by setting the frequency as 

Once, Daily 

or 

Weekly. 

Or you can select 

Stop 

to 

       disable the task. 

Start and End Time: 

Enter the start and end time that 

       automatically turns on and off the receiver. 

Channel Type: 

Select TV or radio 

       channel as required. 

Channel No: 

Select the channel to be played at scheduled 

       time.
   d. When the setting is done, press <SETUP>


or <RETURN>


to save the changes.

2. DVB System Setting
     

In the DVB mode, the DVB System Setting options setup same as the In DVD mode.

     Refer to  the System Setting of DVD mode.

3. DVB Game
     

In the DVB mode, the DVB Game options setup same as the In DVD mode. Refer to 

     of the Game of DVD mode.

42

Summary of Contents for DX-T700

Page 1: ...DX T700 ...

Page 2: ......

Page 3: ...1 ...

Page 4: ...2 ...

Page 5: ...3 ...

Page 6: ...4 ...

Page 7: ...5 ...

Page 8: ...MPEG4 files on discs Dolby Digital KODAK picture CD MP3 files on CD R CD RW DVD video R RESTRICTED Parental Lock 9 Multi angle 32 Subtitle choices 8 Audio choices 16 9 LB TV Aspect Ratio modes 6 ...

Page 9: ...7 ...

Page 10: ...8 ...

Page 11: ...9 ...

Page 12: ...10 ...

Page 13: ...11 ...

Page 14: ...12 ...

Page 15: ...13 ...

Page 16: ...DB5113 14 ...

Page 17: ...15 Message Do you want tostart Auto Search OK Cancel ...

Page 18: ...16 ...

Page 19: ...17 Audio Channel Channel Sound Mode eng LR Audio PID 102 ...

Page 20: ...18 TV Program List No Program Name 1 2 3 4 Ideal World UKTV Br tldeas TMF The HITS 2004 11 19 16 17 16 00 16 30 Good Food Bites 16 30 17 00 Gardens Unplugged ...

Page 21: ...19 DVD ROM Drive DVB USB ...

Page 22: ...20 ...

Page 23: ...21 ...

Page 24: ...22 ...

Page 25: ...23 ...

Page 26: ...24 ...

Page 27: ...25 ...

Page 28: ...26 ...

Page 29: ...27 ...

Page 30: ...28 ...

Page 31: ...29 ...

Page 32: ...30 ...

Page 33: ...31 ...

Page 34: ...32 ...

Page 35: ...33 ...

Page 36: ...34 ...

Page 37: ...35 ...

Page 38: ...36 ...

Page 39: ...37 ...

Page 40: ...38 ...

Page 41: ...39 ...

Page 42: ...40 ...

Page 43: ...41 ...

Page 44: ...42 ...

Page 45: ...43 ...

Page 46: ...44 ...

Page 47: ...DVD DVB T COMBO PLAYER User Manual Please read this User Manual carefully to ensure proper use of this product and keep this manual for future reference DX T700 ...

Page 48: ...Forward The machine has two major functions It can act as a set top box for receiving DVB Tbroadcasts It can also act as an DVD player ...

Page 49: ... TV Set 8 Connecting to AV Amplifier with 2 Channel Analog Audio Input 9 Connecting to an AV Amplifier with Digital Audio Input 10 USB 11 LED screen 12 Remote Control 13 Remote Control Introduction 15 The setup menu system DVD PART 21 MP3 Playback 32 Kodak picture CD Playback 33 The setup menu system DVB PART 34 Troubleshooting 43 Specifications 44 ...

Page 50: ...sapparatus to rain orcords 1 The apparatusshall not be exposed to dripping or Splashing and that no objects filled withliquids such as Vases shall be placedthe apparatus 2 The mainsplug is used as the disconnect device the disconnect device shall remain readily operable 3 To be completely disconnectthe power input the mains plug of apparatus shall be disconnected from the mains 4 The mainsplug of ...

Page 51: ...3 ...

Page 52: ...4 ...

Page 53: ...Caution 5 ...

Page 54: ...hod claims of certain U S patents and other intellectual property rights owned by Macrovision Corporation and other rights owners Use of this copyright protection technology must be authorized by Macrovision Corporation and is intendedfor home and other limited viewing uses only unless otherwise authorized by Macrovision Corporation Reverse engineering or disassembly is prohibited The product comp...

Page 55: ...e illustration Rear panel 1 MAINS CABLE 2 RF IN 3 RF LOOPTHROUGH 4 Audio output L R 5 VIDEO output jack 5 OPEN CLOSE BUTTON 6 PLAY PAUSE BUTTON 7 STOP BUTTON 8 USB PORT 6 S VIDEO output jack 7 Component Video output Y Pb Pr 8 Digital Audio COAXIAL output jack 9 SCART OUT 10 SCART IN ...

Page 56: ...onnecting the player s AV output to the TV set 1 S Video cable and CVBS Video cable set the S Video to Video 2 Component video cable set the Video to INTERLACE YUV or P SCAN Y Pb Pr 3 SCART cable set the video type to TV RGB 4 Left Right Audio cable set the Audio out ...

Page 57: ...Connecting to an AV Amplifier with 2 Channel Analog Audio Input Notes 1 Set the TV to the AV input connected to the DVD player 2 Set the Amplifier to the AV input connected to the DVD player 9 ...

Page 58: ...to an AV Amplifier with Digital Audio Input Notes 1 Select the Coaxial digital audio output 2 Set the player s Audio out to Raw or PCM mode 3 Set the digital Amplifier to the AVinput connected to the DVD player 10 ...

Page 59: ...ck when you want to play the USB DISC you can insert a USB DISC or a MP3 Player with USB Interface to play the MP3 music or and JPEG files or other files Press the SOURCE button to choose USB mode All the function is the same to play a disc 11 ...

Page 60: ...l number and time HOUR MINUTE will be displayed in area 12 LED screen DVD DISC DVD DISC PBC PBC MP3 DISC MP3 DISC DISC PLAY DISC PLAY PLAY PLAY PLAY TIME PLAY TIME PAUSE PAUSE REPEAT REPEAT 10 10 VCD VCD 2 2 DOLBY DIGITAL DOLBY DIGITAL ...

Page 61: ...Please note that reference numbers for the remote are described beginning on page 15 to 20 of this manual 2 In this manual will be used to represent different NAVIGATION ARROWS on the remote respectively 3 In order to operate any of the remote functions you must first press the Power button on the DVD player 4 Some of the keys is multiple key Functionbefore can be used in DVD mode after can be use...

Page 62: ...charge heat open or short circuit the batteries Do not throw batteries into a fire Do not leave dead batteries in the Remote Control Do not use different types of batteries tog ether or mix old and new batteries If you do not use the remote control for a long period of time remove the batteries to avoid possible damage from battery corrosion If the remote control does not function cor rectly or th...

Page 63: ...ring the DVB Menu and press RETURN MENU or SETUP will return to channel playback 5 FAVORITE In DVB mode Press FAVORITE button to turn on the favorite Channel Groups Press FAVORITE button again will turn off the favorite Channel Groups NOTE The FAVORITE button has no effect in DVD mode 6 GOTO In DVD mode pressing GOTO button will bring up a Goto menu and the direction and number buttons can be used...

Page 64: ...play mode pressing RETURN will switch to the channel stored in memory 11 CH In DVB mode If you want to change channels you can press the CH button to change the channels 12 NEXT I n DVD mode Press NEXT to skip to the next chapter or track In D VB mode the NEXT button function same the CH button 16 PREV In DVD mode Press PREV to skip to previous chapter or track In DVB mode the PREV button function...

Page 65: ...ferent speeds The possible speeds are 1 2 1 4 1 8 1 16 1 32 and normal NOTE The SLOW button has no effect in DVB mode 22 ANGLE In DVD mode pressing ANGLE will change the view angle on DVD that support this feature NOTE In the DVD mode This ANGLE button has effect in the special DVD disc NOTE The ANGLE button has no effect in DVB mode 23 OPEN CLOSE In DVD mode press OPEN CLOSE to immediately eject ...

Page 66: ...ress the RETURN to exit the INFO option As below 27 PAUSE In DVD mode press PAUSE to pause playback From this state press PAUSE to advance one video frame For audio only media pressing PAUSE the second time will resume playback For DVB press PAUSE to pause and again press PAUSE to resume playback 28 SETUP In DVD mode Pressing SETUP button will enter the DVD setup menu I n DVB mode press SETUP butt...

Page 67: ... same button again to increase speed from X2 to X4 to X8 to X16 to X32 NOTE The REV button has no effect in DVB mode 32 FW D In DVD mode press FWD to enter fast forward playback Press this key again to increase speed from X2 to X4 to X8 to X16 to X32 NOTE The FWD button has no effect in DVB mode 33 PBC In DVD mode it is PBC NOTE The PBC button has no effect in DVB mode 34 SUBTITLE In DVD mode pres...

Page 68: ... In DVB mode use this button to select different languages on the current channel 37 REPEAT In DVD mode press REPEAT to select repeat mode Press multiple times to cycle between Title Repeat Chapter Repeat and Repeat Off 38 A B Repeat Segment In DVD mode press A B once to set the starting point for repeat segment Press it again to set an end point and the player will repeat the segment from the sta...

Page 69: ...p language Setup you can setup the Menu Audio Subtitle External subtitle Press the UP DOWN and LEFT RIGHT arrow buttons to highlight the icon of the desired page then press the DOWN or RIGHT arrow button to activate that page For example if you want to setup the audio setup press DOWN button to highlight the Audio Option the Audio setup page will be displayed on the screen 1 MENU Notes If your pre...

Page 70: ...e language 3 SUBTITLE 4 EXTERNAL SUBTITLE Highlight the SUBTITLE option and press the Arrow buttons to choose the subtitle language you prefer Press ENTER to confirm If the disc you are playing has that language available it will display subtitles in that language Highlight the EXTERNALSUBTITLE option and press the Arrow buttons to choose the supported subtitle language when playing MPEG4 format d...

Page 71: ...ht the Rear Option the Rear setup page will be displayed on the screen 1 DIGITAL OUT Notes When digital output is NOT in use It is recommended to turn OFF the digital output setting for the purpose on minimizing circuit interference 2 ANALOG OUT Highlight the DIGITAL OUT option and press the Arrow buttons to choose the audio output mode you prefer Press Enter to confirm There are 3 optional audio ...

Page 72: ...rl Angle Mark Press the UP DOWN and LEFT RIGHT arrow buttons to highlight the icon of the desired page then press the DOWN or RIGHT arrow button to activate that page For example if you want to setup the Angle Mark setup press DOWN button to highlight the Angel Mark Option the Angel Mark setup page will be displayed on the screen There are two modes one is LO RO one is LT RT ...

Page 73: ...ust input this code If the input code has been confirmed the level setting up menu will appear Move the cursor to choose the expected level and press ENTER button to confirm and memory it Move the cursor to the ENTER and press ENTER button to confirm and withdraw to the user setup menu or press ENTER button to directly with draw from the operation 2 ANGLE MARK There are On and Off the two choices ...

Page 74: ... Setting Press the SETUP button the DVD main setup menu appears the screen then press the DOWN button to highlight the system setting option A System Setting Menu language Setup Press the UP and DOWN button move on the System setting and to enter button the System setting Menu lanuage Setup option appear the screen In the System setting Menu language Setup you can setup the OSD option ...

Page 75: ...Setting Menu Display Setup you can setup the TV Standard Display Type Video Output Brightness Contrast option Press the UP DOWN and LEFT RIGHT arrow buttons to highlight the icon of the desired page then press the DOWN or RIGHT arrow button to activate that page For example if you want to setup the Contrast setup press DOWN button to highlight the Contrast Option the Contrast setup page will be di...

Page 76: ...ust the contrast TYPE According to the Display type you can choose 4 3PS 4 3LB or 16 9 3 VIDEO OUTPUT According to the output jack of TV set you can choose CVBS S VIDEO CVBS RGB CVBS YUV YUV P SCAN 4 BRIGHTNESS According to the Brightness you can choose Normal Bright or soft 5 28 ...

Page 77: ...ress the UP DOWN and LEFT RIGHT arrow buttons to highlight the icon of the desired page then press the DOWN or RIGHT arrow button to activate that page For example if you want to setup the Default setup press Down button to highlight the Default Option the Default setup page will be displayed on the screen 1 UI Style According to UI Style you can choose Style1 Style2 Style3 Style4 2 Change PIN The...

Page 78: ...tion Type MODE NOTE In the Default Type If you choose the DVB MODE That next power on the PLAYER will direct enter DVB MODE no again display the SOURCE list 4 Default The Default setup options are RESTORE factory setup Let your PLAYER work on the default state 5 System Info The system info includes model HW SW and Date ...

Page 79: ...setup and press ENTER button to confirm the Main Menu Game option appear the screen In the Main Menu Game Setup you can setup the Mine Tetris Rush Hour Calendar four kinds of games For example 31 If you want to play the Mine Game you can press the DOWN button to highlight the Mine options Then press the ENTER button to enter As below Other Game options operation same to the Mine Game ...

Page 80: ... Note The player will not function correctly under the following condition 1 The disc is badly scratched damaged or dirty 2 The disc is not finalized 3 The recording format is not supported by the player When a Mp3 disc is loaded the screen will display as follows MP3 Playback Current directory name Current MP3 JPEG file name If a JPEG fileis playing the name should have a JPEG extension 32 ...

Page 81: ... transition modes for any pictures Press PAUSE to stop playing Press or to see the previous or next picture Press PLAY to continue sideshow transitions Press STOP toreturn to root menu General function Zoom function This player providesboth Zoom in out and Zoom pan function Press the ZOOM consecutively thepicture will zoom in out in turn as followings 33 ...

Page 82: ...e first time a First Time Installation menu will be displayed to guide you through the initial setup Use the remote controller to finish the setup A At the First time installation menu select YES and press ENTER button on the remote controller to proceed B Enter your regional settings include your Country Language Time Zone Then select NEXT to proceed C Select Yes to start the automatic channel se...

Page 83: ...DOWN button to highlight the DVB Menu option A Press the UP and DOWN button move on the DVB Menu and to enter button to enter the DVB Menu Program list option appear the screen In the DVB Menu Program list you can setup the TV Program Music Program Sort options Press the UP DOWN and LEFT RIGHT arrow buttons to highlight the icon of the desired page then press the DOWN or RIGHT arrow button to acti...

Page 84: ...o add to the group and go to the Favor column b When the Favor column of the desired channel is highlighted one red heart symbol will appear after press the ENTER button Pressing the ENTER button again will un select the channel of the favorite group C Once your favorite group is created you can press the FAVORITE keys to quickly access your favorite channels Moving a Channel a Select the channel ...

Page 85: ...annel will be deleted d Press ENTER button again will exit the deleting channel mode 2 Music Program 3 Sort Press the DOWN button to highlight the Music Program Then press the ENTER button to enter the Music program options appear the screen NOTE This Music program options operation same the TV Program Press the DOWN button to highlight the Sort options yon can choose the channels Sort style As By...

Page 86: ...he target channel you must know its parameters e g the channel number After the channel is found it is appended to the current channel list a Enter the Manual Search menu via Main Menu Program Search Manual Search b Specify the appropriate channel number in the Channel No field by press DOWN and UP button Enter your selection the frequency and bandwidth values are changed accordingly c Select ENTE...

Page 87: ...k Allows you to activate or de activate the overall parental control When set to YES all the channels with locking settings will be locked Parental Setting In the channel list select the channel you want to lock and then press ENTER A padlock symbol will be displayed To remove the lock press ENTER again Antenna Power The default setting is OFF Set this option to ON if this receiver box is connecte...

Page 88: ...utton to into the Language setup 1 st 2nd Audio This option allows you to select your first and second choice for the audio language If neither of your selected language is available on the program transmitted the main language of the program will be used Subtitle Allows you to select the subtitle language If your selected language is not available on the program transmitted the main language of t...

Page 89: ...er to set the time manually select OFF in GMT usage item and then manually select the date and time 5 Time Zone Select an appropriate time zone to display the local time correctly Both EPG and system schedule need a correct time zone setting Press the DOWN button to highlight the System Schedule options then Press the ENTER button to into the System schedule setup 6 System Schedule 41 ...

Page 90: ... keys to enter numeric value Mode You can repeat the task by setting the frequency as Once Daily or Weekly Or you can select Stop to disable the task Start and End Time Enter the start and end time that automatically turns on and off the receiver Channel Type Select TV or radio channel as required Channel No Select the channel to be played at scheduled time d When the setting is done press SETUP o...

Page 91: ...Ensure the power outletis operational Ensure the power cordis not damaged Ensure the power plugis connected firmly tothe outlet Ensure the audio jacksare securely connected Ensure the audio connectoris not damaged Ensure the volume isturned up in VOL CHsetup Ensure you have setthe player sAUDIO settings correctly Ensure you have enteredthe correct AV input for yourTV Ensure the audio isnot set to ...

Page 92: ... Frequency response 20Hz to 20kHz S N ratio 90dB Total harmonic distortion 0 0025 Accessories Video Audio cable x 1 Remote Control x 1 User s Manual x 1 Battery x 2 Specifications are subject to change without notice Weight and dimensions are approximate 44 This symbol on the product or in the instructions means that your electrical and electronic equipment should be disposed at the end of life se...

Reviews: