


18
[Figure 26]
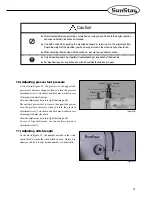
[Figure 27]
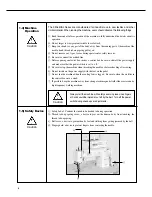
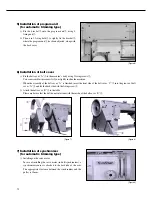
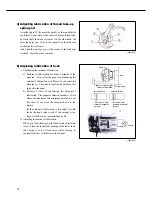
8) Routing upper thread
Put the thread take-up lever in the highest position and
insert the upper thread as shown in the Figure 26 by
numerical order.
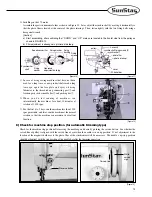
9) Adjusting upper thread
Thread control assembly
Like in Figure 27, turning the tension adjustment nut
①
of the thread tension control assembly clockwise
makes the upper thread tension stronger and
counterclockwise makes it weaker. The result of the
needlework depends on the sewing conditions such
as the sewing material, used thread and stitch length.
So please adjust as desired.
Adjusting the thread take up tension
As in Figure 27, insert the driver into the groove
②
of the thread tension control assembly. Turn
clockwise to make the spring tension stronger and
counter clockwise to make it weaker.
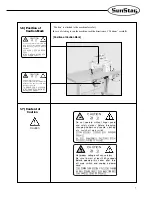
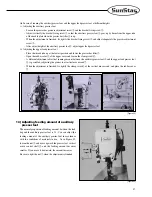
Upper thread tension is
weak while the lower thread
tension is weak
upper thread tension is
strong while the lower thread
tension is weak
good swing
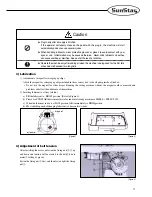
Caution
▶
Turn off the power switch when routing the upper thread.
▶
If the operator mistakenly presses down on the pedal while switched on, the machine will
start automatically and can cause physical injuries.
▶
When using the clutch motor, be aware that the motor will continue to rotate for a while
after the power is switched off.
▶
Start to work on the sewing machine only after the motor has come to a complete stop.
Summary of Contents for KM-640BL
Page 29: ...29 5 Table Drawing 1 KM 640BL ...
Page 30: ...30 2 KM 640BL 7 ...


