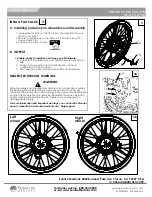
Xtender Mounting parts:
1. 4 ea Large black hex nut
2. 2 ea Index axle washer
3. 2 ea Clamp bracket
4. 2 ea Axle sleeve
5. 2 ea T-nut
6. 2 ea T-nut washer
7. 2 ea T-nut bolt
8. 6 ea 2-1/2” Hex bolt
9. 2 ea 2-3/4” Hex bolt
10. 4 ea Spacer
11. 6 ea Small washer
12. 10 ea Nylock nut
13. 4 ea Saddle
14. 2 ea 1-3/4" Hex bolt
Tools needed:
1. 5mm hex key
2. 12mm wrench
3. 19mm wrench
4. 2ea 7/6” wrench
5. Socket wrench
6. 7/16” Socket
1 1a
8
9
13
11
12
14
Axle Plate
1
10
1a
1
4
2
3
5
6
7
2
Forward
position
Backward
position
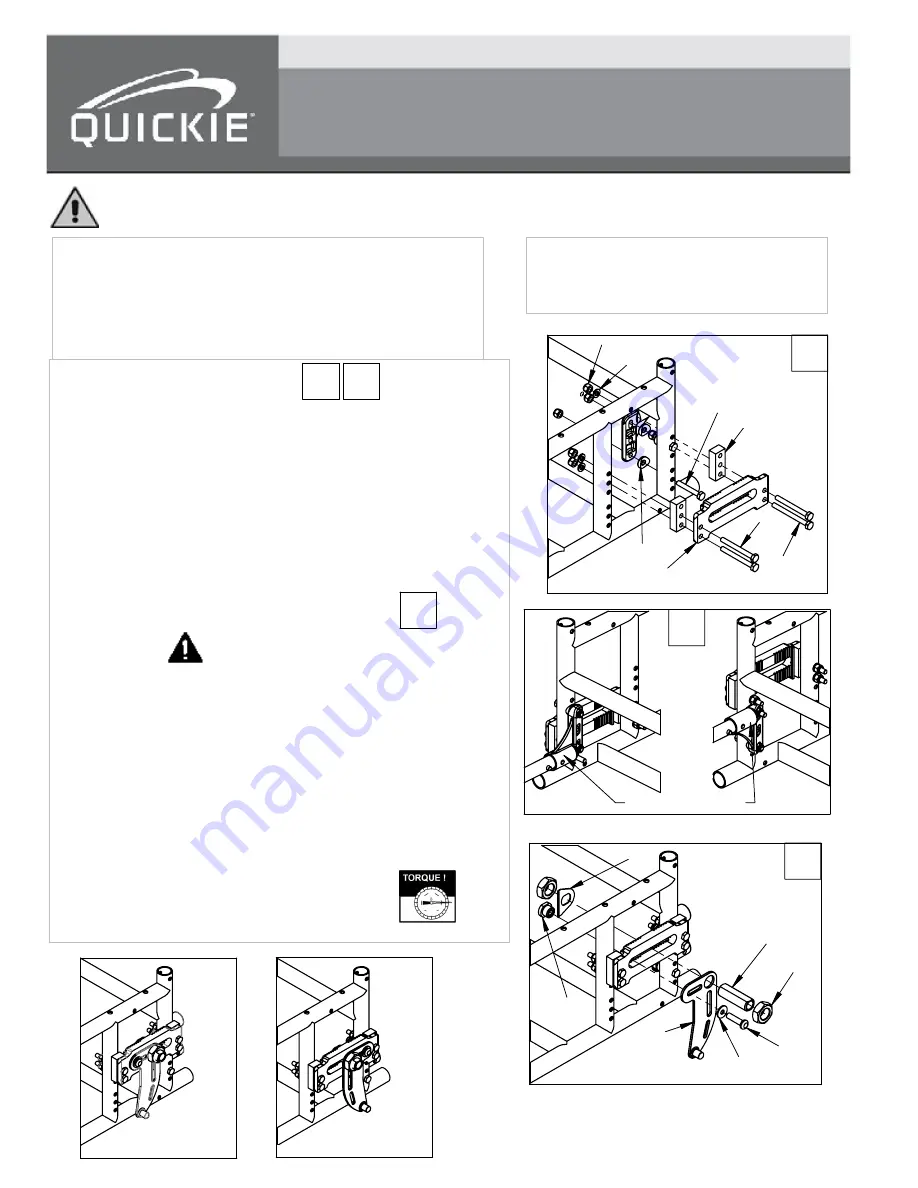
A. INSTALL THE AXLE PLATES
Using the standard axle plate:
1. Assemble and attach both axle plates (left and right) to the
chair frame making sure to use the spacers and hex bolts as
shown. Leave loose.
2. Use two of the 2-1/2” hex bolts (8) and one spacer (10) to attach
the axle plate to the frame at the front. Attach the nuts (12) and
washers (11). Leave loose.
3. Use the other hex bolt (8), longer bolt (9), and spacer (10) at
the back of the chair. Before attaching the rear nuts and
washers to the hex bolts, make sure that the anti-tip receiver is
mounted on the inside of the frame with saddles, figure 1a.
Mount as shown in figure 1a depending on axle plate position.
Use shorter bolt (14) for bottom receiver hole. Leave loose.
B. MOUNTING THE EXTENDER BRACKET
Warning
Attention dealers and qualified technicians
, make sure that the axle
placement and center of gravity of the chair is in the same location
as it was before the installation. Clamp bracket can be installed in
either forward or backward position.
Install axle sleeves and clamp bracket:
1. Install axle sleeve nut (1) to the axle sleeve (4).
2. Install the assembly through the clamp bracket (3) and then the
axle plate slot.
4. On back side, place index washer (2) and axle sleeve nut (1)
on axle sleeve. Hand tighten the nuts.
5. Install T-nut bolt (7) through washer (6), and then through the
clamp bracket slot (3).
6. On the back side place the T-nut (5) into the axle plate slot
thread bolt (7) into T-nut. Leave loose.
5. Tighten axle plate nuts.
6. Tighten axle sleeve nuts.
7. Torque axle sleeve nuts to 30 ft-lbs and screws
to 85 in-lbs.
8. Repeat steps for both sides.
2
Anti-tip receiver
XTENDER KIT INSTALLATION INSTRUCTIONS
GP, GPV, GPSA
Please read these instructions carefully before beginning the installation. Failure to understand and
follow installation instructions may result in injury to installer and/or end user and may void the warranty.
If you have any questions call Sunrise Medical Technical support at 800-333-4000.


