19
TREADMILL FUNCTIONS
SAFETY LOCK FUNCTION:
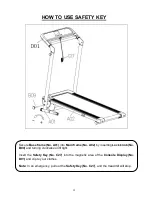
Removeing the
Safety Key (No. C27)
from the computer console while the treadmill is running and
the treadmill will stop immediately. Once the treadmill reaches a full stop, the display will show
“- - -”
and the buzzer will beep 3 times. To start the treadmill again, insert the magnet end of the
Safety
Key (No. C27)
into the computer console and press the START button.
POWER SAVE FUNCTION:
When the treadmill has been idle for 10 minutes, it will enter Power Saving Mode. While the
treadmill is in this mode, the display will be turned off. To turn it back on, press any button.
POWER ON:
Flick the power switch to this symbol to turn on the treadmill.
POWER OFF:
Flick the power switch to this symbol to turn the treadmill off at anytime, including while the treadmill
is in use.
SAFETY NOTE:
1. We recommend that you maintain a slow speed at the beginning of a session and hold the
handrails until you become familiar with the treadmill.
2. Insert the magnet end of the
Safety Key (No. C27)
into the computer console and clip the safety
clip to your clothing before starting your workout. To end your workout, press the STOP button or
remove the
Safety Key (No. C27)
and the treadmill will stop immediately.
EXERCISE INSTRUCTIONS
GETTING STARTED:
Get to know your treadmill. Before attempting to use the treadmill, take some time to familiarize
yourself with the controls. Once you get on, stand with your feet on the side rails and stabilize
yourself by holding onto the handrails.
Next, attach the clip end of the
Safety Key (No. C27)
to your clothes and insert the magnetic end of
the key into the computer console. Press the START button to start the treadmill. The treadmill will
start at the system default setting speed of
0.5 MPH
. Step onto the belt. When you feel comfortable,
slowly increase this speed. When you are finished with your workout, press the STOP button to
stop the treadmill or you can remove the magnetic end of the
Safety Key (No. C27)
to stop the
treadmill.
Summary of Contents for SF-T7632
Page 5: ...4 EXPLODED DIAGRAM ...

