13
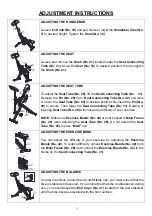
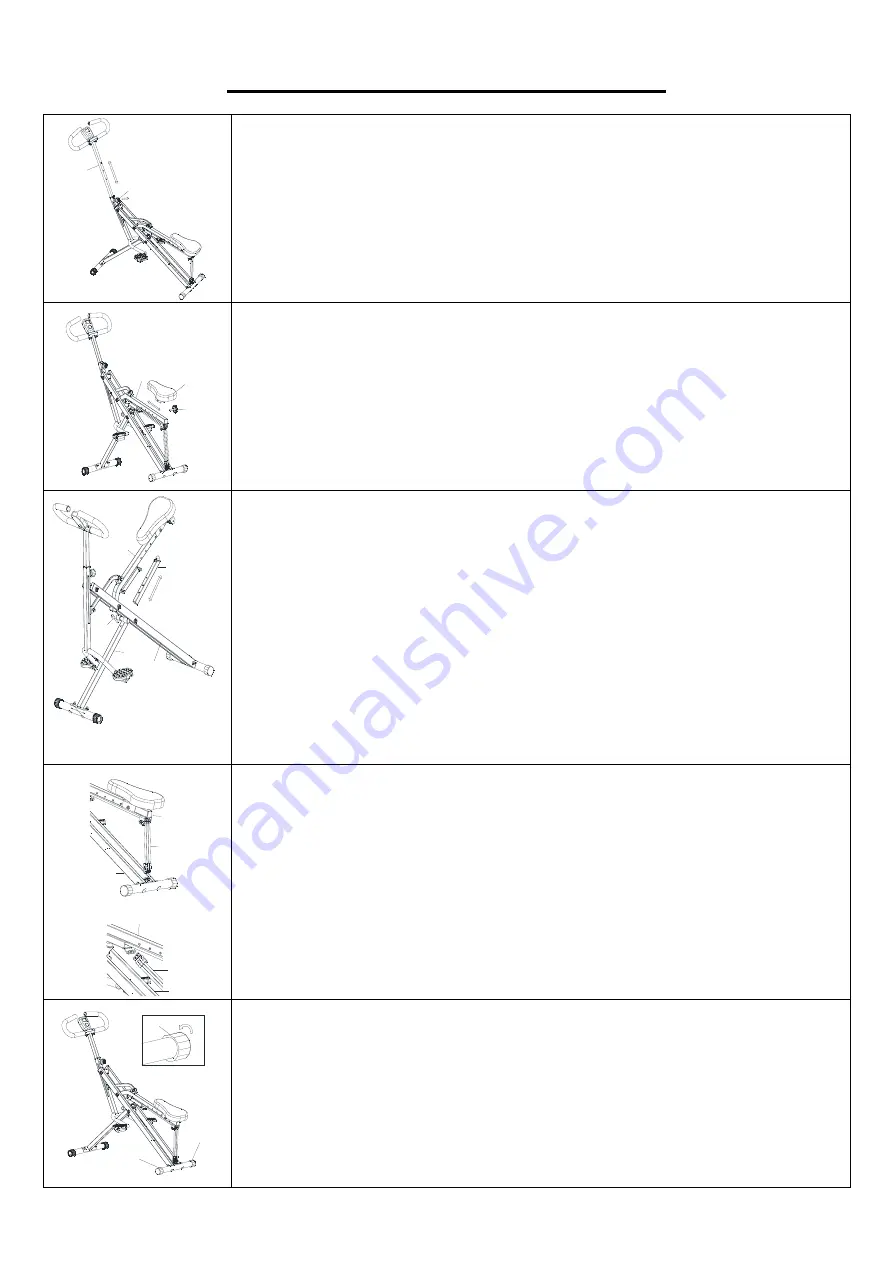
ADJUSTMENT INSTRUCTIONS
7
10
ADJUSTING THE HANDLEBAR
Loosen the
Knob (No. 10)
and pull. Raise or lower the
Handlebar Tube (No.
7)
to desired height. Tighten the
Knob (No. 10)
.
21
18
31
ADJUSTING THE SEAT
Loosen and remove the
Knob (No. 21)
located under the
Seat Connecting
Tube (No. 31)
. Move the
Seat (No. 18)
to desired position, then re-tighten
the
Knob (No. 21)
.
25
31
29
32
28
ADJUSTING THE SEAT TUBE
To adjust the
Seat Tube (No. 25)
, lift the
Seat Connecting Tube (No. 31)
.
Remove the
Pin (No. 29)
from
Front Connecting Tube (No. 32)
and raise
or lower the
Seat Tube (No. 25)
to desired position. Re-insert the
Pin (No.
29)
to secure. Then lower the
Seat Connecting Tube (No. 31)
. Raising or
lowering
Seat Tube (No. 25)
will change the difficulty of your exercise.
NOTE:
Make sure
Exercise Bands (No. 42)
are not hooked to
Main Frame
(No. 28)
when adjusting the
Seat Tube (No. 25).
Do not extend the
Seat
Tube (No. 25)
to pass
“MAX”
line.
42
31
28
42
31
28
ADJUSTING THE EXERCISE BAND
You can adjust the difficulty of your exercise by adjusting the
Exercise
Bands (No. 42)
. To reduce difficulty, unhook
Exercise Bands (No. 42)
from
the
Main Frame (No. 28)
and connect the
Exercise Bands (No. 42)
to the
hooks on the
Seat Connecting Tube (No. 31)
.
37
37
37
ADJUSTING THE BALANCE
In order to achieve a smooth and comfortable ride, you must ensure that the
bike is stabled and secured. If you notice that the bike is unbalanced during
use, you should adjust the
End Caps (No. 37)
located on the rear stabilizer
until the bike becomes levelled with the floor surface.
Summary of Contents for P2100
Page 40: ...39 ...


