


50
Experiments
Experiment 1 Going Forward and Backward
In this experiment, the car begins to walk, but it is just the simplest movements: going forward
and backward and then stopping. This is the first and most important step for car walking.
The subsequent experiments are all based on this experiment.
Experimental Principle
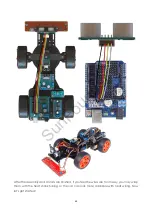
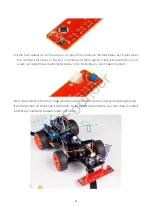
The batteries output 7.2V to the switch module. When you press the button of the switch
module, 7.2V will be input to the step-down DC-DC converter module which then outputs 5V
after lowering the voltage. 5V is input to the sensor shield to supply for the servo. The MG995
servo at the front is to control the direction the car walks in. In this experiment, the car keeps
walking straight forward/backward. The motor driver module is used to drive the two gear
motors connected to the rear wheels of the car, which drive the wheels accordingly. Thus,
the car begins to walk.
Experimental Phenomena
When you press down the button of the switch module, the car starts to go straight. 2 seconds
later, it starts to go backwards and then stops after another 2 seconds. If you press down the
button for a second time, the car will start to walk again. If you want to change the time the
car walks, you can modify the sketch as you like.
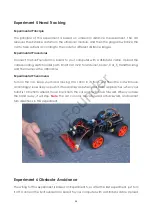
Experiment 2 Turning Right and Left
The principle for this experiment is the same as those for the first experiment. Only a turning
function is added.
Experimental Principle
Change the rotational angle by sketch to make the car turn.
Experimental Procedures
Connect the SunFounder Uno board to your computer. Upload the sketch under the path
Smart Car V2.0
for
Arduino\Code\Car_2_Turn
, and then remove the USB cable. Press down
the button on the switch module, and the car will start running.
Experimental Phenomena
When you press down the button on the switch module, the car will go forward. 1 second
SunFounder


