background image

Piarm, Release 1.0

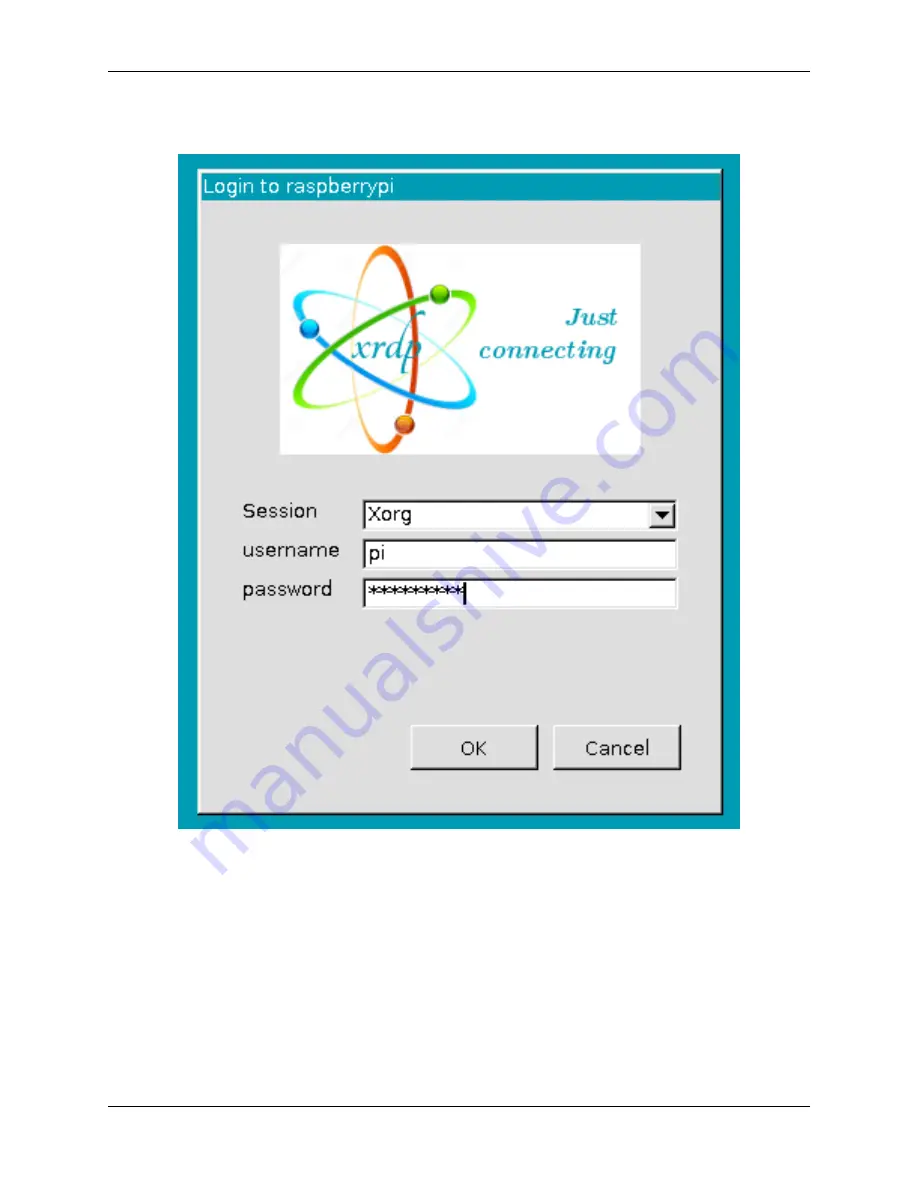
Then the xrdp login page pops out. Please type in your username and password. After that, please click “OK”. At the
first time you log in, your username is “pi” and the password is “raspberry”.

Step 4

Here, you successfully login to RPi by using the remote desktop.

5.2. Remote Desktop

153

Summary of Contents for PiArm

Page 1: ...Piarm Release 1 0 www sunfounder com Mar 31 2022 ...

Page 2: ......

Page 3: ...le 37 3 5 Remote Control 49 3 6 Coordinate Mode 65 3 7 Memory Function 69 3 8 GAME Catching Dolls 73 3 9 GAME Iron Collection 81 4 Play with Python 89 4 1 Quick Guide on Python 89 4 2 Assemble and Test 3 EoATs 110 4 3 Sound Effects 112 4 4 Dual Joystick Module Control 114 4 5 Keyboard Control 121 4 6 Coordinate Mode 129 4 7 Memory function 132 4 8 GAME Catching Dolls 135 4 9 GAME Iron Collection 1...

Page 4: ...ii ...

Page 5: ...on each of which allows you to make PiArm work the way you want it to Play with Ezblock If you are new to programming check out this chapter as it introduces Ezblock Studio a block based visual program ming software that allows you to make PiArm move and implement some interesting projects by simply dragging and dropping blocks Play with Python If you prefer to program in a more popular programmin...

Page 6: ...Piarm Release 1 0 2 CONTENTS ...

Page 7: ...ble Please follow the steps on the PDF to assemble Note 1 Before assembling you need to buy 2 18650 batteries and fully charge them refer to About the Battery 2 Robot HAT cannot charge the battery so you need to buy a battery charger at the same time PiArm Assembly Instructions pdf Warning If the kit you received includes a clear Robot HAT Case please do not mount it so as not to affect the PiArm ...

Page 8: ...Piarm Release 1 0 4 Chapter 1 Component List and Assembly Instructions ...

Page 9: ...so that the arm can reach a specific position 2 1 1 Angle Mode The arm has three servos to control its up and down left and right and front and back We use and to represent their rotation angles as shown below alpha represents the front to back rotation angle of the arm due to the limitation of the structure the recommended rotation range is 30 60 beta represents the up and down rotation angle of ...

Page 10: ...nate system with its origin located at the center of the output axis of the servos on both sides The Control Point is located at the top of the arm and is scaled in millimeters In the initial state the coordinates of the Control Point are 0 80 80 6 Chapter 2 Hardware Introduction ...

Page 11: ... the total arm length of PiArm is 160 mm which means that the limit value of the control points moving along the Y axis should be between 0 0 0 and 0 160 0 However due to the limitations of the structure itself the range of movement should be much smaller than this The recommended range for the X coordinate is 80 80 The recommended range for Y coordinate is 30 130 The recommended range for Z coord...

Page 12: ...mbling the Shovel Bucket Assemble the Shovel Bucket as shown below Note In step 2 you need to insert the servo into P11 for zeroing before inserting the D3 plate into the servo shaft in a vertical orientation 8 Chapter 2 Hardware Introduction ...

Page 13: ...Piarm Release 1 0 Assemble the Shovel Bucket to the end of the PiArm with M2x4 screws 2 2 Shovel Bucket 9 ...

Page 14: ...Piarm Release 1 0 The Shovel Bucket has a rotation range of 90 60 10 Chapter 2 Hardware Introduction ...

Page 15: ...Piarm Release 1 0 Use range Can t dig water can be used to dig sand and gravel 2 2 Shovel Bucket 11 ...

Page 16: ...sembly Assemble the Hanging Clip as shown below Note Note that in step 3 you need to insert the servo into the P11 for zeroing before inserting the D1 plate into the servo shaft in a vertical orientation 12 Chapter 2 Hardware Introduction ...

Page 17: ...Piarm Release 1 0 Attach the Hanging Clip to the end of the PiArm with the M2x4 screw 2 3 Hanging Clip 13 ...

Page 18: ...Piarm Release 1 0 The angle range of the Hanging Clip is 0 90 14 Chapter 2 Hardware Introduction ...

Page 19: ...object should be less than 150g The recommended height of the object to be clamped should be less than 4cm width less than 8 5cm Slender objects need to find the right angle to clip up Translated with www DeepL com Translator free version 2 3 Hanging Clip 15 ...

Page 20: ...Piarm Release 1 0 2 4 Electromagnet Assembly Assemble the electromagnet module according to the diagram below 16 Chapter 2 Hardware Introduction ...

Page 21: ...Piarm Release 1 0 Then secure the electromagnet to the end of the PiArm with the M2x4 screws 2 4 Electromagnet 17 ...

Page 22: ...he iron product the stronger the adsorption It is recommended that the weight of iron objects is less than 150g 2 5 Dual Joystick Module Dual joystick module as the name implies consists of two joysticks each of which can output electrical signals in X Y and Z directions 18 Chapter 2 Hardware Introduction ...

Page 23: ...tick is pushed to the left the coordinates are 0 2048 When the joystick is pushed down the coordinates are 2048 0 as shown below However electrical signals tend to fluctuate and it is difficult to get an absolutely stable reading so we usually set a value interval to determine where the joystick is currently located The recommended boundary values are set to 3072 and 1024 when the joystick reading...

Page 24: ...n or left Note In the Python library these values have been processed into directional indications as follows The Z axis button outputs a low level 0 when pressed and a high level 1 when released 20 Chapter 2 Hardware Introduction ...

Page 25: ... The functions of the USR Button can be configured through programming Pressing down leads to a input of 0 and releasing produces a input of 1 LED Configured through programming Outputting 1 turns the LED on Outputting 0 turns the LED off Battery Indicator Battery voltage above 7 8V will light up the two indicator LEDs Battery voltage ranging from 6 7V to 7 8V will only light up one LED voltage be...

Page 26: ...D will stay on with a solid Bluetooth connection and blink rapidly during a signal transmission The LED will blink at 1 second intervals if the Bluetooth is disconnected Note You can see more details in the Robot HAT Documentation 22 Chapter 2 Hardware Introduction ...

Page 27: ...all the servos at 0 degrees to complete a proper and safe assembly otherwise you will probably damage the servos Install EzBlock Studio will guide you to download Ezblock Studio to play with your robot 3 1 1 Servo Adjust When assembling to the part with the servo you need to keep the servo at 0 and secure it with the servo screw Please follow the tutorial below to do this 1 Firstly Download and In...

Page 28: ...d to indicate that the Raspberry Pi boots successfully 4 Next plug the servo cable into the P11 port as follows 5 At this point you will see the servo arm rotate to a specific position 0 If the servo arm does not return to 0 press the RST button to restart the Robot HAT 6 Now you can continue the installation as instructed on the assembly foldout 24 Chapter 3 Play with Ezblock ...

Page 29: ... possible deviations in the installation process or limitations of the servos themselves making some servo angles slightly tilted so you can calibrate them in this step But if you think the assembly is perfect and no calibration is needed you can also skip this step Projects Here we show you the projects of playing Piarm on Ezblock Studio If you are new to these you can refer to the code images in...

Page 30: ...ion even if no block is placed it cannot be deleted and the Forever block is as the name suggests a continuous loop that allows your program to change and respond This block is used to set an interval time in milliseconds 3 2 2 Tips on PiArm blocks Here you can find some blocks needed to make PiArm work 26 Chapter 3 Play with Ezblock ...

Page 31: ...PiArm Step 2 Now start writing the code to make Shovel Bucket work Put set bucket pin as in the Start block to initialize the bucket pin as P3 Note Because in the assembly diagram above it is connected to the Transfer Module which is already connected to 3 2 Assemble and Test 3 EoATs 27 ...

Page 32: ... to Used to set the angle of Shovel Bucket the range is 0 90 delay From the Basic category used to set the time interval between 2 block runs in ms Step 4 Once the code is written click the Download button in the bottom right corner to download it to the PiArm Now you will see the Shovel Bucket moving back and forth and you can click the Run button to stop the code from running 28 Chapter 3 Play w...

Page 33: ...ovel Bucket work Put set hanging clip pin as in the Start block to initialize the hanging clip pin as P3 Note Because in the assembly diagram above it is connected to the Transfer Module which is already connected to P3 during the PiArm assembly Of course you can also connect it to other spare pins 3 2 Assemble and Test 3 EoATs 29 ...

Page 34: ... the range is 0 90 delay From the Basic category used to set the time interval between 2 block runs in ms Step 4 Once the code is written click the Download button in the bottom right corner to download it to the PiArm Now you will see the Hanging Clip repeatedly open close and you can click the Run button to stop the code from running 30 Chapter 3 Play with Ezblock ...

Page 35: ...ovel Bucket work Put set electromagnet pin as in the Start block to initialize the electromagnet pin as P3 Note Because in the assembly diagram above it is connected to the Transfer Module which is already connected to P3 during the PiArm assembly Of course you can also connect it to other spare pins 3 2 Assemble and Test 3 EoATs 31 ...

Page 36: ... category used to set the time interval between 2 block runs in ms Step 4 Once the code is written click the Download button in the bottom right corner to download it to the PiArm Now you will find that the Electromagnet is energized every second the LED D2 on the electromagnet lights up indicating that it is energized at which time it can be used to adsorb some materials with iron 32 Chapter 3 Pl...

Page 37: ...lay some music and sound effects as well as to implement TTS functions 3 3 1 Tips on Blocks This block is a separate thread and can play some built in background music This block can play some built in sound effects You can write some text in this block and let PiArm speak them 3 3 Sound Effects 33 ...

Page 38: ...nction block the function you created will also appear here The Function block without output is used here Step 2 Create a function named music after creating it you will see it in the Functions category Now let the music function implement playing background music at 50 volume set background music volume to Used to set the volume of the background music in the range of 0 100 play background music...

Page 39: ...n volume play sound effects with volume to This block can be used to play built in sound effects with a volume range of 0 100 Step 4 Similarly create a function named tts that will be used to make PiArm say something say This block converts the text you type into speech for PiArm to speak 3 3 Sound Effects 35 ...

Page 40: ... it to the PiArm Now you will find that piarm first plays the sound effect in the sound function and then plays the background music in the music function When the background music is played the tts function is run for timing and the countdown voice broadcast will be performed after 30 seconds Note You can also find the code with the same name on the Examples page of Ezblock Studio and click Run o...

Page 41: ...e learned how to Assemble and Test 3 EoATs of PiArm s separately In this project first the arm is controlled by Angle Mode and dual joystick module Then the control code for the three EoATs was added to this so that the dual joystick module can control both arm and EoAT Arm Joystick Control Shovel Bucket Joystick Control 3 4 Dual Joystick Module 37 ...

Page 42: ...to a specific position Coordinate Mode Create a spatial right angle coordinate system for the arm and set the control point Set the coordinates of the control point so that the arm can reach a specific position Step 1 You may want to simplify your program with variables now click the Create variable button on the Variables category to create 5 variables HIGH LOW and Note The created variables are ...

Page 43: ...OW variables please refer to Dual Joystick Module Step 3 Use if else block to do some conditional judgment cases drag 5 else if blocks from the left to below the if block if else Conditional judgment block you can create multiple conditional judgments by clicking the set icon and dragging else or else if to the right below the if 3 4 Dual Joystick Module 39 ...

Page 44: ... the Y is connected to A3 Assume that the X and Y of the left joystick and the Y of the right joystick are used to control the 3 servos of PiArm respectively now first set the judgment condition to determine whether the left and right joysticks are toggled or not If A0 LX is greater than HIGH 3072 it means that the left joystick is toggled to the right If A0 LX is less than LOW 1024 it means the l...

Page 45: ...s less than LOW 1024 it means the right joystick is toggled backward Step 4 Now set the rotation effect of PiArm according to the toggle of the left and right joysticks If the left joystick is toggled to the right the Arm will turn right If the left joystick is toggled to the left the Arm will turn left If the left joystick is toggled forward the Arm will extend forward If the left joystick is tog...

Page 46: ...down If the right joystick is toggled backward the Arm will raise up Note and represent the 3 servo rotation ranges on PiArm refer to Angle Mode constrain low high From Math category for setting the variation of a constant to a certain range Step 5 42 Chapter 3 Play with Ezblock ...

Page 47: ...control PiArm Left joystick toggle left or right the arm will turn to the left or right Left joystick toggle forward or backward the arm will extend forward or retract backward Right joystick toggle forward or backward the arm will raise up or lower down Note You can also find the code with the same name on the Examples page of Ezblock Studio and click Run or Edit directly to see the results 3 4 D...

Page 48: ...Piarm Release 1 0 44 Chapter 3 Play with Ezblock ...

Page 49: ... also find the code with the same name on the Examples page of Ezblock Studio and click Run or Edit directly to view the code Once the code is run you can control both the PiArm s arm and Shovel Bucket with the dual joystick module But you need to install Shovel Bucket to the PiArm first 3 4 Dual Joystick Module 45 ...

Page 50: ...will be raised or lowered Push the left joystick to rewind the Shovel Bucket inward Press the right joystick to extend the Shovel Bucket outward 3 4 3 Hanging Clip Joystick Control Now add the control code for the Hanging Clip to the code for the control arm Note You can also find the code with the same name on the Examples page of Ezblock Studio and click Run or Edit directly to view the block 46...

Page 51: ...o PiArm first Push the left Joystick to the left or right the arm will turn to the left or right Push the left Joystick forward or backward the arm will extend or retract Push the right Joystick forward or backward the arm will be raised or lowered Press the left Joystick to close the Hanging Clip Press the right Joystick to open the Hanging Clip 3 4 Dual Joystick Module 47 ...

Page 52: ...zblock Studio and click Run or Edit directly to view the block After the code is run you can use the dual joystick module to control both PiArm s arm and the Electromagnet But you need to install Electromagnet to PiArm first Push the left joystick to the left or right the arm will turn to the left or right Push the left joystick forward or backward the arm will extend or retract 48 Chapter 3 Play ...

Page 53: ...emote Control Create a Library Shovel Bucket Remote Control Hanging Clip Remote Control Electromagnet Remote Control 3 5 1 Arm Remote Control PiArm s arm can be controlled in two ways Angle Mode and Coordinate Mode Angle Mode Writes a certain angle to the three servos on the arm thus rotating the arm to a specific position Coordinate Mode Create a spatial right angle coordinate system for the arm ...

Page 54: ...d the D pad and Button block appear in it Button get value This block is used to read the value of the button press is 1 release is 0 Button is press release This block and Button get value 0 1 have the same effect and can be used directly to determine whether a button is pressed or not D pad get value This block is used to read the up down left right selected through the drop down menu pad values...

Page 55: ...the arrow keys and button values Note The function name cannot contain spaces and two words can be connected by _ Note and represent the 3 servo rotation ranges on PiArm refer to Angle Mode constrain low high From Math category for setting the variation of a constant to a certain range if else Conditional judgment block you can create multiple conditional judgments by clicking the set icon 3 5 Rem...

Page 56: ...forward If the Down button of D pad is pressed the Arm will retract backward If the LEFT button of D pad is pressed the Arm will turn left If the RIGHT button of D pad is pressed the Arm will turn right If Button A is pressed the Arm will lower down If Button B is pressed the Arm will raise up Step 4 52 Chapter 3 Play with Ezblock ...

Page 57: ...he functions must be placed before the start and Forever blocks You can also find the code with the same name on the EzBlock Studio Examples page and click Run or Edit directly to view the result 3 5 2 Create a Library To be able to use the function arm_control in other code later you can create it as a library and import it when you need to use it Step 1 Open the menu icon in the upper right corn...

Page 58: ...ep 2 Select the function there is only one function here so arm_control is selected by default Step 3 Name the library and fill in the description so that it can be better distinguished later 54 Chapter 3 Play with Ezblock ...

Page 59: ...ge You can also see it when you click Import Library 3 5 3 Shovel Bucket Remote Control Create a new project and write code for it so that we can control the Shovel Bucket while controlling the arm Step 1 Import arm_control library if you have not created this library before please refer to Create a Library 3 5 Remote Control 55 ...

Page 60: ...an right click on it and click Expand Block so that you can see its internal code Step 2 Go to the remote control page and drag a D pad and two buttons out again because the import library will not import the widgets so you need to drag them in again Add two more buttons to control the angle of the Shovel Bucket 56 Chapter 3 Play with Ezblock ...

Page 61: ...initialize the PiArm rotation speed and the pin of Shovel Bucket Step 4 Create a new function shovel and write the code as follows to control Shovel Bucket with two buttons Use if else block as a judgment condition If button C is pressed the variable angle is added by 1 if 3 5 Remote Control 57 ...

Page 62: ...ns category to the Forever block respectively After clicking the download button use the D pad and buttons A B on the remote control page to control the movement of the arm and then use buttons C D to control the addition decrease of the bucket angle Note The functions must be placed before the start and Forever blocks You can also find the code with the same name on the EzBlock Studio Examples pa...

Page 63: ...Library In the Mylib page select the library you created and click Import After importing this library is in a collapsed style You can right click on it and click Expand Block so that you can see its internal code Step 2 Go to the remote control page and drag a D pad and two buttons out again because the import library will not import the widgets so you need to drag them in again Add two more butt...

Page 64: ...eed and the pin of Hanging Clip Step 4 Create a new function clip and write the code as follows to control Hanging Clip with two buttons Use if else block as a judgment condition If button C is pressed the variable angle is added by 1 if button D is pressed the variable angle is subtracted by 1 60 Chapter 3 Play with Ezblock ...

Page 65: ...lock respectively After clicking the download button use the D pad and buttons A B on the remote control page to control the movement of the arm and then use buttons C D to control the opening and closing of the Hanging Clip Note The functions must be placed before the start and Forever blocks You can also find the code with the same name on the EzBlock Studio Examples page and click Run or Edit d...

Page 66: ...ry In the Mylib page select the library you created and click Import After importing this library is in a collapsed style You can right click on it and click Expand Block so that you can see its internal code Step 2 Go to the remote control page and drag a D pad and two buttons out again because the import library will not import the widgets so you need to drag them in again In addition add a swit...

Page 67: ...pin of Electromaget Step 4 Create a new function electromagnet and write code for it as the following steps so that you can control Electro magnet by the Switch widget Use if else block as a judgment condition If the switch is on the Electromaget is activated if the switch is off the Electromaget is turned off 3 5 Remote Control 63 ...

Page 68: ... time you can use iron adsorption material when the switch toggles to off the electromagnet turns off At the same time you can use the D pad and buttons A B on the remote control page to control the movement of the arm Note The functions must be placed before the start and Forever blocks You can also find the code with the same name on the EzBlock Studio Examples page and click Run or Edit directl...

Page 69: ...fic position Coordinate Mode Create a spatial right angle coordinate system for the arm and set the control point Set the coordinates of the control point so that the arm can reach a specific position This project sets 2 coordinate points by coordinate mode and let the PiArm clip the rubber duck on the left to the bowl on the right But you need to mount Hanging Clip to the PiArm first 3 6 Coordina...

Page 70: ...he rubber duck on the left and the bowl on the right are on the same line you will find that their Y coordinate values are the same start_coord The coordinates of the left rubber duck start_coord_up The coordinate of straight above the left rubber duck end_coord The coordinates of the bowl end_coord_up The coordinates straight above the bowl 66 Chapter 3 Play with Ezblock ...

Page 71: ...the Y coordinate value here is small the recommended range is 30 130 it is possible to reach to 100 However if you increase the Y coordinate value the X coordinate value needs to be reduced according to the actual situation due to the linkage action Step 3 In the loop block let PiArm do the following PiArm opens the Hanging Clip 20 then rotates to the left rubber duck position start_coord then clo...

Page 72: ...in the bottom right corner and you will see PiArm repeating the actions described above Note You can also find the code with the same name on the Examples page of Ezblock Studio and click Run or Edit directly to view the code 68 Chapter 3 Play with Ezblock ...

Page 73: ...the actions that PiArm has done In this project we will use the Dual Joystick Module to control the movement of the Arm of PiArm in Coordinate Control mode and record the motion trajectory of the Arm through the joystick buttons so that PiArm can move repeatedly along the recorded trajectory 3 7 Memory Function 69 ...

Page 74: ...set their initial values Step 2 Create a function named set_position to make the Dual Joystick Module move the PiArm in Coordinate Mode If the left joystick is toggled to the right the Arm will turn right If the left joystick is toggled to the left the Arm will turn left 70 Chapter 3 Play with Ezblock ...

Page 75: ...Arm will retract backward If the right joystick is toggled forward the Arm will raise up If the right joystick is toggled backward the Arm will lower down Note About X Y Z coordinate directions please refer to Coordinate Mode For the connection and direction of the dual joystick refer to Dual Joystick Module 3 7 Memory Function 71 ...

Page 76: ...PiArm will be recorded at this time and there will be a voice prompt to indicate the completion of recording When the button of the right joystick is pressed PiArm will reproduce these recorded actions Note The if else and and blocks are all from the Logic category run the recorded actions at internal This block is used to set the time interval for each set of recorded actions if it is 0 it will r...

Page 77: ...ou want to control Hanging Clip please refer to Hanging Clip Joystick Control to write the code If you want to control Electromagnet please refer to Electromagnet Joystick Control to write the code 3 8 GAME Catching Dolls Now let s play a game of catching dolls and see who can catch more dolls with PiArm in the given time In order to play this game we need to implement two functions the first one ...

Page 78: ... set initial values for them Then initialize the PiArm rotation speed and Hanging Clip pin Note For the reason of the values of the HIGH and LOW variables please refer to Dual Joystick Module and represent the 3 servo rotation ranges on PiArm refer to Angle Mode 74 Chapter 3 Play with Ezblock ...

Page 79: ...Piarm Release 1 0 Step 2 Create another 5 variables LX LY RY LB RB to read the X Y and pressed values of the Dual Joystick Module respectively 3 8 GAME Catching Dolls 75 ...

Page 80: ...right joysticks are pressed then the timing starts and the flag is set to 1 Step 4 Create a function named clip to control the Hanging Clip When the left joystick is pressed and the right joystick is released the Hanging Clip will slowly closed When the left joystick is released and the right joystick is pressed the Hanging Clip will slowly opened 76 Chapter 3 Play with Ezblock ...

Page 81: ... joystick LX is toggled to the left the Arm will turn left If the left joystick LY is toggled forward the Arm will extend forward If the left joystick LY is toggled backward the Arm will retract backward If the right joystick RY is toggled forward the Arm will lower down If the right joystick RY is toggled backward the Arm will raise up The Hanging Clip control function is also called here This al...

Page 82: ...Piarm Release 1 0 Step 6 Put the control function into the Forever block 78 Chapter 3 Play with Ezblock ...

Page 83: ... Step 7 Create a function named timing to use for timing The game time is set to 60 seconds 60000 and a countdown will chime in the last 3 seconds to let you know that time is almost up Step 8 3 8 GAME Catching Dolls 79 ...

Page 84: ...Piarm Release 1 0 Let the timing function run in a separate thread This allows you to control PiArm while counting down The complete code is as follows 80 Chapter 3 Play with Ezblock ...

Page 85: ... iron pieces triangle circle and square PiArm will randomly say a shape you need to control PiArm to put the corresponding shape of iron pieces into the corresponding box in the specified time you will not be able to control PiArm when the time is over 3 9 GAME Iron Collection 81 ...

Page 86: ... them Then initialize the PiArm rotation speed and Electromagnet pin Note and represent the 3 servo rotation ranges on PiArm refer to Angle Mode Step 2 Drag 2 D pads from the remote control page to control PiArm a button to start the game and a Digital Tube to display the time 82 Chapter 3 Play with Ezblock ...

Page 87: ...amed magnet to enable the left and right control of the D pad B to turn the electromagnet on and off Step 4 Create a function named control to implement the Arm of PiArm to be controlled by the D pad A and D pad B Note 3 9 GAME Iron Collection 83 ...

Page 88: ...ou can create multiple conditional judgments by clicking the set icon and dragging else or else if to the right below the if If the UP button of D pad A is pressed the Arm will extend forward If the Down button of D pad A is pressed the Arm will retract backward If the LEFT button of D pad A is pressed the Arm will turn left If the RIGHT button of D pad A is pressed the Arm will turn right 84 Chap...

Page 89: ...dom shape Step 6 The main flow of the code when button E is pressed the timer starts and PiArm will say a random shape flag is used to represent the start of the countdown and you can control PiArm Step 7 Create a function named timing to use for timing The game time is set to 60 seconds after the time is up PiArm will say Game over and you will no longer be able to control it 3 9 GAME Iron Collec...

Page 90: ...tton E is pressed the timing starts and time startTime represents how many seconds have passed since then Step 8 Let the timing function run in a separate thread This allows you to control PiArm while counting down The complete code is as follows 86 Chapter 3 Play with Ezblock ...

Page 91: ...Piarm Release 1 0 3 9 GAME Iron Collection 87 ...

Page 92: ...Piarm Release 1 0 88 Chapter 3 Play with Ezblock ...

Page 93: ...Pi remote access to Raspberry Pi to run the corresponding code If you are familiar with Raspberry Pi and can open the command line successfully then you can skip the first 3 parts and then complete the last part 4 1 1 What Do We Need Required Components Raspberry Pi The Raspberry Pi is a low cost credit card sized computer that plugs into a computer monitor or TV and uses a standard keyboard and m...

Page 94: ...w the desktop environment of Raspberry Pi you need to use the screen that can be a TV screen or a computer monitor If the screen has built in speakers the Pi plays sounds via them Mouse Keyboard When you use a screen a USB keyboard and a USB mouse are also needed HDMI The Raspberry Pi has a HDMI output port that is compatible with the HDMI ports of most modern TV and computer monitors If your scre...

Page 95: ...as it will download the image and install it automatically to the SD card Visit the download page https www raspberrypi org software Click on the link for the Raspberry Pi Imager that matches your operating system when the download finishes click it to launch the installer Step 2 When you launch the installer your operating system may try to block you from running it For example on Windows I recei...

Page 96: ...pberry Pi Imager click CHOOSE OS Raspberry Pi OS other Scroll down to the end of the newly opened page and you will see Raspberry Pi OS Legacy and Raspberry Pi OS Lite Legacy these are security updates for Debian Buster the difference between them is with or without the desktop It is recommended to install Raspberry Pi OS Legacy the system with the desktop 92 Chapter 4 Play with Python ...

Page 97: ... Press Ctrl Shift X or click the setting button to open the Advanced options page to enable SSH and con figure wifi these 2 items must be set the others depend on your choice You can choose to always use this image customization options 4 1 Quick Guide on Python 93 ...

Page 98: ...ck SAVE Note wifi country should be set the two letter ISO IEC alpha2 code for the country in which you are using your Raspberry Pi please refer to the following link https en wikipedia org wiki ISO_3166 1_alpha 2 Officially_ assigned_code_elements 94 Chapter 4 Play with Python ...

Page 99: ...Piarm Release 1 0 Step 7 Click the WRITE button 4 1 Quick Guide on Python 95 ...

Page 100: ... 0 Step 8 If your SD card currently has any files on it you may wish to back up these files first to prevent you from permanently losing them If there is no file to be backed up click Yes 96 Chapter 4 Play with Python ...

Page 101: ...Piarm Release 1 0 Step 9 After waiting for a period of time the following window will appear to represent the completion of writing 4 1 Quick Guide on Python 97 ...

Page 102: ...ou ve set up with Raspberry Pi OS into the micro SD card slot on the underside of your Raspberry Pi 2 Plug in the Mouse and Keyboard 3 Connect the screen to Raspberry Pi s HDMI port and make sure your screen is plugged into a wall socket and switched on Note If you use a Raspberry Pi 4 you need to connect the screen to the HDMI0 nearest the power in port 4 Use the power adapter to power the Raspbe...

Page 103: ...outer such as a home network you can check the addresses assigned to Raspberry Pi on the admin interface of router The default hostname of the Raspberry Pi OS is raspberrypi and you need to find it If you are using ArchLinuxARM system please find alarmpi 2 Network Segment Scanning You can also use network scanning to look up the IP address of Raspberry Pi You can apply the software Advanced IP sca...

Page 104: ...ten in C that is the bridge linking the customers and Unix Linux Moreover it can help to complete most of the work needed For Linux or Mac OS X Users Step 1 Go to Applications Utilities find the Terminal and open it Step 2 Type in ssh pi ip_address pi is your username and ip_address is your IP address For example ssh pi 192 168 18 197 Step 3 Input yes 100 Chapter 4 Play with Python ...

Page 105: ...Piarm Release 1 0 Step 4 Input the passcode and the default password is raspberry Step 5 We now get the Raspberry Pi connected and are ready to go to the next step 4 1 Quick Guide on Python 101 ...

Page 106: ...word For Windows Users If you re a Windows user you can use SSH with the application of some software Here we recommend PuTTY Step 1 Download PuTTY Step 2 Open PuTTY and click Session on the left tree alike structure Enter the IP address of the RPi in the text box under Host Name or IP address and 22 under Port by default it is 22 102 Chapter 4 Play with Python ...

Page 107: ... login as type in pi the user name of the RPi and password raspberry the default one if you haven t changed it Note When you input the password the characters do not display on window accordingly which is normal What you need is to input the correct password If inactive appears next to PuTTY it means that the connection has been broken and needs to be reconnected 4 1 Quick Guide on Python 103 ...

Page 108: ...rry Pi easily For details on how to do this please refer to Remote Desktop 4 1 4 Download and Run the Code First download and run the robot hat module cd home pi git clone https github com sunfounder robot hat git cd robot hat sudo python3 setup py install Note Running setup py will download some necessary components Due to network problems you may not be able to download successfully You may need...

Page 109: ...om sunfounder piarm git cd piarm sudo python3 setup py install This step will take a little time so please be patient Finally you need to run the script i2samp sh to install the components needed for the i2s amplifier otherwise it may not have sound cd home pi piarm sudo bash i2samp sh 4 1 Quick Guide on Python 105 ...

Page 110: ...Piarm Release 1 0 Type y and press Enter to continue running the script Type y and press Enter to make dev zero run in the background 106 Chapter 4 Play with Python ...

Page 111: ...ript several times 4 1 5 Servo Adjust To ensure that the servo has been properly set to 0 first insert the rocker arm into the servo shaft and then gently rotate the rocker arm to a different angle Follow the instructions on the assembly foldout insert the battery holder cable and turn the power switch to the ON 4 1 Quick Guide on Python 107 ...

Page 112: ...oots successfully Now run servo_zeroing py in the examples folder cd home pi piarm examples sudo python3 servo_zeroing py Note If you get an error try re enabling the Raspberry Pi s I2C port see I2C Configuration Next plug the servo cable into the P11 port as follows 108 Chapter 4 Play with Python ...

Page 113: ...t unplug this servo cable before fixing it with the servo screw you can unplug it after fixing it Do not rotate the servo while it is powered on to avoid damage if the servo shaft is not inserted at the right angle pull the servo out and reinsert it Before assembling each servo you need to plug the servo cable into P11 and turn on the power to set its angle to 0 After the assembly is complete you ...

Page 114: ...t PWM P3 arm set_offset 0 0 0 if __name__ __main__ while True arm set_bucket 50 sleep 1 arm set_bucket 90 sleep 1 How it work from robot_hat import Robot Servo PWM from robot_hat utils import reset_mcu from time import sleep from piarm import PiArm First import the Robot servo and PWM classes from robot_hat Import the reset_mcu class from the robot_hat utils module which is used to reset the MCU t...

Page 115: ...gle of the bucket 4 2 2 Hanging Clip Run the code cd home pi piarm examples sudo python3 clip py After running the code you will see the Hanging Clip repeatedly opening and closing But you need to assemble Hanging Clip first Code from robot_hat import Robot Servo PWM from robot_hat utils import reset_mcu from time import sleep from piarm import PiArm reset_mcu sleep 0 01 arm PiArm 1 2 3 arm hangin...

Page 116: ...ectromagnet_init Used to initialize the connection of the Electromagnet set_electromagnet Used to control the Electromagnet on off 4 3 Sound Effects In this example we use the sound effects of PiArm Robot HAT to be exact It consists of three parts Muisc Sound and Text to Speech Install i2samp Before using this function please activate the speaker so that it can produce sound Run i2samp sh this scr...

Page 117: ...av m music_set_volume 40 m sound_play song def background_music music musics sports Ahjay_Stelino mp3 m music_set_volume 50 m background_music music def tts t say timing begins sleep 1 t say three sleep 1 t say two sleep 1 t say one sleep 1 t say Stop music sleep 1 if __name__ __main__ background_music sleep 10 sound tts while True background_music sound tts How it works The code is simple it crea...

Page 118: ...d music in a specific path def tts t say timing begins sleep 1 t say three sleep 1 t say two sleep 1 t say one sleep 1 t say Stop music sleep 1 Write text to PiArm to make it speak say Writing characters or strings in parentheses will make PiArm speak them out 4 4 Dual Joystick Module Control In this project we will use the Dual Joystick Module that comes with the kit to control the PiArm Shovel B...

Page 119: ...et by pressing the left and right joysticks respectively But you need to assemble Shovel Bucket to PiArm first Code from robot_hat import Servo PWM Joystick ADC Pin from robot_hat utils import reset_mcu from time import sleep from piarm import PiArm reset_mcu sleep 0 01 leftJoystick Joystick ADC A0 ADC A1 Pin D0 rightJoystick Joystick ADC A2 ADC A3 Pin D1 arm PiArm 1 2 3 arm bucket_init PWM P3 arm...

Page 120: ...ftJoystick read_status pressed bucket 2 flag True elif rightJoystick read_status pressed bucket 2 flag True if flag True arm set_angle alpha beta gamma arm set_bucket bucket print servo angles s bucket angle s arm servo_positions arm component_staus if __name__ __main__ while True _angles_control sleep 0 01 How it works leftJoystick Joystick ADC A0 ADC A1 Pin D0 rightJoystick Joystick ADC A2 ADC A...

Page 121: ...ha increases and the Arm will extend forward If the left joystick is toggled down alpha decreases and the Arm will retract backward If the left joystick is toggled to the left gamma increases and the Arm will turn left If the left joystick is toggled to the right gamma decreases and the Arm will turn right If the right joystick is toggled up beta increases and the Arm will raise up If the right jo...

Page 122: ...eftJoystick read_status up alpha 1 flag True elif leftJoystick read_status down alpha 1 flag True if leftJoystick read_status left gamma 1 flag True elif leftJoystick read_status right gamma 1 flag True if rightJoystick read_status up beta 1 flag True elif rightJoystick read_status down beta 1 flag True if leftJoystick read_status pressed clip 2 flag True elif rightJoystick read_status pressed cli...

Page 123: ...the left and right joystick buttons to control the angles of the Hanging Clip respectively 4 4 3 Electromagnet Joystick Control Run the code cd home pi piarm examples sudo python3 joystick_module3 py Once the code is run you will be able to control the rotation of PiArm s arm by toggling the left and right joysticks and controlling the on off of the Electromagnet by pressing the left and right joy...

Page 124: ...e True _angles_control sleep 0 01 In this code the _angles_control function is created to control the PiArm alpha beta and gamma refer to the angles of the 3 servos on the Arm respectively refer to Angle Mode If the left joystick is toggled up alpha increases and the Arm will extend forward If the left joystick is toggled down alpha decreases and the Arm will retract backward If the left joystick ...

Page 125: ... running the code follow the prompts and press the keys on the keyboard to control the PiArm s arm and Shovel Bucket But you need to assemble Shovel Bucket on the PiArm first Note To switch the keyboard to lowercase English input w s a d i and k are used to control the rotation of the arm j and l are used to control the angle of the Shovel Bucket Code from piarm import PiArm from robot_hat import ...

Page 126: ... def readchar fd sys stdin fileno old_settings termios tcgetattr fd try tty setraw sys stdin fileno ch sys stdin read 1 finally termios tcsetattr fd termios TCSADRAIN old_settings return ch def control key arm speed 100 flag False alpha beta gamma arm servo_positions bucket arm component_staus if key w alpha 3 flag True elif key s alpha 3 flag True if key a gamma 3 flag True elif key d gamma 3 fla...

Page 127: ...n fileno ch sys stdin read 1 finally termios tcsetattr fd termios TCSADRAIN old_settings return ch This function references the standard input stream and returns the first character of the read data stream tty setraw sys stdin fileno is to change the standard input stream to raw mode i e all characters will not be escaped during transmission including special characters old_settings termios tcgeta...

Page 128: ...pha increases and the Arm will extend forward Press the s key on the keyboard the alpha decreases and the Arm will retract backward Press the a key on the keyboard the gamma increases and the Arm will turn left Press the d key on the keyboard the gamma decreases and the Arm will turn right Press the i key on the keyboard the beta increases and the Arm will raise up Press the k key on the keyboard ...

Page 129: ... arm j and l are used to control the opening and closing of the Hanging Clip Code from piarm import PiArm from robot_hat import Pin PWM Servo ADC from time import time sleep from robot_hat utils import reset_mcu import sys import tty import termios reset_mcu sleep 0 01 arm PiArm 1 2 3 arm hanging_clip_init PWM P3 arm set_offset 0 0 0 controllable 0 manual Press keys on keyboard w extend s retract ...

Page 130: ...lag True elif key k beta 3 flag True if key j clip 1 flag True elif key l clip 1 flag True if flag True arm set_angle alpha beta gamma arm set_hanging_clip clip print servo angles s clip angle s arm servo_positions arm component_ staus if __name__ __main__ print manual while True key readchar lower control key if key chr 27 break In this code the control function is created to control the PiArm by...

Page 131: ...oard Control Run the code cd home pi piarm examples sudo python3 keyboard_control1 py After running the code follow the prompts and press the keys on the keyboard to control the PiArm s arms and Electromagnet But you need to assemble Electromagnet to PiArm first Note To switch the keyboard to lowercase English input w s a d i and k are used to control the rotation of the arm j and l are used to co...

Page 132: ... key arm speed 100 flag False alpha beta gamma arm servo_positions status if key w alpha 3 flag True elif key s alpha 3 flag True if key a gamma 3 flag True elif key d gamma 3 flag True if key i beta 3 flag True elif key k beta 3 flag True if key j arm set_electromagnet on elif key l arm set_electromagnet off if flag True arm set_angle alpha beta gamma print servo angles s electromagnet status s a...

Page 133: ...ht Press the i key on the keyboard the beta increases and the Arm will raise up Press the k key on the keyboard the beta decreases and the Arm will lower down Finally use the k and l keys to control the ON and OFF of the Electromagnet respectively 4 6 Coordinate Mode PiArm s arm has 2 control modes Angle Mode and Coordinate Mode Angle Mode Write a certain angle to the 3 servos of the arm to make t...

Page 134: ...he Shovel Bucket by pressing the left and right joystick respectively But you need to assemble Hanging Clip to PiArm first Code from re import M from robot_hat import PWM from robot_hat utils import reset_mcu from time import sleep from piarm import PiArm reset_mcu sleep 0 01 Grab an object from one coordinate to another coordinate arm PiArm 1 2 3 arm set_offset 0 0 0 arm hanging_clip_init PWM P3 ...

Page 135: ... when the end of arm tool is mounted The tolerance distance is different for each end of arm tool For example 3 4cm for Hanging Clip and Electro magnet 6 7cm for Shovel Bucket For example here the X coordinate is written as 100 but the actual distance is 13 14cm It is generally recommended that the X coordinate is 80 80 but since the Y coordinate value here is small the recommended range is 30 130...

Page 136: ...ress the left joystick to record one movement of PiArm after recording several sets of movements you can press the right joystick to make PiArm to reproduce these movements Only record the changes between points if the starting point and the end point are the same and you do many moves in between but only press once to record it will go directly from the starting point to the end point and will no...

Page 137: ... arm steps_buff i 2 i 1 sleep 0 05 elif rightJoystick read_status pressed t say action arm set_speed 80 arm record_reproduce 0 05 arm set_speed 100 if flag True arm set_angle alpha beta gamma arm set_bucket bucket print servo angles s bucket angle s arm servo_positions arm component_staus if __name__ __main__ print arm servo_positions i 0 while True _angles_control sleep 0 01 How it works In this ...

Page 138: ...nd the Arm will turn left If the left joystick is toggled to the right gamma decreases and the Arm will turn right If the right joystick is toggled up beta increases and the Arm will raise up If the right joystick is toggled down beta decreases and the Arm will lower down 2 Control the angle of the Shovel Bucket if rightJoystick read_status left bucket 2 flag True elif rightJoystick read_status ri...

Page 139: ...rm component_ staus Write the angle of the Arm and the Shovel Bucket to PiArm and have it rotate to those angles If you have the Hanging Clip or Electromagnet connected to your PiArm you can modify the above code by referring to the following parts Hanging Clip Joystick Control Electromagnet Joystick Control 4 8 GAME Catching Dolls Now let s play a game of catching dolls and see who can catch more...

Page 140: ...arm import PiArm reset_mcu sleep 0 01 t TTS leftJoystick Joystick ADC A0 ADC A1 Pin D0 rightJoystick Joystick ADC A2 ADC A3 Pin D1 arm PiArm 1 2 3 arm hanging_clip_init PWM P3 arm set_offset 0 0 0 arm speed 100 game_flag 0 def control alpha beta gamma arm servo_positions clip arm component_staus if leftJoystick read_status up alpha 1 elif leftJoystick read_status down alpha 1 if leftJoystick read_...

Page 141: ...d t say timing begins game_flag 1 if game_flag 1 control How it works This code adds timing to the Hanging Clip Joystick Control project def timing sleep 60 t say three sleep 1 t say two sleep 1 t say one sleep 1 t say game over global game_flag game_flag 0 Use the sleep function to count down in 60 seconds then let PiArm count down to 3 2 1 and when the time is over let game_flag be 0 then PiArm ...

Page 142: ... will prompt the game to start then randomly say a shape Round Triangle and Square You need to use w s a d i and k on the keyboard to control Arm j and l to pick up the corresponding shape you need to install Electromagnet to PiArm first 60 seconds later the game will be prompted to end and you will no longer be able to control the PiArm If you want to stop the code from running you need to press ...

Page 143: ...keys on keyboard p Game Start ESC Stop manual2 Press keys on keyboard w extend s retract a turn left d turn right i go up k go down j on l off def control while flag True arm speed 100 flag False alpha beta gamma arm servo_positions def control key alpha beta gamma arm servo_positions if key a gamma 3 elif key d gamma 3 if key s alpha 3 elif key w alpha 3 if key i beta 3 elif key k beta 3 if key j...

Page 144: ...t say Round if k 2 t say Triangle if k 3 t say Square if __name__ __main__ print manual1 thread1 threading Thread target timing thread1 start while True key readchar lower if key p print manual2 flag True sleep 3 say_shape if flag True control key if key chr 27 print press ctrl c to quit break How it works This code is based on the project Electromagnet Keyboard Control with the addition of timing...

Page 145: ...readchar lower if key p print manual2 flag True sleep 3 say_shape if flag True control key if key chr 27 break print press ctrl c to quit This is the main flow of the code Print out the key prompt in the terminal and let timing run in a separate thread Call the readchar function to read the key value If key p is read as being pressed print out the key prompt and let flag be True at which point the...

Page 146: ...Piarm Release 1 0 Ctrl C At this point you can stop the code with Ctrl C 142 Chapter 4 Play with Python ...

Page 147: ...DIX 5 1 I2C Configuration Enable the I2C port of your Raspberry Pi If you have enabled it skip this if you do not know whether you have done that or not please continue sudo raspi config 3 Interfacing options P5 I2C 143 ...

Page 148: ...Piarm Release 1 0 Yes then Ok Finish 144 Chapter 5 Appendix ...

Page 149: ... can use the function of remote desktop through VNC Enable VNC service The VNC service has been installed in the system By default VNC is disabled You need to enable it in config Step 1 Input the following command sudo raspi config Step 2 Choose 3 Interfacing Options by press the down arrow key on your keyboard then press the Enter key 5 2 Remote Desktop 145 ...

Page 150: ... Step 3 P3 VNC Step 4 Select Yes OK Finish to exit the configuration Login to VNC Step 1 You need to download and install the VNC Viewer on personal computer After the installation is done open it 146 Chapter 5 Appendix ...

Page 151: ...Piarm Release 1 0 Step 2 Then select New connection Step 3 Input IP address of Raspberry Pi and any Name 5 2 Remote Desktop 147 ...

Page 152: ...Piarm Release 1 0 Step 4 Double click the connection just created 148 Chapter 5 Appendix ...

Page 153: ...Piarm Release 1 0 Step 5 Enter Username pi and Password raspberry by default 5 2 Remote Desktop 149 ...

Page 154: ...Piarm Release 1 0 Step 6 Now you can see the desktop of the Raspberry Pi 150 Chapter 5 Appendix ...

Page 155: ...al login to remote machines using RDP Microsoft Remote Desktop Protocol Install XRDP Step 1 Login to Raspberry Pi by using SSH Step 2 Input the following instructions to install XRDP sudo apt get update sudo apt get install xrdp Step 3 Later the installation starts Enter Y press key Enter to confirm 5 2 Remote Desktop 151 ...

Page 156: ...e Remote Desktop feature that comes with Windows If you are a Mac user you can download and use Microsoft Remote Desktop from the APP Store and there is not much difference between the two The next example is Windows remote desktop Step 2 Type in mstsc in Run WIN R to open the Remote Desktop Connection and input the IP address of Raspberry Pi then click on Connect Step 3 152 Chapter 5 Appendix ...

Page 157: ...ps out Please type in your username and password After that please click OK At the first time you log in your username is pi and the password is raspberry Step 4 Here you successfully login to RPi by using the remote desktop 5 2 Remote Desktop 153 ...

Page 158: ... HAT cannot charge the battery so you need to buy a battery charger When the two power indicators on the Robot HAT are off it means the power is too low and the batteries need to be charged Button Top vs Flat Top Please choose battery with button top to ensure a good connection between the battery and the battery holder 154 Chapter 5 Appendix ...

Page 159: ...rwise the robot may be cut power and stop running because of the overcurrent protection of the protective board Battery capacity In order to keep the robot working for a long time use large capacity batteries as much as possible It is recommended to purchase batteries with a capacity of 3000mAh and above 5 3 About the Battery 155 ...

Page 160: ...Piarm Release 1 0 156 Chapter 5 Appendix ...

Page 161: ...users who have been following and supporting us Your valuable suggestions to us are our motivation to provide better products Particular Thanks Len Davisson Kalen Daniel Juan Delacosta Now could you spare a little time to fill out this questionnaire Note After submitting the questionnaire please go back to the top to view the results 157 ...

Page 162: ...Piarm Release 1 0 158 Chapter 6 Thank You ...

Page 163: ... it for personal study investigation enjoyment or other non commercial or nonprofit purposes under therelated regulations and copyrights laws without infringing the legal rights of the author and relevant right holders For any individual or organization that uses these for commercial profit without permission the Company reserves the right to take legal action 159 ...

Reviews: