background image

Assembly Instructions 

Item# L-DW047PST-3D 


Our clear, easy-to-follow, step by step instructions will guide you through the project from start to finish. The final 

product will be a quality piece that will assemble easily and give years of enjoyment.     


Please read instructions thoroughly before assembly. Familiarize yourself with the inventory of parts and the 

accompanying illustrations to assure safe and proper assembly.   

IMPORTANT:


Repeated assembly can weaken the locking ability of the washers. Periodically check all bolted connections on 

your service cart to make sure they are tight and secure. Please keep the instructions for future reference.     


Read and follow all Warnings & Assembly Instructions before attempting to assemble. 


WARNING: 

Begin assembly not less than 6 feet from any obstruction such as a fence, garage, house, overhanging branches, 

laundry line, or electrical wires. 


Some parts may contain sharp edges.

Keep children away from assembly area. 


 Wear protective gloves as necessary. 


Assemble on level ground.   


Do not over tighten any of the bolts or nuts, but do tighten each bolt and nut until firm. 


Check all nuts and bolts for tightness before and during usage. 


Summary of Contents for L-DW047PST-3D

Page 1: ...the washers Periodically check all bolted connections on your service cart to make sure they are tight and secure Please keep the instructions for future reference Read and follow all Warnings Assembly Instructions before attempting to assemble WARNING Begin assembly not less than 6 feet from any obstruction such as a fence garage house overhanging branches laundry line or electrical wires Some pa...

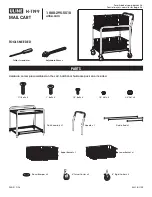
Page 2: ... 2 G Braked wheel 2 H Towel bar 1 AA M6 15 bolt 16 BB M6 20 bolt 4 CC Ф6 flat washer 22 DD M12 wrench 1 EE M6 50 bolt Pre assembled 2 FF M6 wrench 1 Step 1 Connect Bottom shelf E to Support frame C1 C2 with bolt AA and flat washer CC Please do not fully tighten the bolts here Step 2 Turn over assembled Support frame C Fit Basket D to Support frame C and connect them with bolt BB and flat washer CC...

Page 3: ...et Step 3 Put the Table top A upside down Connect assembled Support frame C and Table top A with bolt AA and flat washer CC Then fully tighten all the bolts by using wrench FF Step 6 Turn over the whole assembled piece Place the Cutting board B onto the Basket D to the rear of the drawer behind the stopper This will prevent the cart from tipping Please make sure to keep the cutting board behind th...

Page 4: ...with care and used only for personal residential purposes Limited Warranty The item is warranted to be free from defects in material or workmanship for a period of 6 months If any defect is found please call our customer service department at 1 866 578 6569 for help The manufacturer will not cover transportation or delivery costs or compensate the individual or any outside party for assembling or ...

Reviews: