background image


3.  Remove the lower door hinge (2) and then install it at the designated position on the opposite side. 

And install the door shaft assembly (3) accordingly. (Fig. 2) 

4.  Remove the center hinge  (4)  by unscrewing the two fixing bolts. Be careful to hold the glass door 

firmly after removing the bolts.  Pull down to remove the upper glass door and place it on a padded 
surface to prevent scratching it.  (Fig. 3) 

5.  Remove the door axle (5) from the right upper hinge then install and tighten it in the left upper hinge.  

(Fig. 4) 

6.  Set the upper glass door to the designated position. Then turn around the center hinge 180° and refit 

it on the opposite side by screwing the two fixing bolts.  Level  the door by adjusting the two fixing 
bolts. And make sure that the spacers which the hinge pins sit on are correctly positioned. (Fig. 3) 

7.  Set the lower glass door to the designated position and install the two lock screws (1) to connect the 

door shaft assembly (3) with the glass door and tighten them before the door is leveled. 

8.  Remove the handles from the left side of the doors  and install them  on the right side.  (

See next 

section

.) 


INSTALLING THE STAINLESS STEEL HANDLES 

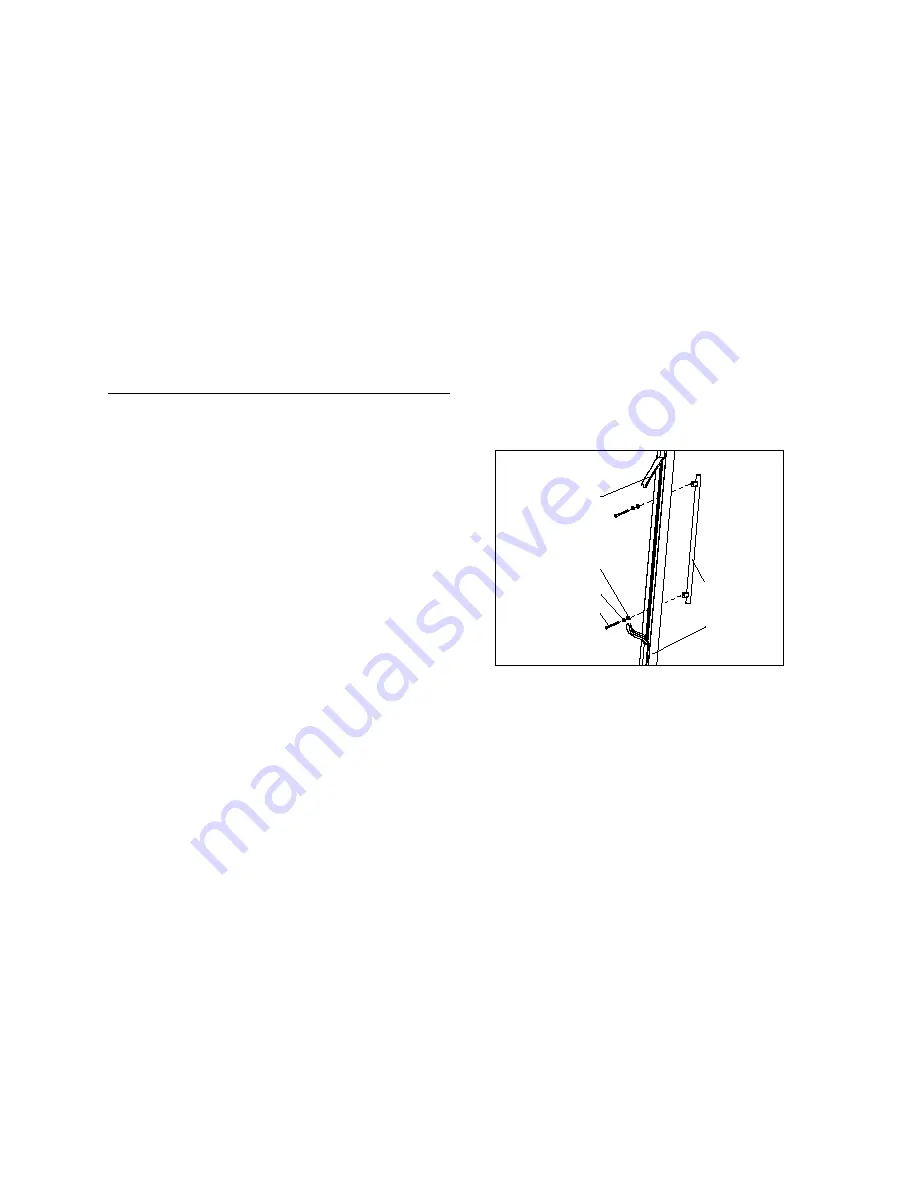
This wine cellar includes two (2) stainless steel handles that are not required to operate the unit. To install 
each handle, follow the instructions below: 

1.  Pull away the door gasket in the area where 

the handle is to be installed.  The gasket is 
easily displaced by hand; no tools are 
necessary. 

2.  Using a flathead screwdriver, remove the two 

(2) pre-installed decorative plugs from the 
back of the door.  Save the decorative plugs 
for future use. 

3.  Insert the two (2) Phillips head handle screws 

with the lock washers and flat washers 
through the gasket side of the door frame until 
the screws pass through the door frame. 
Follow the sequence shown in the figure. 

4.  Align the handle with the screws installed in step # 3 above.  Tighten the screws using a Phillips 

head screwdriver until the handle is both flush and secured tightly against the door frame. (DO 
NOT over-tighten as this will cause damage to the handle assembly and stainless steel door 
surface.) 

5.  Restore the door gasket to its original position. 


Handle

Door Frame

Gasket

Screw

Lock Washer

Flat Washer


Summary of Contents for SWC1875

Page 1: ...No SWC1875 BEFORE USE PLEASE READ AND FOLLOW ALL SAFETY RULES AND OPERATING INSTRUCTIONS Felix Storch Inc 770 Garrison Avenue Bronx NY 10474 www summitappliance com Write Serial No on back of unit he...

Page 2: ...ing the Door Swing of Your Appliance 7 8 Installing the Stainless Steel Handles 8 Operating Your Appliance 9 11 Recommended Temperature Settings 9 Control Panel 9 ON OFF Power 9 Key Lock 9 Setting the...

Page 3: ...itioned and installed as described in this manual so read the manual carefully To reduce the risk of fire electrical shock or injury when using the appliance follow basic precautions including the fol...

Page 4: ...or circuit breaker should be 15 amperes It is important that the appliance be leveled in order to work properly You may need to make several adjustments to level it All installations must be in accord...

Page 5: ...and interior packing Before connecting the appliance to the power source let it stand upright for approximately 2 hours This will reduce the possibility of a malfunction in the cooling system from ha...

Page 6: ...the third ground prong from the power cord Any questions concerning power and or grounding should be directed toward a certified electrician or an authorized service center BUILT IN CABINET INSTRUCTIO...

Page 7: ...appliance However if you must use an extension cord it is absolutely necessary that it be a UL CUL Listed 3 wire grounding type appliance extension cord having a grounding type plug and outlet and tha...

Page 8: ...8 Remove the handles from the left side of the doors and install them on the right side See next section INSTALLING THE STAINLESS STEEL HANDLES This wine cellar includes two 2 stainless steel handles...

Page 9: ...ure set previously the preset temperature at the factory for UPPER ZONE is 50 F 10 C and for LOWER ZONE is 60 F 16 C Key Lock If no key is touched for 2 minutes the controls will be locked automatical...

Page 10: ...ber of bottles you may be able to store can vary You can place 108 standard bottles in this model with 8 bottles on each full size shelf and 6 bottles on the bottom half size shelf Bottle capacity is...

Page 11: ...uart of water Wash the shelves with a mild detergent solution Wring excess water out of the sponge or cloth when cleaning the area where the controls are located or any electrical parts Wash the outsi...

Page 12: ...ppliance stays secure in the upright position during transportation Also protect the outside of the appliance with a blanket or similar item ENERGY SAVING TIPS The appliance should be located in the c...

Page 13: ...added to the wine cellar The door is opened too often The door is not closed completely The temperature control is not set correctly The door gasket does not seal properly The light does not work Not...

Page 14: ...e United States 5 Repairs to parts or systems resulting from unauthorized modifications made to the appliance 6 Expenses for travel and transportation for product service in remote locations 7 The rem...

Reviews: