background image

14 

STAINLESS STEEL CLEANING 


Stainless Steel Cleaning 


General Stainless Steel Surface Cleaning (To Be Performed As Often As Needed): 

 

Certain grades of stainless steel are more prone to corrosion than others.   

 

Stainless steel can be exposed to many contaminants, which if left untreated can cause stains and rust. 

 

Stainless steel requires a specific cleaning procedure to maintain its sheen  and remain rust-free. 

 

Wash with a solution of liquid dishwashing detergent and hot water. 

 

Rinse with pure hot water from spray bottle.  Wipe with clean sponge.  This will remove soap residue 

that can lodge in stainless steel’s microscopic grooves, causing rust. 

 

Dry with clean, soft cloth or paper towel. 

 

Caution! To prevent rust, you MUST rinse with pure hot water from a spray bottle while wiping with 

clean sponge after EACH cleaning.  

 

Caution! Never clean with scouring powder or steel wool as they mar, scratch and/or erode the surface 

of stainless steel.  When surface properties of stainless steel have been compromised, rust may form. 


Brightening:  

 

Method 1: Brighten by polishing with a soft cloth or sponge with a solution of one part vinegar to 2 parts 

water in a spray bottle.  


 

Method 2: Sprinkle baking soda on sponge and rub gently with soft cloth or sponge.


 

Caution! To prevent rust, you MUST rinse with pure hot water from a spray bottle while wiping with 

clean sponge after EACH cleaning. 


 

Dry with clean, soft cloth or paper towel.


Removing Streaks or Stains:


 

Method 1: Place two teaspoons of rubbing alcohol on a microfiber cloth or pad.  Rub the cloth along the 

grain of the appliance until the entire area has been wiped.  The rubbing alcohol will air dry itself. 

 

Method 2: Dip soft cloth or sponge in club soda and rub gently over area of concern. 

 

Caution! To prevent rust, you MUST rinse with pure hot water from a spray bottle while wiping with 

clean sponge after EACH cleaning.  

 

Dry with clean, soft cloth or paper towel. 


Polishing: 

 

Place a dab of olive oil onto clean soft cloth.  Spread over area until a light sheen is observed.  Use 

pressure to “work the oil” into the small grooves in the surface.  Apply firm, steady pressure using small 

circular motions.   

      > Dry buff: Remove excess oil with clean cloth or paper towel using small circular motions.   

      > Wet buff: Use an ounce of white vinegar with clean cloth or paper towel using small circular motions. 

      > Continue wiping until oily finish has been removed.   

 

Caution! To prevent rust, you MUST rinse with pure hot water from a spray bottle while wiping with 

clean sponge after EACH cleaning.  

 

Dry with clean, soft cloth or paper towel. 


Removing Rust: 

 

If rust has begun to form, there are a variety of products that can treat it. 

 

Among these are CLR® (calcium, lime and rust remover) and Chemetall Oakite 33 (rust, oxides and 

scale remover). 

 

Caution!  To prevent food contamination, personal injury or further corrosion, carefully             

observe and follow the rust-removing product

s precautions and instructions. 
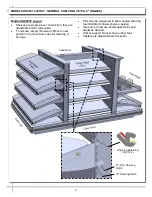
Summary of Contents for Addenda SHS9251

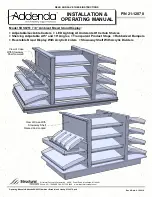
Page 1: ... THESE INSTRUCTIONS P N 21 12070 INSTALLATION OPERATING MANUAL Model SHS9251 7 8 Ambient Bread Island Display Adjustable Lockable Casters LED Lighting At Underside Of Certain Shelves Shelving Adjustable At 5 and 10 Angles Transparent Product Stops Rubberized Bumpers Reversible Bread Display With Acrylic Dividers Stowaway Shelf With Acrylic Dividers View of Case With Stowaway Shelf Lowered View of ...

Page 2: ...S MODEL SHS9251 LAYOUT CONT D STOWAWAY SHELF REVERSIBLE SHELF PRODUCT STOPS MODEL SHS9251 LAYOUT CONT D LED LIGHTS SWITCHES STOWAWAY SHELF SIGNAGE SURFACE MODEL SHS9251 LAYOUT CONT D LED STYLE LIGHT FIXTURES MODEL SHS9251 LAYOUT CONT D WIRE ROUTE MODEL SHS9251 LAYOUT CONT D FIELD ACCESS BOX LED DRIVER GENERAL CLEANING STAINLESS STEEL CLEANING TROUBLESHOOTING SERIAL LABEL INFORMATION LOCATION TECHN...

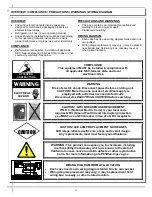
Page 3: ... GUIDELINES LED lamps reflect specific size shape and overall design Any replacements must meet factory specifications CAUTION CAUTION GFCI BREAKER USE REQUIREMENT If N E C National Electric Code or your local code requires GFCI Ground Fault Circuit Interrupter protection you MUST use a GFCI breaker in lieu of a GFCI receptacle ATTENTION CONTRACTORS PRECAUTIONS AND WARNINGS This page contains an i...

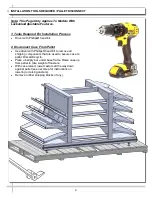
Page 4: ...connect Case From Pallet Use driver with Phillips head bit to remove all shipping components that are used to secure case to pallet Discard recycle Place J bar pry bar under base frame Raise case up from pallet to take weight off casters With case raised lower casters all the way down against pallet see next step for instructions on lowering or raising casters Remove rubber shipping blocks if any ...

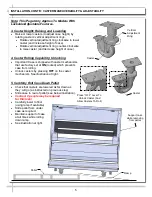
Page 5: ...king Important Case is shipped with caster mechanisms that are factory set at ON locked which prevents case from rolling Unlock casters by pressing OFF on the caster mechanism See illustration at right 5 Carefully Roll Case Down Pallet Check that casters are lowered as far down as they will go as instructed on previous step Slide case to rear of pallet see below illustration Caution 2 people may b...

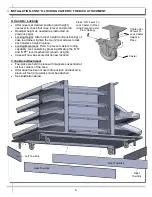
Page 6: ...ews to lock each caster s height in place Locking Movement Then to prevent casters rolling capability lock casters by pressing ON atop the ON and OFF lever mechanism shown at right Case will now be secured at its new location 7 Toe Kick Attachment Toe kicks are held in place with magnets suspended at all four corners of the case After case has been moved into position and locked in place all four ...

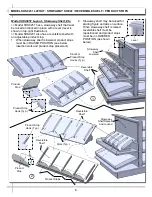
Page 7: ... upward Move to new position or remove from case for cleaning or storage Pins may be staggered to allow angled shelving as illustrated in lower shelves below Use pliers to remove shelf support pins and adjust as desired Wicker support bracket have rubber feet Casters are adjustable and lockable 0º Flat Shelving Notch 15º Shelving Notch Shelving Retaining Clip Typ Case Rear ...

Page 8: ...wered product stops must be in RAISED POSITION see below insertion slots and product stop placement 2 Stowaway shelf may be raised for placing flyers and ads on surface When stowaway shelf is raised reversible shelf must be repositioned and product stops must be in LOWERED POSITION as shown below 1 2 Product Stop Product Stop Product Stop Hook Typ Reversible Shelf Slots For Product Stop Hooks Typ ...

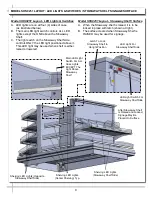
Page 9: ... lowered Model SHS9251 Layout Stowaway Shelf Surface A When the Stowaway shelf is raised it is to be locked in place with latch shown at right B The surface created when Stowaway Shelf is RAISED may be used for signage LED Light Switch For Stowaway Shelf Side LED Light For Stowaway Shelf Side Shelving LED Lights Stowaway Shelf Side Shelving LED Lights Center Shelving Typ Shelving LED Lights Opposi...

Page 10: ...ove LED light from mounting clips by pressing against flange part of clips with thumb Replacement of LED lights Attach magnetic mounting clips onto LED light Adjust magnetic mounting clips so they are equally spaced on LED light Reattach LED light assembly to its shelf header Position properly in shelf header Note If mounting clips are riveted to shelf or header attach by placing LED in base of cl...

Page 11: ...tricians are to access or run wiring via routes Model SHS9251 Layout Wire Route Wire routes are at case underside side near Field Access Boxes and top See illustrations below Wire Route At Underside Wire Route Near LED Driver and Field Access Box Wire Route At Top ...

Page 12: ...tion away from foot traffic Case is field wired Case does not plug into wall outlet 1 Model SHS9251 Layout Field Access Box 4 x 4 field access box is attached to base at right See illustration below right 2 Model SHS9251 Layout LED Driver LED driver is attached to base at left See illustration below left LED Driver Field Access Box Shelf Field Access Wire To LED Driver Field Wire To Field Access B...

Page 13: ...n cause it to cloud over time Daily Wood Rubber Laminate and Painted Surfaces Including Bumpers Clean with mild soap and water solution and a soft cloth Daily Stainless Steel Shelf Cleaning See STAINLESS STEEL CLEANING section in this operating manual Monthly Under Case Cleaning Remove toe kicks via magnets no tools required Use a broom or vacuum to remove dust and dirt that may collect at undersi...

Page 14: ...e after EACH cleaning Dry with clean soft cloth or paper towel Removing Streaks or Stains Method 1 Place two teaspoons of rubbing alcohol on a microfiber cloth or pad Rub the cloth along the grain of the appliance until the entire area has been wiped The rubbing alcohol will air dry itself Method 2 Dip soft cloth or sponge in club soda and rub gently over area of concern Caution To prevent rust yo...

Page 15: ... management to have trained service provider perform troubleshooting Troubleshooting is to be performed by trained service providers only If case light still do not come on it may need to be replaced Contact Structural Concepts Technical Service Department for replacement light see TECHNICAL SERVICE section of this manual for contact information To replace disconnect plug from existing LED light D...

Page 16: ...nt See images below for samples of both refrigerated and non refrigerated serial labels 16 SERIAL LABEL LOCATION INFORMATION LISTED TECH INFO SERVICE Serial Label Location Information Listed Technical Information Service Serial labels are located at rear or side of your case Serial labels contain general model and serial number to the case For additional technical information and service see the T...

Page 17: ...reasonable attorney fees and costs Remedies of SCC SCC s rights and remedies shall be cumulative and may be exercised from time to time In a proceeding or action relating to the breach of this Agreement by Purchaser Purchaser shall reimburse SCC for reasonable costs and attorney s fees incurred by SCC No waiver by SCC of any breach of Purchaser shall be effective unless in writing nor operate as a...

Reviews: