TROUBLESHOOTING
(continued)
POWER CONVERSION PROBLEMS
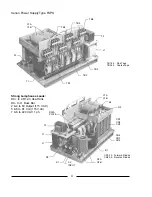
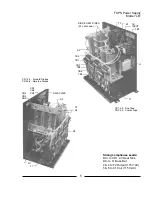
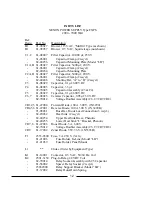
RECTIFICATION (AC to DC) is performed by bridge diodes CR1 - CR6. CR1, CR2, and
CR3 are
forward
diodes, and CR4, CR5, and CR6 are
reverse
diodes. The two types are
not
interchangeable.
AN OPEN DIODE will cause a pronounced flicker in the light output. Two or more open
diodes will disable bulb ignition. A shorted diode will trip the circuit breaker (at the wall or in a
Console Distribution Panel) protecting the AC input line. See the following DIODE TESTING &
REPLACEMENT section.
BANKED CAN CAPACITORS C1 & C2, and Choke L1, filter the rectified DC output. C1
and C2 capacitors also store energy to contribute to the open circuit ignition discharge. A shorted
capacitor can trip the AC circuit breaker. A faulty choke can allow excessive ripple, which can open
the AC circuit breaker.
RELAY K2, in the presence of high DC open circuit voltage, will pull and place Resistor R2
in series with Capacitors C1 and C2. This resistor limits the inrush surge and prolongs the discharge
of C1 & C2 to promote bulb ignition. If K2 relay fails, ignition may become erratic, and R2 may
remain in circuit. With R2 in circuit, ripple will increase to a level noticeable in light output, but not
necessarily enough to trip the AC line circuit breaker.
DIODE TESTING & REPLACEMENT
1. Disconnect the diode from its circuit. Inspect for discoloration, oxidation, or loose crimp at lead
junction.
2. A shorted diode will show low resistance in both directions. An open diode will have infinite
resistance in both directions. An Ohmmeter test is required.
3. a) Analog VOM: Select R x 1 Ohm scale. With meter leads connected in one direction, the
reading should be zero (or nearly so); reversing the meter leads should show very high resis-
tance. If the diode does not exhibit these characteristics, replace it. NOTE DIODE TYPE:
forward or reverse.
b) Digital VOM: Select Diode Test. With meter leads connected in one direction, the reading
should be OL (overload); reversing the meter leads should display approximately .4 volt. If the
diode does not exhibit these characteristics, replace it. NOTE DIODE TYPE: forward or reverse.
4. Carefully clean the area of the heat sink in which the diode mounts. Apply heat sink compound
(Radio Shack #276-1373 or equivalent) using a wood or plastic spatula or stick. A thin layer is
adequate.
WARNING:
HEAT SINK COMPOUND IS HIGHLY CAUSTIC.
Do not apply with fingers; keep
away from eyes. Carefully follow ALL the instructions printed on the package.
5. Install the new diode and tighten securely for maximum mechanical contact and electrical conduc-
tion. Clean and firmly secure the lead terminal to the buss.
8
Summary of Contents for XENON FXPS
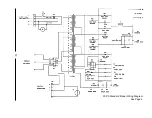
Page 12: ...FXPS Standard Model Wiring Diagram See Page 4 10 ...
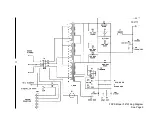
Page 13: ...FXPS Model LB Wiring Diagram See Page 5 11 ...
Page 18: ......


