

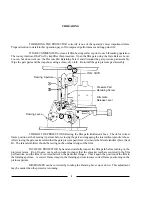
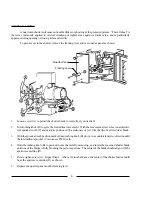


THREADING
THREADING THE PROJECTOR correctly is one of the operators most important duties.
Proper attention to detail in this operation pays off in improved performances and long print life.
IT IS RECOMMENDED to clean all film-bearing surfaces prior to each threading operation.
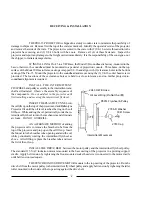
The roomy interior of the Pro-35 simplifies this procedure. Open the film gate using the Gate Release Lever.
Loosen, but do not remove, the Pressure Pad Retaining Screw, and dismount the gate pressure pad assembly.
Wipe the gate pads and the trap shoes using a clean, dry cloth. Re-install the gate pressure pad assembly.
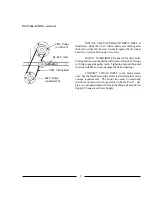
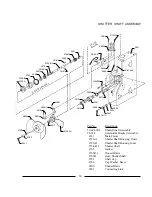
THREAD THE PROJECTOR following the film path illustrated above. Check for correct
frame position at the Framing Aperture before closing the gate and engaging the intermittent sprocket shoes.
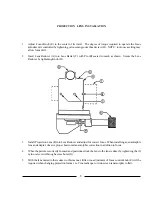
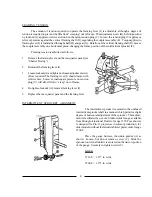
After closing the gate, make certain that the gate pressure pad (Item A) is inside the lateral stabilizer plate (Item
B). The lateral stabilizer should be resting on the outboard edge of the film.
INCH THE PROJECTOR by hand and carefully inspect the film path before turning on the
projector motor. Run fingers over each sprocket to insure that the sprocket teeth are centered in the film
perforations, and the film is centered between the pad roller flanges. Check again the position of the film in
the framing aperture. A correct frame image in the framing aperture insures correct frame positioning on the
picture aperture.
MISFRAMES can be corrected by rotating the Framing Lever up or down. This adjustment
may be made when the projector is running.
Framing Aperture
FILM PATH
Pressure Pad
Retaining Screw
Film Gate
Release Lever
Framing Lever
4
Summary of Contents for Ballantyne PRO-35
Page 15: ......


