background image

4

Assembly/Operating Instructions

Important: When changing between each operating function, ALWAYS ensure that the vacuum unit is 

fully disconnected & unplugged from your mains power socket.

Dry Vacuuming (Assembly)

The following initial assembly steps & operating instructions are for dry vacuuming:
1.  Remove the product along with all of its components and accessories from its 

packaging.

2.  Loosen the buckles and remove the head cover, and carefully place the head 

cover to one side.

3.  Empty out all the contents inside the barrel, and turn the barrel upside down and 

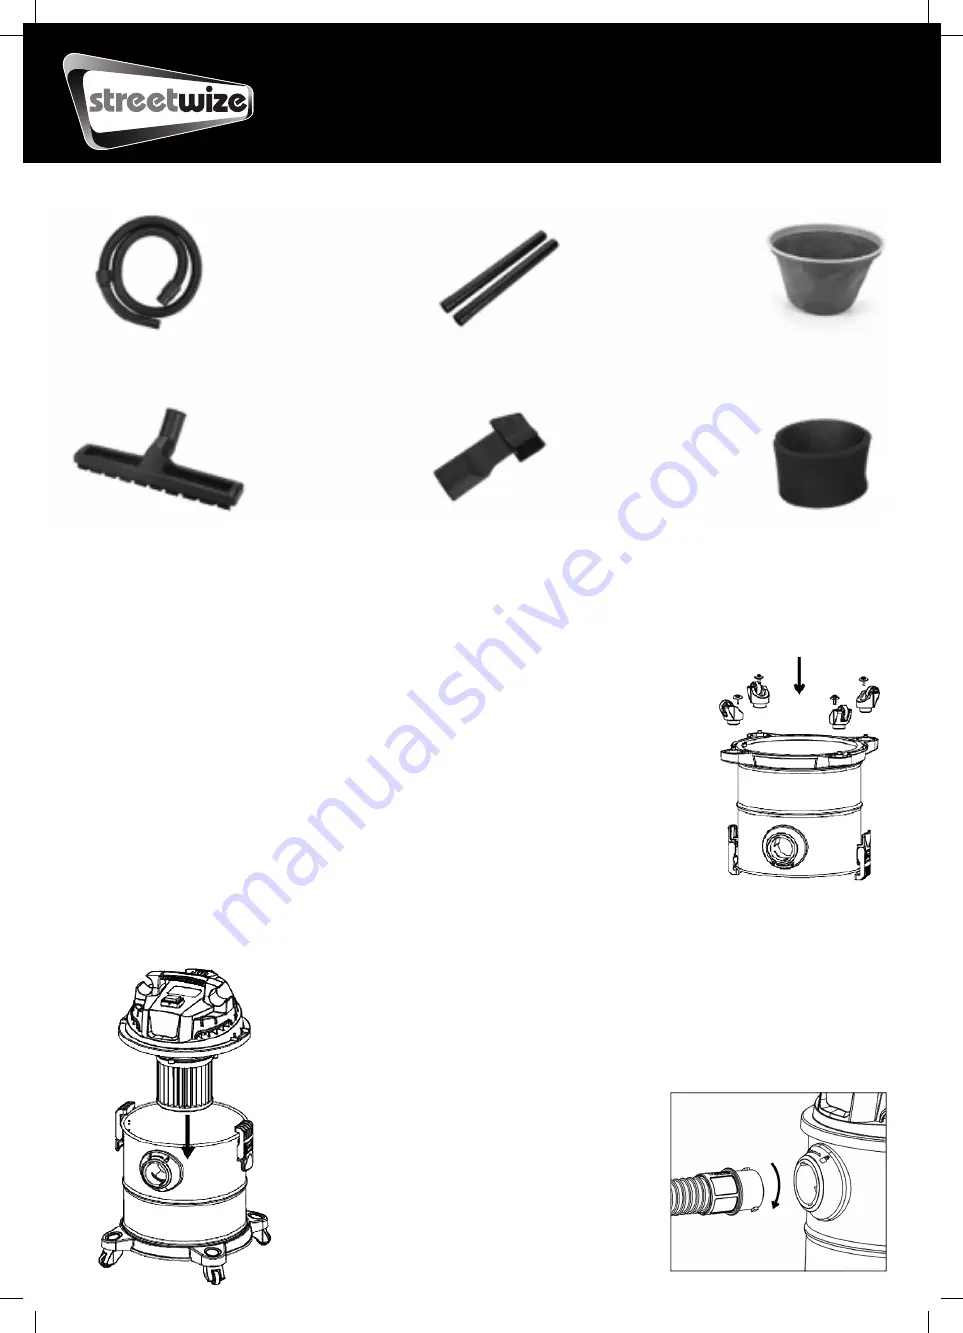
screw on the caster wheels as shown on Figure 1. Once the caster wheels are 

attached, stand the barrel back up to its upright position.

4.  Correctly position the cloth filter inside the barrel. 
5.  Then replace the head cover on the vacuum and secure using the barrel buckles as shown in Figure 2.

6. 

Then assemble the vaccuum’s hose shaft tubes by joining both tubes 

together  and then connect the assembled hose shaft to the vacuum’s 

flexible air hose. Once assembled, connect the flexible air hose end to 

the suction inlet (see Figure 3). 

7. 

Attach one of two the nozzle heads (see Table 1 for attachment uses).

8. 

To use the vacuum, simply the 

connect power cable to your 

230V AC mains power socket 

and then turn the vacuum on 

via the power switch.

Accessories

Flexible Air Hose

Floor Brush

Hose Shaft

2-in-1 Nozzle

Cloth Filter

Sponge

Fig. 1

Fig. 2

Fig. 3

Summary of Contents for SWCV7

Page 1: ...230V 1200W Wet Dry Vacuum Cleaner SWCV7 Information For Use...

Page 2: ...Cleaner With Blower from Streetwize This product is intended for both wet and dry vacuuming It is supplied with two interchangeable filters one specifically designed for dry vacuuming and the other fo...

Page 3: ...3 Product Elements Handle Dust shaking button Hose Slot Head cover Cylinder buckle Cylinder Power switch Cylinder Cover Suction Inlet Base Caster...

Page 4: ...Figure 1 Once the caster wheels are attached stand the barrel back up to its upright position 4 Correctly position the cloth filter inside the barrel 5 Then replace the head cover on the vacuum and se...

Page 5: ...er functionality simply take out the hose from the suction inlet and place it into the blower outlet as shown in figure 5 Once the hose is securely attached to the blower outlet connect the unit to yo...

Page 6: ...ever dry the filter using a hair dryer or any other appliance that generates hot air as this may damage or deform the filter Never use detergent bleaching agent alcohol or any other chemical based cle...

Page 7: ...s written in this document 3 Clean the filter see Cleaning Maintenance Abnormal noise 1 Check whether the filter is blocked 1 Remove waste from the filter and clean the filter see Cleaning Maintenance...

Page 8: ...We have over 1000 car and leisure products in our range Technical Specifications Product Name Streetwize 1200W Wet Dry Vacuum With Blower Supplier Code SWCV7 Power Wattage 1200W Input Voltage 230V AC...

Reviews: