background image

Preparation to use the player

07  

STORMBLUE

A9

+

Preparation to use the player

STORMBLUE

06

A9

Connecting MP3 player to your PC

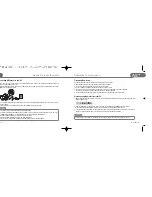
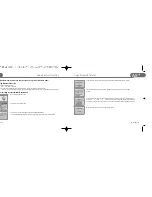
1. You can connect the player to your PC by included USB cable. Pick up the included USB extention cable and

connect it to the USB port of your PC.

2. Plug USB extension cable in the USB port of MP3 player and Plug the other side of the USB Minijack in the Female

USB port of the extension cable. 

3. Turn on the player by push and hold the power button. Then, a removable disk will appear in your PC when you open

windows explorer.

4. Earphone should not be inserted into the Player when the player is connected to PC

File upload/Download

The player should be turned on in advance before you plug it in the USB port
a. Open Windows Explorer and select the removable disk newly created.
b. You can just copy/move files from your PC to the removable disk.
c. You can create many folders in the removable disk to sort out music files. 
d. Just copy or move any files including music files from your PC to a certain folder in your removable disk.

You must not newly make any files to the CONFIG folder of the removable disk. 

e. You can delete/rename any files stored in the removable disk in the same way as you do in the PC. 

Disconnecting the player from your PC

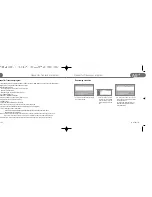
a. Before unplugging the player from the PC, make sure to double click the Green Arrow icon on the task bar on the right

bottom of the PC screen.

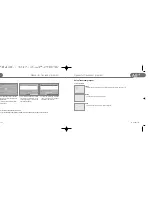
b. When the dialogue box is displayed on the monitor, Click the stop button to stop USB Mass Storage Device.  
c. When a new dialogue box appears, click “OK” to clearly remove the removable disk from your PC.
d. If you use Windows 98 or 98SE, first open windows explorer. Click the removable disk by right button of the mouse

and pop-up menu will appear. Then, you can proceed to disconnect the player accordingly.

Caution

For users whose OS version is Windows 98 or Windows 98SE
The Driver for Window 98 and 98SE must be installed in your PC before you connect this player to your PC if you
use Windows 98 or 98SE OS. Do not install the driver if your OS is Windows ME/2000/XP.
- Insert the provided program CD to the CD Rom drive in your PC.
- Enter Win98 driver folder and Run the Driver for Win98/SE OS.
- You can visit our website www.stormblue.biz to download the driver for Windows 98/SE

Caution

Fatal error may occur in the PC or the player if you remove the player without completing above procedures.

Summary of Contents for A9+

Page 1: ...RMBLUE CO LTD 308 World Meridian Venture Center 60 24 Gasan dong Guemchon Cu Seoul 153 801 Korea 2 2 2113 8745 Fax 82 2 2113 8723 A9 User Manual w stormblue co kr VER 2 0 ...

Page 2: ......

Page 3: ...us but also it is illegal in some jurisdictions Listening to the music by earphones at large volume level for extended periods of time may result in damaging your ears You must not newly make any file to CONFIG folder of the player To maintain good performance Avoid high or low temperature and moisture Do not have other different things in the product Avoid placing the product under high moisture ...

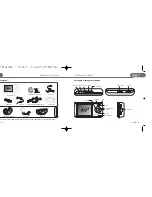
Page 4: ...ard slot Down Microphone Rewind USB Conector Hold key Power Play REC A B Line in Earphones Installation CD User manual Earphones Bluetooth stereo headset USB Adaptor Arm Band Accessories could be changed without notice in advance to increase the performance or quality of the product Neck strap Encoding cable USB extension cable Carrying case USB Gender Optional ...

Page 5: ...of the removable disk e You can delete rename any files stored in the removable disk in the same way as you do in the PC Disconnecting the player from your PC a Before unplugging the player from the PC make sure to double click the Green Arrow icon on the task bar on the right bottom of the PC screen b When the dialogue box is displayed on the monitor Click the stop button to stop USB Mass Storage...

Page 6: ...Open Windows Explorer and click the removable disk by the right button of the mouse Click the format menu by the left button of the mouse harging the player st connect the player to the USB port when your PC is turned on Then the charging lamp will be turned on You don t ed to turn on the player before connecting to the USB port if you only want to charge the player When fully charged the arging L...

Page 7: ...gation mode In this same way you can also run text files and JPG image files If you power off the player during playback of the music file and turn it on again just click the Power Play button Then it resumes the music file from the last point of playback Photo Text file display Image display function only support JPG file Just copy jpg files from your PC to the player Text display function only s...

Page 8: ...ick the same button in a few moment to mark the ending point of the repeat Then the repeat will start o finish A B repeat just click the same button again Hold Push this button in the direction of the arrow It disables all the button to avoid unintentional operation Changing EQ During playback just click MODE EQ button and EQ will be switched sequentially Flat POP ROCK Live Class Vocal DBass USER ...

Page 9: ...he station will appear The address can be changed up and down by click or button After you adjust the address click REC A B button again to save the station Preset mode and save all station automatically You can switch to Preset mode after you save at least one radio station in Scan mode Click Navi Menu button to switch to Preset mode Click REC A B button to automatically search for all available ...

Page 10: ...utton to select the mode lick REC button to start recording To finish recording click the same button again o pause and resume the recording click PLAY button sequentially ecorded file is found in Voice folder in Navigation mode Navigation mode To enter navigation mode just click the menu button File copy between SD card and the player Delete file A9 support external SD card Put SD card into the S...

Page 11: ... stage of Setup menu click button To completely get out of the Setup menu Click and hold the Menu button Information File name display the file name of the song going on ID3 tag display the ID3 tag of the song going on Lyric display the lyric of the song going on manually or automatically Language select Select language at your preference Current Time Adjust the current time Backlight Time Adjust ...

Page 12: ... introductory part of the songs for overview Play Setup The function of Button in this Setup and up and down of the cursor Menu button Enter the submenu Select finish the option in submenu and go back to the previous stage and Increase or decrease the percentage in play speed setup Move to the next column in search speed setup button Go back to the initial stage After getting back to the initial s...

Page 13: ...ference ecording Setup e function of Button in this Setup and up and down of the cursor Menu button Enter the submenu Select finish the option in submenu and go back to the previous stage and Increase or decrease the recording level button Go back to the initial stage After getting back to the initial stage click and hold Menu button to completely get out of the Setup menu Mode button Switch On an...

Page 14: ...menu FM area Select the correct area for FM broadcast for your nation Stereo mode Switch mono and stereo User EQ Make your own EQ setup Control Setup The function of Button in this Setup and Up and down of the cursor Menu button Enter the submenu Select finish the option in submenu and go back to the previous stage button Go back to the initial stage After getting back to the initial stage click a...

Page 15: ...ORMBLUE A9 Setup Menu E 26 Firmware upgrade See the firmware upgrade part Load default This will change all setup to the status of factory setup This function doesn t delete any file ontrol Setup Setup Menu ...

Page 16: ...he CD Rom Drive of your PC 2 Enter the transcoder Folder 3 Install the program by double click on the setup file PC System Requirements PENTIUM 3 WINDOWS 98 ME plus DIRECTX 9 0 WMV 9 0 plus must be installed in your PC Integrated Codec must be installed in your PC Available Format RAW AVI MICROSOFT WMV DAT MPG ASF Some files in above format may not be compressed by Transcoder program Necessary Cod...

Page 17: ...nscoder program Press the Settings button and adjust he setting in connection with Video Audio Caption More details see the instruction beside f setting menu 5 Press the Start button and be started the progress of transcoding To be showed the progress of states for transcoding as blue bar 6 If show the Processing completed 100 were able to play the file be transcoded by A9 normally Be saved the tr...

Page 18: ...this process When connected or failed to connected it display the message Bluetooth is optional function and this section is only for A9 Bluetooth model sing Bluetooth function e function of Button in this Setup and up and down of the cursor Menu button Enter the submenu Select finish the option in submenu and go back to the previous stage button Go back to the initial stage After getting back to ...

Page 19: ...r player Firmware upgrade will be implemented only for higher version of firmware When you make a firmware upgrade make sure the battery has been charged enough The remaining battery must be over one third of battery full There could be radio electric wave interference between bluetooth equipment and other device such as ndustrial equipments medical equipments and microwave ovens which use similar...

Page 20: ...mm 70g Automatic Manual Media Sync pecifications about MP3 part Audio Encoding Recording time Display Sound Battery File System Capacity Extendable slot Playback Time ITEM Audio Format Image Video Format Contents MPEG1 2 2 5 Layer3 8 320Kbps VBR WMA Version 9 32 320Kbps Ogg Vorbis Q1 Q10 ID3 Tag Ver1 0 1 1 2 0 Support WMA 32Kbps 128Kbps Max 35 hours with 512MB Support MPEG4 Simple Profile Support ...

Page 21: ... a Bluetooth stereo headphone Check if the headphone has been set to pairable mode the player registers headphones only in this mode Ensure that PIN code is right PIN code must be the same as the headphone s 4 The player can t connect to a Bluetooth stereo headphone Ensure that the player registered the headphone Before connection the player must register the headphone If the player and the headph...

Page 22: ...e USB Cable is connected properly Check the condition of the battery 6 The player works abnormally or does not play Click the Reset button and initialize the player No sound in a Bluetooth stereo headphone Ensure that the player and the headphone are connected Ensure that the player plays music Check the volume of the headphone Check the battery status If the battery is too low the player can t tr...

Page 23: ... service fee may apply after the warranty period or in case of the following If the problem was caused by the customer s misuse If any internal modification was done by the customer We do not reissue warranty certificate Please store it in a safe space Product Model Name Name Address Tel Name Address Tel Month Day Year Customer Purchaser Date of Purchase Period of Warranty or more information abou...

Page 24: ......

Reviews: