background image

2

2

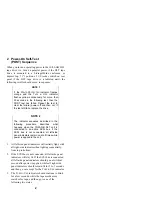
Power-On Self-Test
(POST) Sequence

When you turn on operating power to the 10/20-GB DLT
tape drive (i.e., turn on pedestal power if the DLT tape
drive is mounted in a StorageWorks enclosure, or
depress top (“1”) portion of 1/0 rocker switch on rear
panel if the DLT tape drive is a tabletop unit), the
following results should occur, in sequence:

NOTE 1

If the W

RITE

-P

ROTECTED

 indicator flashes

orange and the T

APE IN 

U

SE

 indicator

flashes yellow continuously for  more than
30 seconds in the following test, then the
POST test has failed. Repeat the test to
clear the failure (power off and then on); if
the test still fails, replace the drive.

NOTE 2

The indicator sequence described in the
following procedure describes what
happens when the 10/20-GB DLT unit is
connected to an active SCSI bus. If the
SCSI bus is not connected, all left-side
panel indicators remain on at all times while
power is applied to the unit.

1.  All left-side panel indicators will initially light, with

all right-side indicators then lighting sequentially,
from top to bottom.

2.  If the SCSI bus is not connected, all left-side panel

indicators will stay lit. If the SCSI bus is connected,
all left-side panel indicators should go out within 1
second after power is applied, while all right-side
panel indicators should remain lit for 3 to 5 seconds
and then go out except for the T

APE IN 

U

SE

 indicator.

3. The 

T

APE IN 

U

SE

 indicator should continue to blink

for a few seconds, while the tape mechanism
searches for tape, and then go to one of the
following two states:

Summary of Contents for 10/20-GB DLT

Page 1: ...Use this card as a quick reference when operating the 10 20 GB DLT tape drive For detailed information see the User Guide EK SM1TB UG A01 1 10 20 GB DLT Front Panel All normal use operating controls...

Page 2: ...described in the following procedure describes what happens when the 10 20 GB DLT unit is connected to an active SCSI bus If the SCSI bus is not connected all left side panel indicators remain on at...

Page 3: ...h time the TAPE IN USE indicator should become steadily lit You can now either record on or read from that tape or else press the Unload push button switch to direct the DLT tape drive to unlatch the...

Page 4: ...y Override indicator is off activates the density selection mode causing that indicator to blink If the Density Override indicator is blinking selects the next higher density format option At rest out...

Page 5: ...release handle is unlocked and can be operated Off Cartridge insert release handle is locked Do not operate handle UNLOAD PUSH BUTTON Recessed pushed in Used to unlock the tape cartridge insert releas...

Page 6: ...e DLT tape drive right side of handle and unloading a cartridge from the drive left side of handle The following is a more detailed version of the procedure for loading a cartridge as illustrated belo...

Page 7: ...cator lights steadily The tape is then ready for use 5 Unloading a Tape Cartridge from DLT Tape Drive CAUTION Remove a cartridge from the DLT tape drive before turning off or powering down the host sy...

Page 8: ...lease handle unless the green OPERATE HANDLE indicator is lit steadily 1 Press the UNLOAD push button on the front panel s right side or issue the appropriate system software command The yellow TAPE I...

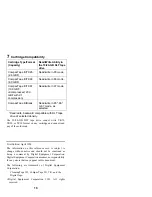
Page 9: ...mounting a tape cartridge insert the tape cartridge into the DLT tape drive with a slow steady motion If the yellow Use Cleaning Tape indicator lights unload the data cartridge from the DLT tape driv...

Page 10: ...tape drive of selected density The 10 20 GB DLT tape drive cannot write TK70 TK50 or TZ30 format on any cartridge and cannot read any of those formats First Edition April 1994 The information on this...

Reviews: