background image


27 


5 START  UP 


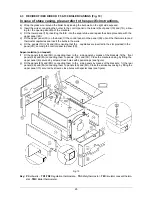
WARNING: Before start up, open the door and insert w holly turbolators into 

the  front  end sections of the smoke tubes, ensuring that they  hav e been 

pushed inside for at least 100 mm.  


5.1 PRELIMINARY  CHECKS 

Before starting the boiler, check that: 

- The 

rating plate

 specifications and power supply  network (electricity, water, 

gas or fuel oil) specifications correspond; 

- The  burner 

power range

 is compatible with the power of the boiler; 

-  The boiler room also contains the instructions for the burner;  

- The 

flue gas exhaust pipe

 is operating correctly;  

- The 

air inlet supply

 is well dimensioned and free from any obstacle; 

- The 

manhole

, the 

smokebox

 and the 

burner plate

 are closed in order to  provide a complete flue gas 

seal;  

-  The system is 

full of water

 and that any 

air pockets

 have therefore been eliminated;  

- The 

anti-freeze

 protections are operative; 

- The  water 

circulation pumps

 are operating correctly.  

-  The expansion vessel and the safety valve(s) hav e been connected correctly (with no interception) and 

are properly operating. 

-  Check the electrical parts and thermostat operation. 


5.2 WATER  TREATMENT 

The most common phenomena that occur in heating systems are: 

-   Scaling 

Scale obstructs heat transfer between the combus tion  gases and the water, causing an abnormal in-

crease in the temperature of the metal and therefore reducing the life of the boiler.  

Scale is found mostly at the point s where the wall temperature  is highest and the best remedy, at con-

struction level, is to eliminate areas that overheat. 

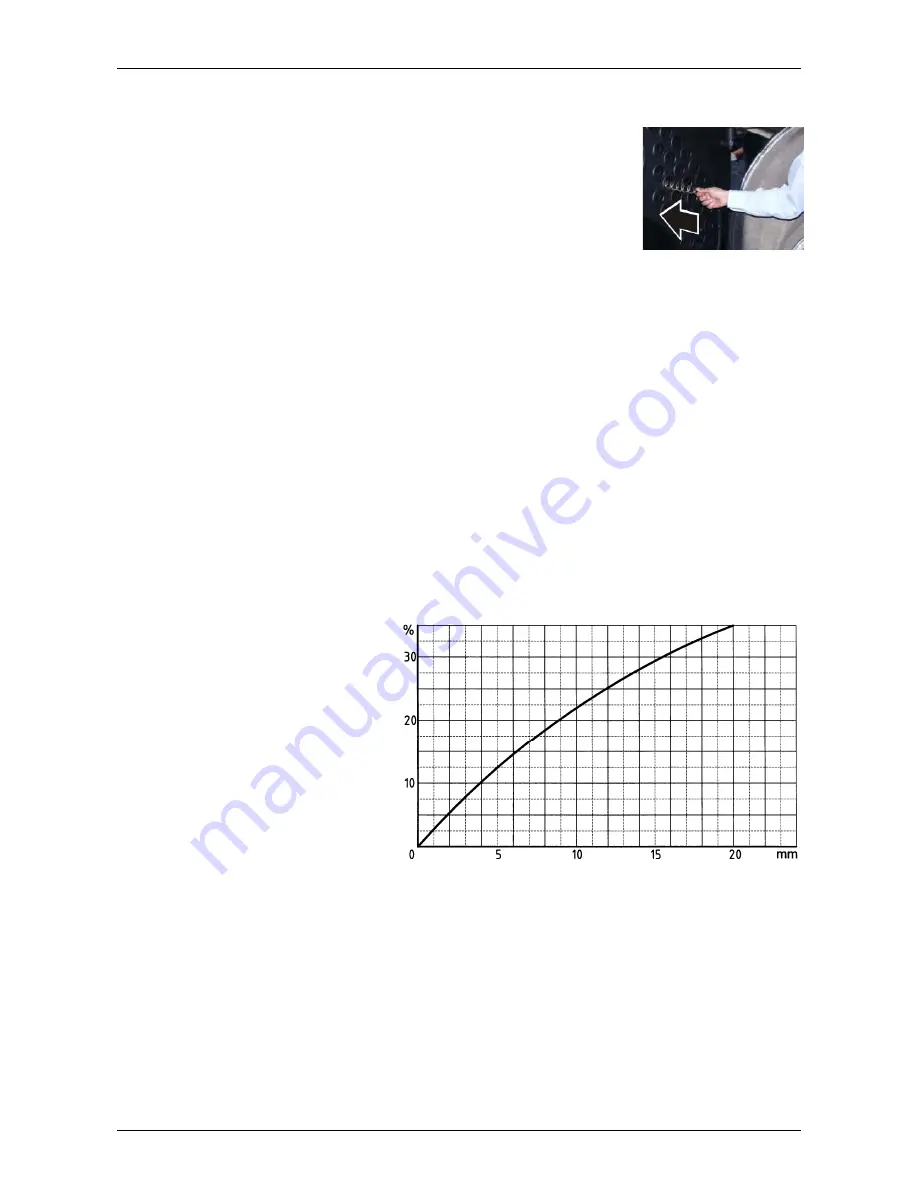
Scale creates an insulating layer which reduces the thermal transfer of the generator, affecting system ef-

ficiency. This means that the heat produced by burning the fuel is not fully exploited and is lost to the flue.  


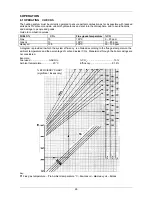
Scale diagram 


Key 

%

    % fuel not used 

mm 

mm scale 


-   Corrosion on the water side 

Corrosion  of  the metal surfaces of the 

boiler  on the water side is due to the 

passage of dissolved iron  through  its 

ions (Fe+). In this process the presence 

of dissolved gases and in particular of oxygen and car bon dioxide is very important. Corrosion often  oc-

curs with softened or demineralised water which has a more aggressive effect on iron (acid water with  Ph 

<7): in these cases, although the sy stem is protected from scaling, it  is not protected against corrosion 

and the water must be treated with corrosion inhibitors.  


5.3  FILLING THE SYSTEM 


The water must enter the system as slowly as possible and in a quantity proportional to the air bleeding 

capacity of the components involved. Filling times vary depending on the capacity and characteristics of 

the system but should never be less than 2 or 3 hours. 

In the case of a system with closed expansion vessel, water must be let in until the pressure gauge indicator 

reaches the static pressure value pre-set by the vessel. 

Heat the water to maximum temperature. During this operation the air contained in the water is released 

through the automatic air separators or through manual bleed valves. The water discharged from the system 

with elimination of the air is made up by the automatic or manual filling valve. 

Summary of Contents for REX F

Page 1: ...TECHNICAL MANUAL REX REX F REX K REX K F REX DUAL REX DUAL F PRESSURISED STEEL BOILERS...

Page 2: ......

Page 3: ...side by side 80 260 POSITIONING INSTRUMENTS 15 3 3 ELECTRICAL CONNECTION 16 3 4 REX REX F REX K REX K F OPTIONAL CONTROL PANEL FIG 3 16 3 5 INSTALLATION OF REX 140 350 BOILER CONTROL PANEL FIG 4 AND P...

Page 4: ...cturer cannot be held responsible At the first start up all regulation and control devices positioned on the control panel should be checked for efficiency The guarantee shall be valid only upon compl...

Page 5: ...X REX 25 REX K 25 2 0 6 95 0 80 0 10 185 188 187 10 5 13 5 14 0 98 5 220 431 230 50 IP40 20 X X X X REX 30 REX K 30 2 0 6 89 0 80 0 10 184 186 186 10 5 13 5 14 0 50 5 300 475 230 50 IP40 20 X X X X RE...

Page 6: ...0 50 50 6 1 1 1 2 1 2 1 2 REX 9 REX K 9 REX 9 F REX K 9 F 1030 855 415 912 415 54 5 756 700 1119 755 513 265 341 200 250 130 200 50 50 6 1 1 1 2 1 2 1 2 REX 10 REX K 10 REX 10 F REX K 10 F 1030 855 41...

Page 7: ...F REX K 200 F 2000 1 720 000 2094 1 800 840 95 51 221 59 164 46 162 68 3301 69 95 80 REX 240 F REX K 240 F 2400 2 064 000 2518 2 165 480 95 31 266 46 197 76 195 62 3970 25 95 40 REX 300 F REX K 300 F...

Page 8: ...5 443 92 329 47 325 90 6614 41 95 45 REX 450 F 4500 3 870 000 4720 4 059 200 95 34 499 47 370 70 366 68 7442 10 95 50 REX 500 F 5000 4 300 000 5245 4 510 700 95 33 555 03 411 94 407 47 8269 95 95 46 R...

Page 9: ...230 50 IP40 20 X X X X REX DUAL 150 5 2 6 95 0 80 0 10 185 188 187 10 5 13 5 14 0 44 5 1710 2621 230 50 IP40 20 X X X X REX DUAL 170 7 2 6 91 0 80 0 10 184 187 187 10 5 13 5 14 0 56 5 1710 2621 230 5...

Page 10: ...10 440 1320 830 54 5 1034 5 989 806 750 590 2048 1250 1650 398 200 250 160 250 6 80 80 1 1 1 1 2 1 2 1 2 REX DUAL 60 REX DUAL 60 F 1993 490 1470 1910 490 1470 930 54 5 1034 5 1089 906 850 690 2049 125...

Page 11: ...0 0 10 185 188 188 10 5 13 5 14 0 35 5 2400 3686 230 50 IP40 20 X X X X REX DUAL 260 6 5 6 94 0 80 0 10 185 188 187 10 5 13 5 14 0 42 5 2400 3686 230 50 IP40 20 X X X X Flue gas temp at boiler output...

Page 12: ...1 4 1 1 2 1 2 1 2 1 2 REX DUAL 170 REX DUAL 170 F 1990 1335 675 1417 675 60 2600 1240 1305 2247 1753 704 1100 443 270 320 280 350 150 150 6 1 1 1 4 1 1 2 1 2 1 2 1 2 REX DUAL 190 REX DUAL 190 F 1990 1...

Page 13: ...led because it uses a burner provided with fan which introduces into the combustion chamber the exact amount of air necessary in relation to the fuel and maintains an overpressure in the furnace equiv...

Page 14: ...u are advised to close t he supply cock and keep it closed so that any leaks from the system will be identified by a drop in hydraulic pressure indicated on the system pressure gauge The generator mus...

Page 15: ...ith control manometer flange 5 2 nd safety valve fitting or thermal drainage 1st safety 6 2 nd boiler circulator consent thermostat and safety thermostat bulb wells 7 Flanges to weld after the definit...

Page 16: ...l can be rotated to gain access to the terminal board and uncoil the ther mostat and thermometer capillaries A copy of the wiring diagram is contained inside the control panel cover The regulation the...

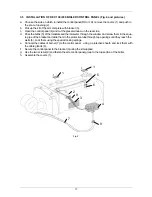
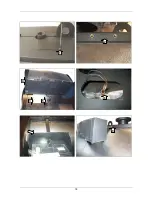
Page 17: ...s and thermometer through the window and screw them in the squa re pipe of the bracket and slide them in the protective tube through top openings until they reach the wells 6 Lock them using the speci...

Page 18: ...18 1 2 6 3 4 5 9...

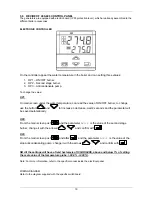
Page 19: ...on and for increase o decrease wait 2 seconds and the parameter will be saved automatically OP2 From the main screen push and the parameter A2S P is the value of the second stage burner change it with...

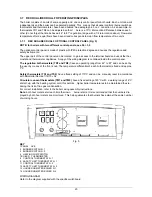
Page 20: ...is contained inside the control panel The regulation bi thermostats TR1 and TR2 have an operating range from 42 to 87 and can be set by the user by means of the front k nob The temperature differenti...

Page 21: ...ssary for the boiler and that it is provided with all control and safety devices provided for by the regulations referred to above f Check that the boiler room vents are sized in or der to guarantee t...

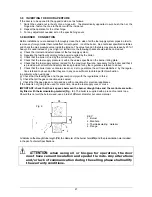
Page 22: ...be inserted and welded on the rear plate tube 6 keeping the boiler in upright position or but welding will be more difficult horiz ontally the choice will depend on the size of premises and the equipm...

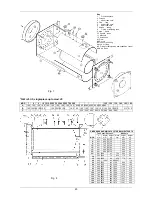
Page 23: ...alve and expansion vessel N6 Bulb wells Fig 7 Fig 8 DIMENSIONS AND WEIGHTS OF THE BULKIEST PARTS Tube nest Furnace Manhole MOD mm length mm weight kg width mm height mm weight kg 7 631 620 30 700 630...

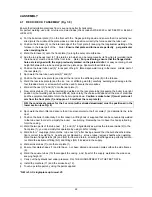
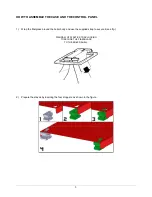
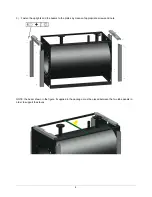
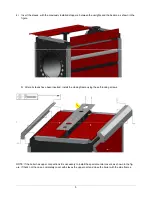
Page 24: ...e boiler side frame d Fit the upper panel 2S on the boiler and fit on th is panel the control panel uncoil the thermometer and thermostat capillaries and insert the bulbs in the wells e Fit panel 1D a...

Page 25: ...ls e Fit the panels 1D 2D and 3D ensuring that the capillaries are inserted in the slot provided in the panel 3D securing the control panel to panel 3D Super isolation on request f Fit the panels 5S a...

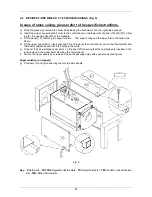
Page 26: ...sing holes P1 or P2 insert bulbs in their wells see figure Fit the control panel c Fit panels P1 and P4 inserting the upper fold into the square tube and the lower fold to the boiler side frame d Fit...

Page 27: ...the best remedy at con struction level is to eliminate areas that overheat Scale creates an insulating layer which reduces the thermal transfer of the generator affecting system ef ficiency This means...

Page 28: ...ature CO Gas 10 190 C 0 20 ppm Gas oil 13 195 C 10 80 ppm Heavy oil 13 5 200 C 50 150 ppm A diagram is provided in which the system efficiency is obtained according to the flue gas temperature the amb...

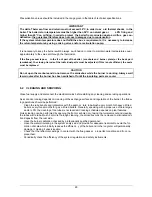
Page 29: ...n switched off until the insulating parts are cooler 6 2 CLEANING AND SERVICING Close fuel supply and disconnect the electrical mains before starting any cleaning and servicing operations As economic...

Page 30: ......

Page 31: ...087833051 info stokvisboilers com www stokvisboilers com The illustration and details reported are indicative only and are not binding STOKVIS reserves the right to introduce alterations and or amendm...

Page 32: ...ASSEMBLY INSTRUCTIONS STAVES LINING...

Page 33: ......

Page 34: ...L 1 Wrap the fiberglass around the boiler body and use the supplied strap to secure it see fig DIAGRAM OF PLASTIC STRAP LOCKING TO SECURE THE FIBERGLASS TO THE BOILER SHELL 2 Prepare the staves by ins...

Page 35: ...e uprights and the beams to the plates by means of appropriate screws and nuts NOTE the beam shown in the figure if supplied in the package must be placed between the two tube panels in order to suppo...

Page 36: ...After all staves have been inserted install the closing frame using the self locking screws NOTE If the boiler has upper connections it is necessary to install the special central covers as shown in...

Page 37: ...e boiler front beam Pass the cables through the loopholes within the structure see the figure NOTE if the panel supporting stave is included in the kit containing the screw holes and the capillar eyel...

Page 38: ...087833051 info stokvisboilers com www stokvisboilers com The illustration and details reported are indicative only and are not binding STOKVIS reserves the right to introduce alterations and or amendm...

Reviews: