12
AFTER SALES SUPPORT
1300 886 649
AUS
MODEL: GYJ45-68 PRODUCT CODE: 52533 05/2016
Wall-mounted installation
•
If wall-mounting the dryer above a washer, allow sufficient room to open the lid of
a top load washer.
•
You will need at least 5cm space between the top of the dryer and the ceiling for
ease of installation.
•
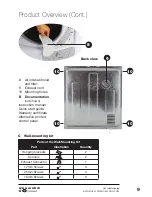
If you want to mount this dryer directly to your laundry wall, use the supplied
wall-mounting kit which contains the following parts:
Parts of the Wall-Mounting Kit
Part
Illustration
Quantity
Hanging brackets
2
Spacers
2
Exhaust Connector
1
12mm Screws
4
25mm Screws
4
16mm Screws
3
Getting Started: Installation (Cont.)
•
Additional tools required (for mounting onto a plasterboard/wood stud wall):
* Drill (with a 3mm drill bit)
* Phillips head screwdriver
* 4 Timber screws (ø12x50mm)
* Helper to help lift the dryer onto the wall.
•
Wall-mounting instructions follow on the next pages.
Rack-mounted installation
•
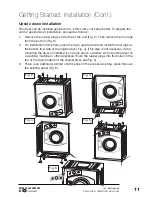
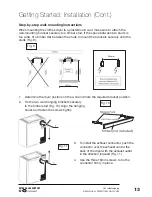
If the clothes dryer is to be
rack-mounted, you will need a secure stand (Fig. 7)
to ensure stability and prevent vibration. (The stand is not included.)
•
Make sure to leave at least 10cm space between the dryer and the wall (Fig. 8).
Stand
Fig. 7
Fig. 8
Clearance


