37
ENGLISH
GB
6 STORAGE
Store the rotary cultivator in a dry place. Also see
section “Safety instructions”.
After draining the petrol, start the engine and allow
it to run until it runs out of petrol.
7 MAINTENANCE
WARNING!Repairs must be carried out
by the dealer. Otherwise the guarantee
becomes invalid.
WARNING!Before carrying out repairs
and maintenance, the spark plug con-
nection must be disconnected.
7.1 Periodic maintenance
Before each operation
• Check for fuel leaks.
• Check that all screws are tightened.
After each operation
• Clean the rotary cultivator.
• Check for fuel leaks.
Every 25 operating hours and every 3 months
• Check, clean or replace the air filter.
• Check that all screws and nuts are tightened.
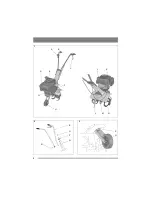
7.2 Air filter (1:D)
Do not use flammable liquids when
cleaning.
Serious engine damage can be caused if
the machine is operated with a defective
or blocked filter.
The paper filter must never be cleaning
with liquid.
The machine is equipped with a pre-filter (foam
rubber) and a main filter (paper).
Clean/replace the air filter every 3 months or every
25 operating hours. During operation in dry and
dusty conditions, the air filter must be cleaned/re-
placed every day.
Clean/replace the air filter as follows:
1. Undo the screws or locking tabs and the filter
housing.
2. Grasp the main filter (paper) and shake it a few
times against a hard surface or blow clean with
compressed air from the inside out.
3. Wash the pre-filter (foam rubber) in liquid de-
tergent and water. Then carefully twist the filter
out and allow to dry.
4. When the pre-filter is dry, reinstall the filter in
reverse order.
The filters must be replaced if very dirty or defec-
tive.
7.3 Spark plug (1:G)
The sparkplug must be replaced in the following
cases.
• When the electrodes are burnt.
• If the porcelain insulator indicates damage.
• If the rotary cultivator is difficult to start.
The electrode gap should be 0.7-0.8 mm.
Use sparkplug Champion QC12YC or similar.
7.4 Changing the oil
Change the oil the first time after 2 hours of oper-
ation, and subsequently every 25 hours of opera-
tion or at least once a season. Change oil when the
engine is warm.
The engine oil may be very hot if it is
drained off directly after the engine is
shut off. So allow the engine to cool a few
minutes before draining the oil.
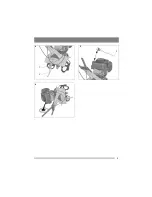
1. Unscrew the cap for oil filling/oil draining. See
“4.6”.
2. Place a container on the floor.
3. Tilt the machine so that the hole is above the
container. See fig. 6.
3. Let the oil run out into the container.
5. Fill with new oil: See “5.2”.
7.5 Cleaning
Never use high-pressure washing equip-
ment when cleaning. This can cause wa-
ter to penetrate between the seals and
cause machine damage.
First brush off all dirt. Then wipe down the rotary
cultivator using a damp cloth. The underside can
be washed with water.
7.6 Fault-tracing
Fault: Difficult to start


