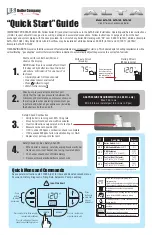
18
|KA
WWW.STIEBEL-ELTRON.COM
INSTALLATION
INSTALLATION
2
6
_0
2_0
4
_0
1
9
1
»
Suspend unit on the wall fastening and align vertically with
the wall spacers.
2
6
_0
2_0
4
_0
1
9
3
2
1
1 Service clip
2 Wall spacer
»
Fasten the service clip with a screw.
9.3 Tap
installation
»
Remove the front tap panel (see chapter "Installation / Instal-
lation location" for optional tap positions).
»
Unscrew the locking nut from the tap extension.
»
Slide the tap panel on to the tap extension and tighten the
locking nut up to the end of the thread.
»
Screw the tap in place up to the stop, align vertically and fas-
ten with the locking nut (SW 26).
»
Fasten the tap panel with the screw; pressing the tap lever
forwards.
9.4 Water
connection
The fast connectors enclosed may be connected only to
the bare copper pipe (External Ø 15 mm).
7
6
5
1
2
3
4
2
6
_0
2_0
4
_0
1
9
4
1 Fast connector (90°)
2 Fast connector (straight)
3 Magnetic valve
4 Temperature limiter (STB-Water)
5 Drain valve
6 Steam pipe connection
7 Cold water connection
»
For surface mounting, slide the fast connector (90°) along the
cold water connection to the stop (approx. 28 mm). (option-
ally the fast connector (straight) for concealed connection).
»
Assemble cold water input pipe and slide into the fast con-
nector up to the stop.
Fitting a stopcock is recommended for servicing work.