page 22
Up to this point, with two strings on, but not tuned to pitch,
our own guitar had a string clearance between the bottom
of the strings and the top of the 12th fret of 19/32" — that’s
3/32" higher than 9/16". This is quite tall. In fact, if the cover
plate were installed, the strings might even touch the under-
side of the cover plate’s hand rest.
The preferred final string height at the 12th fret is approxi-
mately 7/16". So, we had to lower our strings a full 3/32" at
the 12th fret.
TIP: String action formula
The formula for lowering action is to determine the
amount you wish to lower the strings at the 12th
fret, and remove twice that amount from the sad-
dle. We needed to drop the strings at the saddle
approximately 3/16".
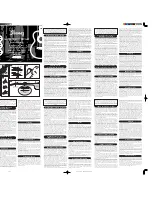
The photo
(48)
shows three lines marked on a piece of tape
placed on the saddle. From the bottom up, they are: 1) the
theoretical final height of the string notches determined by
the formula, which in our case measured approximately 3/8"
above the casting; 2) a “temp” mark above the “final” mark
indicating the wood needed for a notch deep enough to
hold the strings); 3) a third mark (the dotted line) that is a
rough height to start working from.
The distance from the bottom “final” line to the top of the
saddle was approximately 3/16", or the theoretical amount to
be removed. Of course your measurements may or may not
be exactly the same as ours. It wouldn’t have made sense to
cut notches that deep in order to reach the bottom; there-
fore, we removed all the wood above the dotted line and
started lowering the outside strings, a bit at a time, until the
string clearance at the 12th fret was close to 7/16", but taller
by about 1/32".
At this point it’s important to note two things: 1) You are not
tuned to pitch with all the strings on. Full string tension
compresses the cone and lowers the action. This is why you
need to be cautious and remain on the high side of the final
depth at this point. 2) The final (approximate) measurement
of 7/16" taken at the 12th fret will be the distance from the
fingerboard to the top of the strings, so they are all in the
same plane for the steel bar to slide over.
Install the remaining strings and tighten them only enough
to stay in place when you space them across the saddle.
You’ll have to hold the strings in place at the nut while you
mark on each side of them in pencil for a preliminary nut
spacing.
A good starting point for string spacing at the nut (and the
saddle) is to divide the space between the centers of the two
outside strings by 5, and then mark that measurement in
pencil five times across the top of the nut. This is “equal string
spacing on centers.”This is just a starting point, so make slight
starter cuts; just enough to hold the strings in place tem-
porarily on these five marks.
From this point, you can move the strings side-to-side (as
you move them downward as well) by using razor saws and
nut slotting files held on their sides. Make small cuts to move
the strings sideways in the direction needed to get a spacing
that looks right to you. We prefer to spread the wound strings
a little further from each other to make up for their thicker
diameters, and to squeeze the unwound strings a little clos-
er together. The end product is a
proportional
string spacing
that takes into account the diameters of the strings, and has
a uniform look. As you work, create just enough notch
depths to hold the strings securely, but don’t lower them to
their final depths yet. Just cut good starter slots.
Setting the string height
Install the remaining strings
48.
Approach the final action height slowly. Otherwise, you may
waste a saddle blank.