7
2. Mount the Faucet:
a) Familiarize yourself with all components
shown in faucet diagram.
b) Disassemble hardware from the threaded
nipple, except for chrome base plate and
rubber washer.
NOTE: Rubber washer may be replaced with bead
of plumber’s putty for neater appearance.
c) Connect length of standard 1/4" tubing to
faucet. Ensure plastic insert is in tubing.
Push on firmly until it seats.
d) Feed the threaded nipple through
sink/counter mounting hole and orient the
faucet as discussed with the customer.
e) From below sink/counter assemble the
black plastic washer, star washer and hex
nut on threaded nipple and tighten by hand.
f) After rechecking faucet orientation, tighten
hex nut (9/16" wrench or deep socket) until
faucet feels secure.
g) From above the sink make any minor
orientation corrections by turning the faucet
with a padded adjustable wrench.
h) Install plastic ferrule and compression nut
on tubing.
Note: Flats on chrome faucet may be used for
tightening with an adjustable wrench. Use care not
to mar chrome finish
.
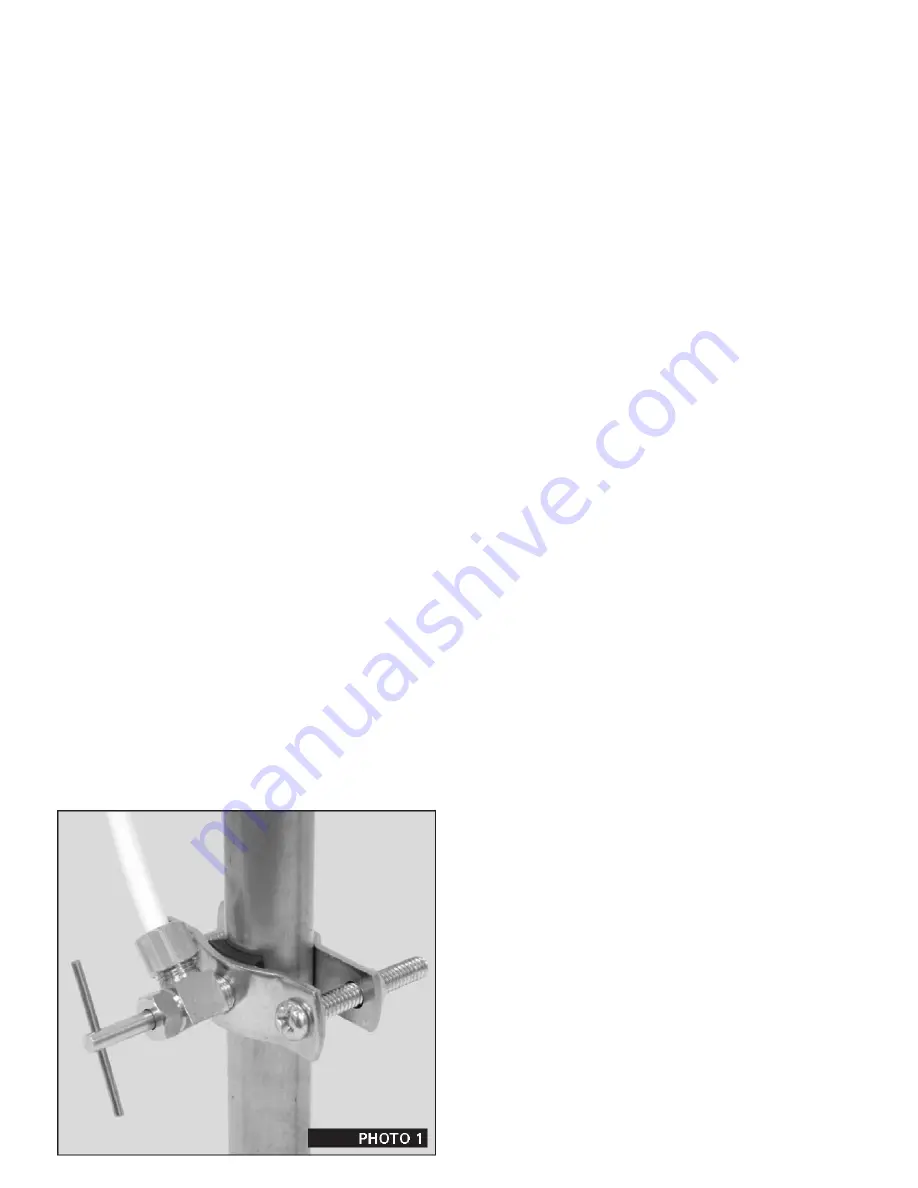
B. Install the Feed Water Valve and Tubing
The saddle tapping valve supplied is designed for
use with 3/8" to 1/2" OD soft copper supply tubing
(plain or chromed), rigid metal pipe, or CPVC
plastic pipe. Do not use with flexible ribbed supply
tubing which has too thin a wall thickness and
requires special hard ware.
Saddle Valve Installation
SOFT COPPER TUBING INSTALLATION:
1) Turn off cold water valve under the sink, or
main valve for the house.
2) Before installing saddle tapping valve, make
sure piercing lance does not protrude
beyond rubber gasket.
3) Assemble saddle tapping valve on copper
tubing. Tighten clamp.
4) To pierce soft copper tube, turn handle
clockwise until it is firmly seated. The valve
is closed in this position.
5) Turn on main supply valve to pressurize
coldwater line. Check for leaks. With a
wrench snug nut/seal around valve stem.
6)
Connect one end of the tubing to the feed
water valve using brass compression nut
and plastic sleeve.
NOTE: For basement installations the existing feed
water tubing may have to be longer to reach feed
valve.
RIGID METAL PIPE AND CPVC PLASTIC PIPE
INSTALLATION:
1) Turn off cold water supply valve and drain the
line to prevent spillage.
2) Drill 3/16" hole at the desired location. To pre-
vent shock hazard, use a battery operated drill.
3) Before installing saddle tapping valve, make
sure piercing lance does not protrude beyond
rubber gasket.
4) Assemble saddle tapping valve on copper
tubing.
5) Turn saddle valve handle clockwise to close
valve. With a wrench tighten nut/seal around
valve stem.
6) When you wish to open valve and supply cold
water to the unit, turn valve handle counter
clock wise.
7) Connect one end of the tubing to the feed
water valve using brass compression nut and
plastic sleeve.
NOTE: For basement installations the existing feed
water tubing may have to be longer to reach feed
valve.
C. Pre-fill and Sanitize the Storage Tank
Pre-filling the tank is always recommended so there
is pressure to check for leaks and several gallons
of water to flush carbon post filter. Tanks are
furnished with a special disinfectant and only


