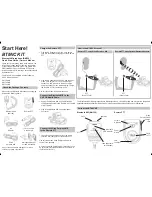
background image

6

ON

MI

C

OF

F

MIC-310

3.- OPERATION

Wired

1. Use the cannon-6.3mm cable and connect the 6.3mm plug to an amplifier, the 

opposite extreme connect to the microphone.
2. Turn on the microphone.
3. Start using the microphone.
4. Place the switch to ON in order to mute the sound without turn the microphone 

off.
5. Turn off the microphone.
6. Remove the battery.

Wireless

1. Connect the wireless antenna in the input from microphone.  

2. Connect the receiver to an amplifier an turn on.

3. Turn on the microphone.

Summary of Contents for MIC-310

Page 1: ......

Page 2: ...de c mo utilizar apropiadamente el producto Para apoyo compras y todo lo nuevo que tiene Steren visite nuestro sitio web www steren com MICR FONO INAL MBRICO Y AL MBRICO DE LARGO ALCANCE La informaci...

Page 3: ...de graves de 6 a 10dB a 100Hz creando un sonido m s c lido que si estuviera colocado m s lejos Retroalimentaci n La retroalimentaci n ocurre cuando el sonido amplificado de cualquier bocina entra de...

Page 4: ...cendido apagado 9 Jack de 3 5mm Se conecta a un amplificador 10 Conector tipo cannon Se conecta a la entrada cannon del micr fono 11 Plug 6 3mm Se conecta a un amplificador 1 Compartimiento de la bate...

Page 5: ...r a AA poniendo atenci n a la polaridad Posteriormente vuelva a colocar la tapa del micr fono Receptor 1 Abra el compartimiento de bater a en el receptor 2 Coloque dos bater as AAA teniendo cuidado de...

Page 6: ...encenderlo 3 Comience a emitir sonido 4 Coloque el switch en posici n ON para silenciar el sonido sin necesidad de apagar el micr fono 5 Para apagar el micr fono mueva el interruptor en posici n Off 6...

Page 7: ...a 1000Hz Distancia efectiva 10 a 20 m Dimensiones 182 x 50 x 25mm Acabado Color negro Peso Transmisor 300g Receptor 70g Alimentaci n Transmisor 1 5V 1xAA Receptor 3V 2xAAA 4 Comience a usar el micr f...

Page 8: ...pia casa comercial donde adquiri el producto Si la presente garant a se extraviara el consumidor puede recurrir a su proveedor para que le expida otra p liza previa presentaci n de la nota de compra o...

Page 9: ......

Page 10: ...ew this manual thoroughly to ensure proper installation and operation of this product For support shopping and everything new at Steren visit our website www steren com MIC 310 LONG RANGE WIRE AND WIR...

Page 11: ...sound than when farther away Feedback Feedback occurs when the amplified sound from any loudspeaker reenters the sound system through any open microphone and is repeatedly amplified Most commonly fee...

Page 12: ...jack This plug is connected to an amplifier 10 Cannon plug This plug is connected to the input from microphone 11 6 3mm Plug This plug is connected to an amplifier 1 Battery compartment 2 Switch Wirel...

Page 13: ...crophone 1 Open the compartment lid 2 Place a battery AA pay attention to the polarity Receiver 1 Open the battery compartment on the receiver 2 Insert two AAA batteries in the receiver taking care of...

Page 14: ...the microphone 2 Turn on the microphone 3 Start using the microphone 4 Place the switch to ON in order to mute the sound without turn the microphone off 5 Turn off the microphone 6 Remove the battery...

Page 15: ...82 x 50 x 25 mm Finish Black metal Weight Transmitter 300 g approximately Receiver 70 g approximately Power input Transmitter 1 5V 1 x AA Receiver 3V 2 x AAA 4 Start to use the microphone 5 Place the...

Page 16: ...rvice at any of the addresses mentioned later THIS WARRANTY IS VOID IN THE NEXT CASES If the product has been damaged by an accident acts of God mishandling leaky batteries failure to follow enclosed...

Page 17: ......

Reviews: