Getting Started
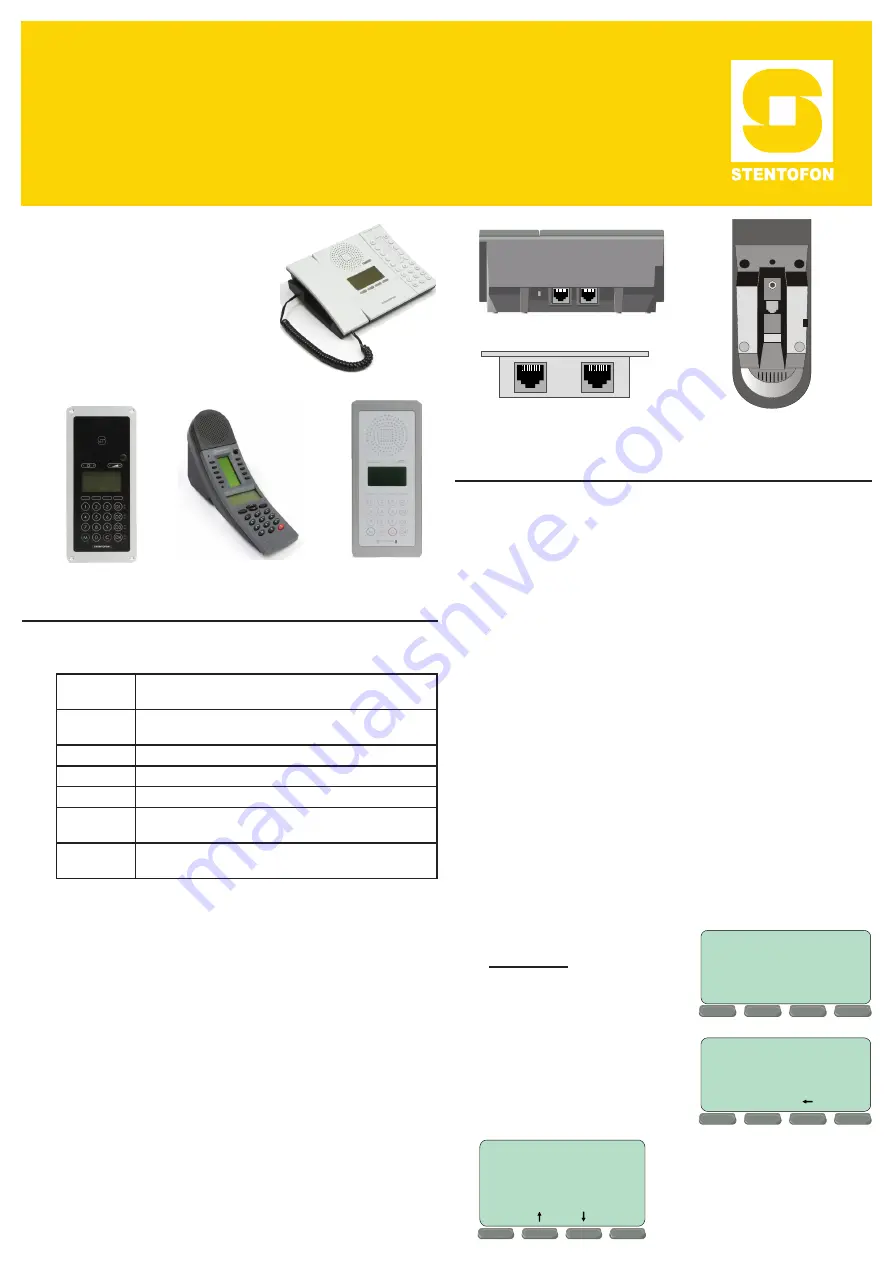
IP Master Stations
The information in this document
pertains to the following
STENTOFON IP Master
Stations:
- IP Desktop Master Station
- IP Flush Master Station
- IP OR Master Station
- IP Dual Display Station
1
Installation
The table below is an overview of the main connectors
involved when installing the IP Master Stations.
LAN
10/100 Mbps RJ45 port for LAN (uplink) connection. Supports
PoE (802.3af). Draws power from either spare line or signal line.
AUX
10/100 Mbps RJ45 ports for auxiliary equipment such as PC and
IP camera.
Handset Port
RJ11 (only for IP Flush Master Station and IP Master Kit)
Headset Port
RJ11 (only for IP Flush Master Station and IP Master Kit)
Input/Output
Pluggable screw terminal (all stations except IP Desktop Station)
Extension Unit
(IP DAK-48)
RJ45 (only for IP Flush Master Station and IP Master Kit)
Local Power
Pluggable screw terminal, 17-27 VDC Idle 4W, max. 8W (all
stations except IP Desktop Station)
1.1 Power Supply
The IP Master Station supports Power over Ethernet
(PoE, IEEE 802.3 a-f) where power can be drawn from
either the spare line or signal line. If PoE is not available,
the IP Master Station (except for IP Desktop) can be
connected to a local power. A 24 VDC power supply
should be used.
1.2 Network Connection
There are two RJ45 ports on the IP Master stations:
●
LAN port is for connecting to the network and the
AlphaCom server/exchange.
●
AUX port is for connecting to auxiliary equipment
such as a PC.
There is one RJ45 port located at the bottom of the IP
Dual Display station that is used as the LAN port.
RJ45 Ports on Desktop Master
RJ45 Ports on Flush/OR Master
RJ45 Port on Dual Display
2
Configuration
There are two ways of configuring the IP Master Station:
●
Using the station keypad
●
Using a web browser
For station configuration, there are essentially three
parameters to set:
●
AlphaCom IP address
●
Station directory number
●
Station IP address
2.1
Configuration Via Station Keypad
When the IP Master Station is not connected to the
AlphaCom server/exchange, an offline menu is displayed.
The offline menu can be used to configure the station
and is navigated with the 4 buttons below the display.
The button on the left is used as a
Select
or
Ok
button
as shown in the display, while the button on the right is
used as a
Back
button. The two buttons in the middle
are used to navigate up or down according to the arrows.
When configuring IP settings, the
M-key
is used to insert
a “
.
” (dot) and the
right-middle button
is used to delete
a character.
Main menu
To enter the setup menu:
1. Press the
Setup
button
on the left
2. Enter the password
1851
3. Press the
Ok
button
A menu with five options will
be displayed. Use the two
arrow buttons in the middle
to navigate through the menu
options. Press the
Sel
button
RJ45
LAN
AUX
LAN
AUX
No AlphaCom conn.
Setup
State:
- Enter password
1851
Ok
Esc
- Main menu -
Station info -->
IP settings -->
AlphaCom Settings -->
Load defaults -->
Restart -->
Sel
Back


