background image

042D07_INS0616

11

Disassociation:
To remove the thermostat from the ZigBee network, enter Menu 1 (ZigBee menu) and select (Off). 

Then press the UP and DOWN buttons to start the disassociation process. During disassociation, 

(Off) will be blinking and the connectivity icon   will be animated in a decreasing pattern. When the 

disassociation process has been completed, (Off) will be displayed solid. If an error occurs, (Err) will 

be displayed for 3 seconds then the screen will revert to the associated ZigBee channel.
To achieve better network performance, it is recommended to always associate your ZigBee devices 

starting from the closest one to the farthest one.

Factory Reset

The thermostat may be manually reset to its original factory settings.
When this is performed, all parameters are reset to their default values and the thermostat is 

removed from the ZigBee network.
To reset the thermostat to its default settings:
- Enter the advanced settings
- Enter the °STELPRO menu (menu 7)
- Navigate to the (def) screen using the UP or DOWN buttons.
- Enter the (def) menu by pressing the UP and DOWN buttons for less than 3 seconds
- Select (yes) and confirm the selection by pressing the UP and DOWN buttons for less than 3 seconds.
The thermostat will then reset itself.

Power Outage

If a power outage occurs, the thermostat will stop working but all configuration is saved.

Outdoor Temperature ( 

 )

When connected to a ZigBee network, the thermostat may display the outdoor temperature 

provided by an external sensor.
When available, the outdoor temperature is displayed instead of the setpoint, providing that the 

outdoor temperature display setting is set to (On).
If no temperature is received within a 4-hour timeframe, the outdoor temperature will disappear and 

the setpoint will be displayed.
In order to display the outdoor temperature, an external sensor needs to be part of the ZigBee 

network. It may be a physical sensor or a weather station app.

Summary of Contents for STZB402 Plus

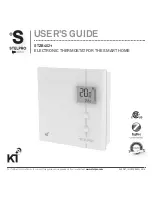
Page 1: ... consult this guide online please visit our website at www stelpro com 042D07_INSSTZB402 0616 USER S GUIDE S Y S T È M E Q U A L I T É C ERTIFIÉ REGISTERED Q U A L I T Y S Y S T E M STZB402 ELECTRONIC THERMOSTAT FOR THE SMART HOME ...

Page 2: ...ct this product to a supply source other than 120 VAC or 240 VAC and do not exceed the load limits specified Protect the heating system with the appropriate circuit breaker or fuse You must regularly clean dirt accumulations on the thermostat Do NOT use fluid to clean thermostat air vent Do not install thermostat in a wet place However installing it in insulated walls is allowed NOTE When a part o...

Page 3: ...opper wires Selection of the thermostat location The thermostat must be mounted to a connection box on a wall facing the heating unit at around 1 5 m 5 feet above the floor level on a section of the wall exempt from pipes or air ducts Do not install the thermostat in a location where temperature measurements could be altered For example close to a window on an external wall or close to a door lead...

Page 4: ...the previous thermostat 3 Ensure that the air vents of the Ki thermostat are clean and clear of any obstruction 4 Using a screwdriver loosen the screw retaining the mounting base of the thermostat do not completely remove the screw Then remove the mounting base at the back of the thermostat by tilting it downward then towards you 5 Align and secure the mounting base to the connection box using the...

Page 5: ... connect them using the solderless connectors supplied When making the connection with aluminum wire make sure that you are using connectors identified CO ALR Please note that the thermostat wires do not have polarity Therefore the way they are connected is not important 2 WIRE INSTALLATION 4 WIRE INSTALLATION ...

Page 6: ...cated on the top of the thermostat with those on the mounting base and secure the thermostat to the mounting base Note that you can also position the thermostat on the left or the right side of the junction box see below Then tighten the screw at the bottom of the unit 9 Turn the power on ALIGNMENT ...

Page 7: ...0616 7 Ambient temperature Heating status Thermostat mode Advanced settings Set point temperature OR outdoor temperature requires external sensor over ZigBee Fan mode Lock mode Frost warning ZigBee connectivity OPERATION ...

Page 8: ... heating the room the heating status graph will display the heating percentage No bar 0 1 bar 1 25 2 bars 26 50 3 bars 51 75 4 bars 76 100 Thermostat mode The thermostat has three modes Comfort Eco and Off The first two modes have their own preestablished setpoint Comfort 21 C 70 F Eco 17 C 63 F The user may change the setpoint to any value in the range described in the setpoint section When the E...

Page 9: ...onnectivity icon may blink if there is an issue with the ZigBee radio circuit Advanced settings There are 7 advanced settings menus on the thermostat The advanced settings are the following 1 ZigBee menu used to associate or remove the thermostat from a ZigBee network 2 Display format used to switch the temperature format between C and F 3 Heating mode used to switch the heating mode between Baseb...

Page 10: ... time at which point the icon will momentarily flash rapidly if a change has been made To exit the advanced settings press the UP and DOWN buttons simultaneously for 3 seconds at any time If the thermostat is left idle it will revert back to the main screen after 30 seconds ZigBee network association Association Make sure the ZigBee controller is in pairing mode refer to your ZigBee controller ins...

Page 11: ...e network To reset the thermostat to its default settings Enter the advanced settings Enter the STELPRO menu menu 7 Navigate to the def screen using the UP or DOWN buttons Enter the def menu by pressing the UP and DOWN buttons for less than 3 seconds Select yes and confirm the selection by pressing the UP and DOWN buttons for less than 3 seconds The thermostat will then reset itself Power Outage I...

Page 12: ... is above 50 C 122 F heating will be always inactive Temperature sensor is defective heating will always be inactive Call technical support Err The connection could not be established with the ZigBee network Make sure the thermostat is within range of the ZigBee controller or a ZigBee repeater and make sure the ZigBee controller is in association mode E1 Secondary temperature sensor is defective T...

Page 13: ... turned on The display turns off a few minutes and then turns on again The thermal protection of the heating unit has opened due to overheating Check if the heating unit is in good operating condition and that clearance around the appliance is according to the manufacturer s specifications The displayed ambient temperature is incorrect Check the presence of an air stream or a heat source near the ...

Page 14: ... resistive load 16 7 A 4000 W 240 VAC 2000 W 120 VAC Temperature display range 0 C to 50 C 32 F to 122 F Temperature display resolution 0 5 C 1 F Temperature setpoint range 5 C to 30 C 41 F to 86 F Temperature setpoint increment 0 5 C 1 F Storage temperature 50 C to 50 C 58 F to 122 F Operating temperature LCD performance might diminish below 0 C 32 F 20 C to 50 C 4 F to 122 F ...

Page 15: ...der for the warranty to be valid the unit must have been installed and used according to instructions If the installer or the user modifies the unit he will be held responsible for any damage resulting from this modification The warranty is limited to the factory repair or the replacement of the unit and does not cover the cost of disconnection transport and installation E mail contact stelpro com...

Reviews: