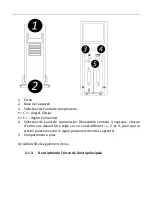
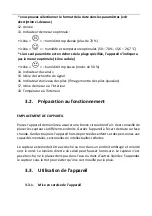
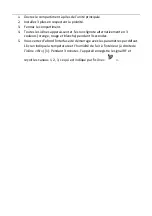
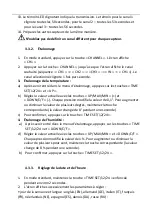
background image


h)


Ne nettoyez pas l’appareil avec des substances acides, des produits médicaux, 

des diluants, du carburant, de l’huile ou d’autres produits chimiques, car cela 

pourrait endommager l’appareil. 

i)


Si le capteur est placé trop loin de l’unité principale (plus de 30 m), l’écran 

affiche la dernière mesure au lieu de la valeur actuelle. Dans ce cas, retirez les 

piles de l’unité principale et des capteurs, réduisez la distance et activez de 

nouveau les appareils. 

j)


Après l’enlèvement des piles (désactivation) des capteurs, l’unité principale 

affiche la dernière mesure pendant une heure et ensuite « — ». 


3.4.1.


Instructions concernant l’élimination des batteries et des piles : 


L’appareil fonctionne avec des piles AAA 1,5 V. 

Retirez les piles usagées comme vous les avez installées. 

Déposez les piles dans un point de collecte approprié. 


3.4.2.


Élimination des appareils usagés : 


À la fin de sa vie utile, ce produit ne doit pas être jeté avec les déchets ménagers 

mais doit être apporté à un centre de collecte et de recyclage des équipements 

électriques et électroniques. Cela est indiqué par un symbole sur le produit, dans 

le manuel d’utilisation ou sur l’emballage. Les matériaux utilisés dans l’appareil 

sont recyclables selon leur désignation. En réutilisant, en réaffectant ou en 

utilisant d’une autre manière les équipements usagés, vous apportez une 

contribution importante à la protection de notre environnement. 

Consultez votre administration locale pour trouver une déchetterie appropriée. 

Summary of Contents for SBS-RS-40

Page 1: ...BSŁUGI STACJA POGODOWA NÁVOD K POUŽITÍ METEOSTANICE MANUEL D UTILISATION STATION MÉTÉO ISTRUZIONI PER L USO STAZIONE METEREOLOGICA MANUAL DE INSTRUCCIONES ESTACIÓN METEOROLÓGICA HASZNÁLATI ÚTMUTATÓ IDŐJÁRÁS ÁLLOMÁS BRUGSANVISNING VEJRSTATION DE EN PL CZ FR IT ES HU DA SBS RS 40 ...

Page 2: ... 40 EN Product model PL Model produktu CZ Model výrobku FR Modèle IT Modello ES Modelo HU Modell DK Model DE Hersteller expondo Polska sp z o o sp k EN Manufacturer PL Producent CZ Výrobce FR Fabricant IT Produttore ES Fabricante HU Termelő DK Producent DE Anschrift des Herstellers ul Nowy Kisielin Innowacyjna 7 66 002 Zielona Góra Poland EU EN Manufacturer Address PL Adres producenta CZ Adresa vý...

Page 3: ...llgemeine Beschreibung Die Betriebsanleitung soll Ihnen helfen das Gerät sicher und zuverlässig zu benutzen Das Produkt wird streng nach den technischen Spezifikationen unter Verwendung der neuesten Technologien und Komponenten und unter Einhaltung der höchsten Qualitätsstandards entwickelt und hergestellt VOR BEGINN DER ARBEITEN IST DIESE BETRIEBSANLEITUNG SORGFÄLTIG ZU LESEN UND ZU VERSTEHEN Um ...

Page 4: ...gen Details vom tatsächlichen Aussehen des Produkts abweichen Die Bedienungsanleitung wurde in der deutschen Sprache verfasst Die den anderen Sprachfassungen handelt es sich Übersetzungen aus dem Deutschen 2 Anwendungssicherheit ACHTUNG Lesen Sie alle Sicherheitshinweise und alle Anweisungen Die Nichtbeachtung der Sicherheitshinweise und Anweisungen kann zu schweren Verletzungen oder zum Tod führe...

Page 5: ...e Sicherheit verantwortlichen Person beaufsichtigt oder wurden von dieser eingewiesen wie dieses Gerät zu bedienen ist k Bei dem Gerät handelt es sich nicht um ein Spielzeug Kinder müssen beaufsichtigt werden um sicherzustellen dass sie nicht mit dem Gerät spielen l Benutzen Sie das Gerät nicht wenn der EIN AUS Schalter nicht korrekt funktioniert sich nicht ein und ausschalten lässt m Bewahren Sie...

Page 6: ...egriffen werden noch darf das Gerät gereinigt werden wenn es an die Stromversorgung angeschlossen ist b Die zweckentfremdete Nutzung des Netzkabels ist untersagt Benutzen Sie das Kabel nicht um das Gerät zu transportieren oder den Stecker herauszuziehen Halten Sie das Kabel von Hitze Öl scharfen Kanten und beweglichen Teilen fern Beschädigte oder verwickelte Kabel erhöhen das Risiko eines Stromsch...

Page 7: ... andere Unbeteiligte bei der Arbeit mit dem Gerät geschützt werden müssen 3 Nutzungshinweise Die Wetterstation dient zur Sammlung von Wetterdaten d h Temperatur und Luftfeuchtigkeit Für Schäden die durch unsachgemäßen Gebrauch entstehen haftet der Benutzer 3 1 Beschreibung des Geräts 3 1 1 Hauptstation 1 Display 2 Funktionstasten ...

Page 8: ...3 Öffnung für die Halterung zum Aufhängen des Geräts 4 Ausklappbare Stütze zum Aufstellen des Geräts 5 Batteriefach 3 1 2 Messsensor ...

Page 9: ... Übertragung des Signals an die Hauptstation das Set enthält 3 Messsensoren und jeder dieser sollte auf einen anderen Kanal 1 2 und 3 eingestellt werden damit die Wetterstation die Signale von allen drei Messsensoren empfangen kann 5 Batteriefach Im Lieferumfang ist ebenfalls ein USB Kabel enthalten 3 1 3 Beschreibung des Displays der Hauptstation ...

Page 10: ...tzliche Veränderungen der Parametermesswerte Die Aufzeichnung der vorhergesehenen Messung erfolgt bei einer Änderung der Temperatur um mind 1 und der Luftfeuchtigkeit um mind 3 im Vergleich zu den letzten Messergebnissen 4 Angabe des Messergebnisses für die Luftfeuchtigkeit im Raum 5 Anzeige des Kanals 2 6 Anzeige des Kanals 3 7 Uhr 8 Anzeige der Tageszeit es kann entweder das 12 Stunden oder 24 S...

Page 11: ...urmessung im Raum 3 2 Vorbereitung für den Betrieb POSITIONIERUNG DES GERÄTS Das Gerät sollte so aufgestellt werden dass eine gute Luftzirkulation gewährleistet ist Es wird empfohlen die Messsensoren an verschiedenen Stellen aufzustellen Das Gerät muss von heißen Oberflächen ferngehalten werden Bewahren Sie das Gerät immer außerhalb der Reichweite von Kindern und Personen mit eingeschränkten geist...

Page 12: ... in 3 Farben orange rot und weiß 3 Sekunden lang zu blinken 5 Nach dem Start nimmt das Display das Anfangs Interface an in dem alle Werksdaten enthalten sind Die aktuelle Temperatur und Luftfeuchtigkeit im dem Raum in dem sich die Hauptstation befindet wird angezeigt nach dem Symbol IN 1 Das Gerät startet eine 3 minütige Aufzeichnung des Funksignals und den Empfang der Kanäle 1 2 3 was durch das S...

Page 13: ...nsetzen 9 Kammer schließen 10 Auf dem Display werden 3 Sekunden lang alle Symbole angezeigt 11 Nach der Einstellung wird auf dem Display die aktuelle Temperatur und Luftfeuchtigkeit in dem Raums angezeigt in dem sich der Messsensor befindet sowie der Kanal über den das Signal gesendet wird 12 Mit dem Schalter auf der Rückseite kann die Temperaturmesseinheit eingestellt werden Standardeinstellung C...

Page 14: ...die Tasten TIME SET 12 24 und UP gedrückt werden b Mit den Tasten UP MAX MIN und DOWN C F den aktuellen Messwert einstellen Ein einmaliges Drücken jeder dieser Tasten bewirkt eine Änderung des Parameterwertes um 0 1 Um einen Wert deutlich zu erhöhen oder zu verringern z B um einige Grade muss die entsprechende Taste gedrückt gehalten werden der Wert wird innerhalb von einer Sekunde um 8 geändert c...

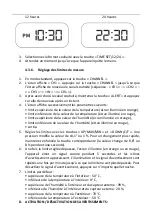
Page 15: ...ormat Tag Monat oder Monat Tag Monat Tag Menü verlassen 3 Die Einstellung erfolgt mit den Tasten UP MAX MIN und DOWN C F Wenn ein Wert erheblich verändert werden soll empfiehlt es sich die Taste gedrückt zu halten 4 Um die Eingabe zu bestätigen und zu dem nächsten Parameter zu wechseln muss die Taste TIME SET 12 24 gedrückt werden 5 Nach 8 Sekunden Inaktivität schließt das Gerät das Einstellungsme...

Page 16: ...ellung der Grenzwerte für die Messungen 1 Im Standardmodus muss die Taste CHANNEL gedrückt werden 2 Auf dem Display wird die Meldung CH1 angezeigt Die Taste CHANNEL so oft drücken bis auf dem Display wieder die Meldung angezeigt wird die dem gewünschten Kanal entspricht Reihenfolge der angezeigten Meldungen CH1 CH2 CH3 IN CH1 3 Nachdem der gewünschte Kanal ausgewählt wurde muss die Taste ALERT ged...

Page 17: ...e für Temperaturmessung im Raum 0 C Obergrenze für Feuchtigkeitsmessung im Raum und den Außensensor 99 Untergrenze für Feuchtigkeitsmessung im Raum und den Außensensor 20 Obergrenze für Temperaturmessung im Außenbereich 70 C Untergrenze für Temperaturmessung im Außenbereich 50 C 8 AKTIVIEREN DEAKTIVIEREN VON WARNUNGEN a Im Standardmodus des Geräts muss die Taste CHANNEL gedrückt werden Auf dem Dis...

Page 18: ...ldungen oben nicht angezeigt 4 3 7 Anzeige der niedrigsten höchsten Werte 1 Während des Standardbetriebs des Geräts die Taste UP MAX MIN drücken 2 Der niedrigste und höchste gespeicherte Messwert der Temperatur und Luftfeuchtigkeit wird angezeigt 3 Um diese Werte zu löschen muss die Taste UP MAX MIN gedrückt werden 3 3 8 Suche des Messsensorsignals ...

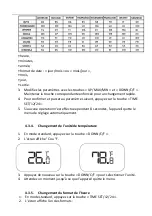
Page 19: ...hlossen wird für Kanal 1 alle 50 Sekunden für Kanal 2 alle 53 Sekunden für Kanal 3 alle 56 Sekunden 3 3 9 Messbereich Messung Bereich Messgenauigkeit Lesegenauigkeit Temperatur im Raum 0 50 C 0 40 C 1 5 0 1 Temperatur im Außenbereich 50 70 C 0 40 C 10 0 C 1 0 1 40 50 C 30 10 C 1 5 50 70 C 50 30 C 2 Luftfeuchtigkeit im Raum 20 99 40 80 5 1 30 40 80 90 8 20 30 90 99 10 Luftfeuchtigkeit im Außenberei...

Page 20: ...rprüft werden e Für die Reinigung des Geräts muss ein weiches Tuch verwendet werden f Die Batterien darf nicht im Gerät gelassen werden wenn es über einen längeren Zeitraum nicht verwendet werden soll g Verwenden Sie zur Reinigung keine scharfen und oder metallischen Gegenstände z B eine Drahtbürste oder einen Metallspatel da diese die Oberfläche des Gerätematerials beschädigen können h Das Gerät ...

Page 21: ...s an einer Recycling Sammelstelle für Elektro und Elektronikgeräte abgegeben werden Dies wird durch das Symbol das auf dem Produkt der Anleitung oder der Verpackung angezeigt ist kenntlich gemacht Die im Gerät verwendeten Materialien können entsprechend ihrer Kennzeichnung wiederverwendet werden Durch die Wiederverwendung die Verwendung von Materialien oder andere Formen der Nutzung gebrauchter Ge...

Page 22: ...cable length mm 980 1 General Description The instruction manual is intended to assist in safe and reliable use The product is designed and manufactured strictly according to technical specifications using the latest technology and components and maintaining the highest quality standards PLEASE CAREFULLY READ AND UNDERSTAND THIS INSTRUCTION MANUAL BEFORE OPERATION To ensure long and reliable opera...

Page 23: ...l instruction manual is in the German language version Other language versions are translations from German 2 Safety of use CAUTION Read all safety warnings and all instructions Failure to follow warnings and instructions could result in serious injury or even death The term unit or product in the warnings and in the description of the instructions refers to the WEATHER STATION a Keep the work are...

Page 24: ...unction properly does not turn on and off m Keep unused equipment out of the reach of children and out of the reach of anyone unfamiliar with the unit or this instruction manual These units is dangerous in the hands of inexperienced users n Keep the unit in good working condition o Keep the unit out of the reach of children p Repairs and maintenance should be carried out by qualified personnel usi...

Page 25: ...ed electrician or the manufacturer s service department d To avoid electric shock do not immerse the cable plug or unit itself in water or other liquid while charging e Do not exceed the recommended electrical voltage f A distance between the sensors and the main station not exceeding 30 m is recommended This will ensure the best signal reception CAUTION Although the product has been designed to b...

Page 26: ...1 Display 2 Function buttons ...

Page 27: ...3 Handle opening for hanging the unit 4 Expandable support stand for placing the unit 5 Battery compartment 3 1 2 Sensor ...

Page 28: ... Switch changing the channel of signal transmission to the main station the set contains 3 sensors each of them should be set to a different channel 1 2 and 3 so that the station can receive the signal from the three sensors 5 Battery compartment USB cable is also included 3 1 3 Master station display description ...

Page 29: ...g based on the last readings The function detects sudden changes in parameter measurements The change of the predicted measurement recording occurs when the temperature changes by a min of 1o and humidity by a min of 3 in relation to the last measurement 4 Reading the humidity measurement inside the room 5 Channel 2 indicator 6 Channel 3 indicator 7 Clock 8 Time of day readout ...

Page 30: ...or 15 Signal search icon 16 Battery indicator the picture shows batteries running low 17 Indoor readings measurement icon 18 Indoor temperature measurement readout 3 2 Preparation for operation POSITIONING OF THE UNIT Place the unit in a way that ensures good air circulation It is recommended that sensors be spaced in different locations Keep the unit away from any hot surfaces Always keep the uni...

Page 31: ...ity 3 Close the chamber 4 All the icons will appear on the display and the display itself will flash 3 colors orange red and white consecutively for 3 seconds 5 Upon startup the display will assume an initial interface containing factory data It will indicate the current temperature and humidity of the room it is in behind the IN icon 1 The unit will start 3 minute RF signal recording and receptio...

Page 32: ...ting channel with the switch on the back 8 Insert batteries in accordance with polarity 9 Close the chamber 10 The display will show all icons for 3 seconds 11 Once adjusted the display will show the current temperature and humidity of the room it is in and the channel it is transmitting through ...

Page 33: ...he message corresponding to the desired channel order of messages displayed CH1 CH2 CH3 IN CH1 The display will start flashing the selected message at a frequency of 1 Hz 3 Temperature calibration a After entering the calibration menu press the TIME SET 12 24 and UP buttons b With the buttons UP MAX MIN and DOWN C F to set the current measurement value A single press of each of these buttons will ...

Page 34: ...a given button the value will change by 8 within a second b To confirm press the TIME SET 12 24 button 4 3 3 Setting date and time 1 Press the TIME SET 12 24 button for approx 2 seconds in standard operation mode 2 The parameters to be adjusted will appear successively on the display day of the week and language English EN German GE Italian IT French FR Dutch NE Spanish ES Danish DA Russian RU hou...

Page 35: ...mode of the unit press the DOWN C F button 2 The display will show one of the units o C or o F 3 Press the DOWN C F button again to select the desired unit 4 Wait for a while until the unit automatically exits the menu 4 3 5 Changing the time format 1 Press the TIME SET 12 24 button in the standard operation mode 2 One of the formats will be displayed 12 hour 24 hour 3 Use the TIME SET 12 24 butto...

Page 36: ...play lower limit of humidity value red backlight output 5 Use the UP MAX MIN and DOWN C F buttons to adjust the limits A single press will change 0 1o or 1 In order to make significant changes in the value it is recommended to hold down the desired button 0 8o or 8 change per second 6 When the measurement exceeds the set limit the unit will illuminate with a given color orange or red give a warnin...

Page 37: ...lay again shows the message corresponding to the desired channel order of messages displayed CH1 CH2 CH3 IN CH1 b Press the ALERT button c The option to activate deactivate measurement warnings will be displayed d Use the ALERT button to select the desired option e Press the CHANNEL button to move to the next channel and activate deactivate warnings for all sensors in the same way f To activate de...

Page 38: ...it signaling option In this case the above messages will not be displayed 4 3 7 Recalling the lowest highest values 1 Press the UP MAX MIN button in the standard operation mode 2 The lowest and highest stored temperature and humidity values will be displayed ...

Page 39: ... 5 The icon will appear on the display 6 If after 3 minutes the sensor signal is not received the unit will repeat the search until successful for channel 1 every 50 seconds for channel 2 every 53 seconds for channel 3 every 56 seconds 3 3 9 Measurement range Measurement Range Measurement accuracy Reading accuracy Indoor temperature 0 50o C 0 40o C 1 5 0 1 Outdoor temperature 50 70o C 0 40o C 10 0...

Page 40: ...moment 2 A menu will be displayed in which you can choose to activate or deactivate the backlight 3 In power saving mode the display will stop being illuminated after 8 seconds of inactivity Outside the power saving mode the display is continuously illuminated 3 4 Cleaning and maintenance a Use only non corrosive cleaning agents for cleaning the surfaces b Store the unit in a dry and cool place pr...

Page 41: ...d after one hour the display will show 3 4 1 Instructions for the safe disposal of batteries The units are equipped with AAA 1 5V batteries Remove used batteries from the unit in the same way you put them in Return the batteries to a unit responsible for their disposal 3 4 2 Disposal of used units At the end of its useful life this product should not be disposed of with normal household waste but ...

Page 42: ...2 Długość kabla USB mm 980 1 Ogólny opis Instrukcja przeznaczona jest do pomocy w bezpiecznym i niezawodnym użytkowaniu Produkt jest zaprojektowany i wykonany ściśle według wskazań technicznych przy użyciu najnowszych technologii i komponentów oraz przy zachowaniu najwyższych standardów jakości PRZED PRZYSTĄPIENIEM DO PRACY NALEŻY DOKŁADNIE PRZECZYTAĆ I ZROZUMIEĆ NINIEJSZĄ INSTRUKCJĘ Dla zapewnien...

Page 43: ...produktu Instrukcją oryginalną jest niemiecka wersja instrukcji Pozostałe wersje językowe są tłumaczeniami z języka niemieckiego 2 Bezpieczeństwo użytkowania UWAGA Przeczytać wszystkie ostrzeżenia dotyczące bezpieczeństwa oraz wszystkie instrukcje Niezastosowanie się do ostrzeżeń i instrukcji może spowodować ciężkie obrażenia ciała lub śmierć Termin urządzenie lub produkt w ostrzeżeniach i w opisi...

Page 44: ...giwać urządzenie k Urządzenie nie jest zabawką Dzieci powinny być pilnowane aby nie bawiły się urządzeniem l Nie należy używać urządzenia jeśli przełącznik ON OFF nie działa sprawnie nie załącza i nie wyłącza się m Nieużywane urządzenia należy przechowywać w miejscu niedostępnym dla dzieci oraz osób nieznających urządzenia lub tej instrukcji obsługi Urządzenia są niebezpieczne w rękach niedoświadc...

Page 45: ...pła oleju ostrych krawędzi lub ruchomych części Uszkodzone lub poplątane przewody zwiększają ryzyko porażenia prądem c Zabrania się używania zasilacza jeśli przewód jest uszkodzony lub nosi wyraźne oznaki zużycia Uszkodzony przewód powinien być wymieniony przez wykwalifikowanego elektryka lub serwis producenta d Aby uniknąć porażenia prądem elektrycznym nie należy zanurzać kabla wtyczki ani samego...

Page 46: ...otyczących pogody tj temperatury i wilgotności powietrza Odpowiedzialność za wszelkie szkody powstałe w wyniku użytkowania niezgodnego z przeznaczeniem ponosi użytkownik 3 1 Opis urządzenia 3 1 1 Stacja główna 1 Wyświetlacz 2 Przyciski funkcyjne ...

Page 47: ...3 Otwór na uchwyt umożliwiający powieszenie urządzenia 4 Rozkładana podpora umożliwiająca postawienie urządzenia 5 Komora na baterie 3 1 2 Czujnik ...

Page 48: ...nie Fahrenheita 4 Przełącznik zmiany kanału nadawania sygnału do stacji głównej zestaw zawiera 3 czujniki każdy z nich powinien być ustawiony na inny kanał 1 2 i 3 aby stacja mogła odebrać sygnał z trzech czujników 5 Komora na baterie Zestaw zawiera także kabel USB 3 1 3 Opis wyświetlacza stacji głównej ...

Page 49: ...zytów Funkcja wykrywa nagłe zmiany w pomiarze parametrów Zmiana zapisu przewidzianych pomiarów następuje gdy temperatura zmieni się o min 1o a wilgotność o min 3 w stosunku do ostatniego pomiaru 4 Odczyt pomiaru wilgotności powietrza wewnątrz pomieszczenia 5 Wskaźnik kanału 2 6 Wskaźnik kanału 3 7 Zegar 8 Odczyt pory dnia w ustawieniach można wybrać format 12 lub 24 godzinny opis poniżej 9 Odczyt ...

Page 50: ... 3 2 Przygotowanie do pracy UMIEJSCOWIENIE URZĄDZENIA Urządzenie należy ustawić w sposób zapewniający dobrą cyrkulację powietrza Zaleca się rozstawienie czujników w różnych lokalizacjach Urządzenie należy trzymać z dala od wszelkich gorących powierzchni Urządzenie należy zawsze użytkować poza zasięgiem dzieci oraz osób ograniczonych funkcjach psychicznych sensorycznych i umysłowych Zaleca się aby ...

Page 51: ...nie migać kolejno 3 kolorami pomarańczowym czerwonym i białym przez 3 sekundy 5 Po uruchomieniu wyświetlacz przyjmie interfejs początkowy zawierający dane fabryczne Wskaże aktualną temperaturę i wilgotność powietrza w pomieszczeniu w którym się znajduje za ikoną IN 1 Urządzenie rozpocznie 3 minutową rejestrację sygnału RF oraz odbiór kanałów 1 2 3 co sygnalizuje ikonka ...

Page 52: ...baterie zgodnie z polaryzacją 9 Zamknąć komorę 10 Przez 3 sekundy wyświetlacz pokaże wszystkie ikony 11 Po uregulowaniu wyświetlacz wskaże aktualną temperaturę i wilgotność pomieszczenia w którym się znajduje oraz kanał za pomocą którego nadaje sygnał 12 Za pomocą przełącznika z tyłu można ustawić jednostkę pomiaru temperatury domyślnie ustawiona o C ...

Page 53: ...artość pomiaru Pojedyncze naciśnięcie każdego z tych przycisków spowoduje zmianę wartości parametru o 0 1o Aby znacznie zwiększyć lub zmniejszyć wartość np o kilka stopni należy przytrzymać dany przycisk wartość ulegnie zmianie o 8o w ciągu sekundy c Aby zatwierdzić należy nacisnąć przycisk TIME SET 12 24 4 Kalibracja wilgotności a Po wejściu do menu kalibracyjnego nacisnąć przycisk TIME SET 12 24...

Page 54: ...ian wartości zaleca się przytrzymać dany przycisk 4 Aby zatwierdzić wartości i przejść do kolejnego parametru należy nacisnąć przycisk TIME SET 12 24 5 Po 8 sekundach bezczynności urządzenie automatycznie wyjdzie z menu ustawień 4 3 4 Zmiana jednostki temperatury 1 W standardowym trybie pracy urządzenia nacisnąć przycisk DOWN C F 2 Wyświetlona zostanie jedna z jednostek o C lub o F 3 Nacisnąć pono...

Page 55: ...aną kolejno następujące parametry górny limit wartości temperatury podświetlenie wyświetlacza w kolorze pomarańczowym dolny limit wartości temperatury podświetlenie wyświetlacza w kolorze czerwonym górny limit wartości wilgotności podświetlenie wyświetlacza w kolorze pomarańczowym dolny limit wartości wilgotności podświetlenie wyświetlacza w kolorze czerwonym wyjście 5 Za pomocą przycisków UP MAX ...

Page 56: ...cisk CHANNEL Na wyświetlaczu pojawi się komunikat CH1 Naciskać przycisk CHANNEL aż na wyświetlaczu pojawi się ponownie komunikat odpowiadający żądanemu kanałowi kolejność wyświetlanych komunikatów CH1 CH2 CH3 IN CH1 b Nacisnąć przycisk ALERT c Wyświetlona zostanie opcja aktywacji dezaktywacji ostrzeżeń dotyczących pomiarów d Za pomocą przycisku ALERT wybrać żądaną opcję e Nacisnąć przycisk CHANNEL...

Page 57: ...szych wartości 1 W standardowym trybie pracy urządzenia nacisnąć przycisk UP MAX MIN 2 Wyświetlona zostanie najniższa oraz najwyższa zapamiętana wartości temperatury oraz wilgotności 3 Aby wyczyścić te wartości należy przytrzymać przycisk UP MAX MIN 3 3 8 Wyszukiwanie sygnału czujnika 1 Jeśli stacja główna straci sygnał któregoś z czujników na wyświetlaczu pojawi się komunikat ...

Page 58: ...ładność pomiaru Dokładność odczytu Temperatura wewnątrz pomieszczenia 0 50o C 0 40o C 1 5 0 1 Temperatura na zewnątrz 50 70o C 0 40o C 10 0o C 1 0 1 40 50o C 30 10o C 1 5 50 70o C 50 30o C 2 Wilgotność wewnątrz pomieszczenia 20 99 40 80 5 1 30 40 80 90 8 20 30 90 99 10 Wilgotność na zewnątrz 20 99 40 80 5 1 30 40 80 90 8 20 30 90 99 10 Jeśli pomiar przekroczy dany zakres wyświetlacz wskaże komunik...

Page 59: ...j oraz wszelkich uszkodzeń e Do czyszczenia należy używać miękkiej ściereczki f Nie pozostawiać baterii w urządzeniu gdy nie będzie ono używane przez dłuższy czas g Do czyszczenia nie wolno używać ostrych i lub metalowych przedmiotów np drucianej szczotki lub metalowej łopatki ponieważ mogą one uszkodzić powierzchnię materiału z którego wykonane jest urządzenie h Nie czyścić urządzenia substancja ...

Page 60: ...y go oddać do punktu zbiórki i recyklingu urządzeń elektrycznych i elektronicznych Informuje o tym symbol umieszczony na produkcie instrukcji obsługi lub opakowaniu Zastosowane w urządzeniu tworzywa nadają się do powtórnego użycia zgodnie z ich oznaczeniem Dzięki powtórnemu użyciu wykorzystaniu materiałów lub innym formom wykorzystania zużytych urządzeń wnoszą Państwo istotny wkład w ochronę nasze...

Page 61: ...ce MHz 433 Výstupní výkon RF dBm 0 32 Délka USB kabelu mm 980 1 Všeobecný popis Účelem pokynů je pomoc při bezpečném a spolehlivém používání Výrobek je navržený a vyrobený přísně podle technických pokynů pomocí nejnovějších technologií a komponentů a při zachování nejvyšších standardů kvality PŘED ZAHÁJENÍM PRÁCE SI DŮKLADNĚ PROSTUDUJTE TYTO POKYNY Pro zajištění dlouhodobého a spolehlivého provozu...

Page 62: ... pouze k náhledu a v některých detailech se mohou lišit od skutečného vzhledu výrobku Originální pokyny tvoří německá verze Ostatní jazykové verze jsou překlady z německého jazyka 2 Bezpečné používání UPOZORNĚNÍ Prostudujte si všechna varování týkající se bezpečnosti a všechny pokyny Nedodržování varování a pokynů může způsobit těžké zranění nebo smrt Výrazy zařízení nebo výrobek použité u varován...

Page 63: ...uje li přepínač ON OFF nezapíná ani nevypíná zařízení m Nepoužívané zařízení uložte mimo dosah dětí a osob neznajících zařízení nebo tyto pokyny k obsluze Zařízení jsou nebezpečná v rukou nezkušených uživatelů n Zařízení udržujte v dobrém technickém stavu o Zařízení chraňte před dětmi p Opravu a údržbu zařízení musí provádět kvalifikovaní pracovníci pomocí výhradně originálních náhradních dílů Bud...

Page 64: ... servisu výrobce d Pro zabránění zasažení elektrickým proudem nevkládejte kabel zástrčku ani samotné zařízení do vody ani jiné kapaliny během nabíjení e Nepřekračujte doporučené elektrické napětí f Doporučujeme aby vzdálenost čidel od hlavní stanice nepřekračovala 30 m Bude tak zajištěn nejlepší příjem signálu UPOZORNĚNÍ Přestože zařízení bylo navrženo tak aby bylo bezpečné a mělo dostatečné ochra...

Page 65: ...1 Displej 2 Tlačítka funkcí ...

Page 66: ...3 Úchytný otvor umožňující zavěšení zařízení 4 Rozkládací podpěra umožňující postavit zařízení 5 Přihrádka na baterie 3 1 2 Čidlo ...

Page 67: ...hrenheita 4 Přepínač změny kanálu pro vysílání signálu do hlavní stanice balení obsahuje 3 čidla každé z nich by mělo být nastaveno na jiném kanálu 1 2 a 3 aby stanice mohla přijímat signál ze tří čidel 5 Přihrádka na baterie Balení obsahuje také USB kabel 3 1 3 Popis displeje hlavní stanice ...

Page 68: ... načtených hodnot Funkce odhalí náhlé změny v měření parametrů Ke změně záznamu předpokládaných hodnot dojde v případě že se teplota změní o min 1o a vlhkost o min 3 oproti poslednímu měření 4 Načtená hodnota měření vlhkosti vzduchu uvnitř místnosti 5 Indikátor kanálu 2 6 Indikátor kanálu 3 7 Hodiny 8 Načtená denní doba v nastavení můžete zvolit pro hodiny formát 12 nebo 24 hodin popis níže 9 Načt...

Page 69: ...dnot uvnitř 18 Načtená hodnota měření teploty uvnitř místnosti 3 2 Příprava k provozu UMÍSTĚNÍ ZAŘÍZENÍ Zařízení postavte tak aby byla zajištěna dostatečná cirkulace vzduchu Doporučuje se rozmístit čidla na tři různá místa Zařízení používejte v dostatečné vzdálenosti od horkých ploch Zařízení vždy používejte mimo dosah děti a osob se sníženými psychickými smyslovými a duševními funkcemi Doporučuje...

Page 70: ... samotný displej bude 3 vteřiny blikat postupně ve 3 barvách oranžové červené a bílé 5 Po spuštění bude mít displej podobu úvodního rozhraní s továrními údaji Bude ukazovat aktuální teplotu a vlhkost vzduchu v místnosti ve které se nachází za ikonou IN 1 Zařízení zahájí 3 minuty trvající zaznamenávání RF signálu a příjem kanálů 1 2 3 což signalizuje ikonka ...

Page 71: ...razí všechny ikony 11 Po nastavení se na displeji zobrazí aktuální teplota a vlhkost v místnosti v níž se nachází a také kanál jehož prostřednictvím vysílá signál 12 Pomocí přepínače vzadu můžete nastavit jednotku měření teploty výchozí nastavení o C 13 Blikající LED ikona na displeji znamená že je vysílán signál Ikona bude blikat v případě kanálu 1 každých 50 vteřin v případě kanálu 2 každých 53 ...

Page 72: ... snížení o větší hodnotu např o několik stupňů dané tlačítko podržte hodnota se bude měnit o 8o za vteřinu c Pro potvrzení stiskněte tlačítko TIME SET 12 24 4 Kalibrace vlhkosti a Po vstupu do nabídky kalibrace stiskněte tlačítko TIME SET 12 24 a DOWN C F d Pomocí tlačítek UP MAX MIN a DOWN C F nastavte aktuální hodnotu měření Jedním stisknutím každého z těchto tlačítek změníte hodnotu parametru o...

Page 73: ... 24 5 Po 8 vteřinách nečinnosti zařízení automaticky opustí nabídku nastavení 4 3 4 Změna jednotky teploty 1 Ve standardním provozním režimu zařízení stiskněte tlačítko DOWN C F 2 Zobrazí se jedna z jednotek o C nebo o F 3 Opět stiskněte tlačítko DOWN C F a zvolte požadovanou jednotku 4 Chvíli počkejte až zařízení automaticky opustí nabídku 4 3 5 Změna formátu času 1 Ve standardním provozním režim...

Page 74: ...vlhkosti displej bude podsvícený červeně konec 5 Pomocí tlačítek UP MAX MIN a DOWN C F nastavte hraniční hodnoty Jedním stisknutím hodnotu změníte o 0 1o nebo 1 Při zadávání větších změn hodnot doporučujeme podržet požadované tlačítko změna o 0 8o nebo 8 za vteřinu 6 Pokud při měření dojde k překročení stanovené hranice zařízení bude podsvíceno danou barvou oranžově nebo červeně vydá výstražný sig...

Page 75: ...o ALERT c Zobrazí se možnost aktivace deaktivace výstrah týkajících se měření d Pomocí tlačítka ALERT zvolte požadovanou možnost e Pro přechod do dalšího kanálu zvolte tlačítko CHANNEL a stejným způsobem aktivujte deaktivujte výstrahy pro všechna čidla f Pokud chcete aktivovat deaktivovat výstrahy pro všechny kanály současně tak že vymažete hraniční hodnoty stiskněte tlačítko ALERT ve standardním ...

Page 76: ...ispleji informace 2 V takovém případě stiskněte tlačítko CHANNEL 3 Na displeji začne blikat číslo kanálu čidla které ztratilo signál 4 Podržte tlačítko CHANNEL 5 Na displeji se zobrazí ikona 6 Pokud po 3 minutách nedojde k příjmu signálu čidla bude zařízení opakovat vyhledávání tak dlouho dokud nebude úspěšné u kanálu 1 každých 50 vteřin u kanálu 2 každých 53 vteřin u kanálu 3 každých 56 vteřin 3 ...

Page 77: ...ní používejte výhradně přípravky neobsahující leptavé látky b Zařízení uchovávejte na suchém a chladném místě chráněném před vlhkostí a přímým slunečním zářením c Na zařízení nestříkejte vodu ani ho nevkládejte do vody d Zařízení pravidelně kontrolujte z hlediska jeho technické funkčnosti a na jakákoli poškození e K čistění používejte měkký hadřík f Pokud nebudete zařízení delší dobu používat vyjm...

Page 78: ...stě zodpovědném za likvidaci těchto materiálů 3 4 2 Likvidace opotřebených zařízení Po skončení životnosti toto zařízení nelikvidujte s normálním komunálním odpadem ale odevzdejte ho do sběrného dvora za účelem recyklace elektrických a elektronických zařízení Informuje o tom symbol umístěný na výrobku v pokynech k obsluze nebo na obalu Plasty použité v zařízení jsou vhodné pro opakované použití v ...

Page 79: ...2 Longueur du câble USB mm 980 1 Description générale Ce mode d emploi a pour but de vous aider à utiliser l appareil en sécurité et de manière fiable Le produit est conçu et fabriqué dans un respect strict des spécifications techniques avec les technologies et les composants les plus récents et conformément aux normes de qualité les plus élevées AVANT TOUTE UTILISATION CE MODE D EMPLOI DOIT ÊTRE ...

Page 80: ...t données qu à titre indicatif et peuvent différer dans certains détails de l aspect réel du produit C est la version allemande de ce mode d emploi qui est sa version originale Les autres versions linguistiques sont des traductions de l allemand 2 Sécurité d utilisation ATTENTION Lisez tous les avertissements de sécurité et toutes les instructions Le non respect des avertissements et des instructi...

Page 81: ...e personne responsable de leur sécurité ou qu elles aient reçu des instructions de celle ci sur la manière d utiliser l appareil k Cet appareil n est pas un jouet Surveillez les enfants pour vous assurer qu ils ne jouent pas avec l appareil l N utilisez pas l appareil si l interrupteur ON OFF ne fonctionne pas correctement ne se met pas en marche ou ne s arrête pas m Lorsque vous n utilisez pas l ...

Page 82: ... pour déplacer l appareil ou pour retirer la fiche de la prise Gardez le câble à l écart des sources de chaleur de l huile des arêtes tranchantes et des pièces mobiles Les fils endommagés ou emmêlés augmentent le risque d électrisation c Il est interdit d utiliser l alimentation si son câble st endommagé ou présente des signes évidents d usure Un câble endommagé doit être remplacé par un électrici...

Page 83: ...es données météorologiques c est à dire la température et l humidité L utilisateur est responsable de tout dommage résultant de toute utilisation contraire à la destination de l appareil 3 1 Description de l appareil 3 1 1 Unité principale 1 Écran 2 Touches de fonction ...

Page 84: ...3 Trou de suspension 4 Support escamotable 5 Compartiment à piles 3 1 2 Capteur ...

Page 85: ...teur de canal de transmission l ensemble contient 3 capteurs chacun d entre eux devant être réglé sur un canal différent 1 2 et 3 pour que la station puisse recevoir le signal provenant des trois capteurs 5 Compartiment à piles Un câble USB est également inclus 3 1 3 Description de l écran de l unité principale ...

Page 86: ...dains dans la mesure des paramètres Les mesures enregistrées changent lorsque la température change d au moins 1 et l humidité change d au moins 3 par rapport à la dernière mesure 4 Relevé de l humidité de l air intérieur 5 Indicateur du canal 2 6 Indicateur du canal 3 7 Horloge 8 Indicateur avant après midi vous pouvez sélectionner le format 12 ou 24 heures dans les paramètres voir description ci...

Page 87: ...intérieur 3 2 Préparation au fonctionnement EMPLACEMENT DE L APPAREIL Placez l appareil de manière à assurer une bonne circulation d air Il est conseillé de placer les capteurs à différents endroits Gardez l appareil à l écart de toute surface chaude Gardez toujours l appareil hors de portée des enfants et des personnes aux capacités mentales sensorielles ou intellectuelles réduites Le capteur ext...

Page 88: ...ran clignote alternativement en 3 couleurs orange rouge et blanche pendant 3 secondes 5 Vous verrez d abord l interface de démarrage avec les paramètres par défaut L écran indique la température et l humidité de l air à l intérieur à droite de l icône IN 1 Pendant 3 minutes l appareil enregistre le signal RF et reçoit les canaux 1 2 3 ce qui est indiqué par l icône ...

Page 89: ...r au dos 8 Installez les piles en respectant la polarité 9 Fermez le compartiment 10 Toutes les icônes apparaissent pendant 3 secondes 11 Une fois la lecture stabilisée l écran affiche la température et l humidité actuelles et le canal de transmission 12 Vous pouvez régler l unité de température à l aide du sélecteur au dos unité par défaut C ...

Page 90: ...ression modifie la valeur de 0 1 Pour augmenter ou diminuer la valeur de plusieurs degrés maintenez la touche correspondante la valeur change de 8 pendant une seconde c Pour confirmer appuyez sur la touche TIME SET 12 24 4 Étalonnage de l humidité a Après avoir entré dans le menu d étalonnage appuyez sur les touches TIME SET 12 24 et DOWN C F d Réglez la valeur actuelle avec les touches UP MAX MIN...

Page 91: ...2 24 5 Si aucune opération n est effectuée pendant 8 secondes l appareil quitte le menu de réglage automatiquement 4 3 4 Changement de l unité de température 1 En mode standard appuyez sur la touche DOWN C F 2 L écran affiche C ou F 3 Appuyez de nouveau sur la touche DOWN C F pour sélectionner l unité 4 Attendez un moment jusqu à ce que l appareil quitte le menu 4 3 5 Changement du format de l heu...

Page 92: ...lluminé en rouge sortie 5 Réglez les limites avec les touches UP MAX MIN et DOWN C F Une pression modifie la valeur de 0 1 ou 1 Pour un changement plus rapide maintenez enfoncée la touche correspondante la valeur change de 0 8 ou 8 pendant une seconde 6 Une fois la limite réglée dépassée l écran s illumine en orange ou en rouge l appareil émet un signal sonore pendant 5 secondes et les icônes d av...

Page 93: ...ion des avertissements d Choisissez l option souhaitée avec la touche ALERT e Appuyez sur la touche CHANNEL pour passer au canal suivant et activer désactiver les avertissements pour tous les capteurs f Pour activer désactiver la fonction d avertissement pour tous les canaux à la fois vous pouvez supprimer les limites en appuyant sur la touche ALERT en mode standard Lorsque les limites sont réglée...

Page 94: ...capteurs l écran affiche 2 Dans ce cas appuyez sur la touche CHANNEL 3 Le numéro du capteur dont le signal a été perdu clignote 4 Maintenez enfoncée la touche CHANNEL 5 L écran affiche 6 Si le signal ne revient pas dans les 3 minutes l appareil répète la recherche jusqu à ce qu elle réussisse toutes les 50 secondes pour le canal 1 toutes les 53 secondes pour le canal 2 et toutes les 56 secondes po...

Page 95: ...es d inactivité Lorsque le mode économie d énergie est inactif l écran est éclairé en permanence 3 4 Nettoyage et entretien a Pour nettoyer la surface n utilisez que des produits libres de substances caustiques b Conservez l appareil dans un endroit sec et frais à l abri de l humidité et des rayons directs du soleil c Il est interdit de tremper l appareil avec un jet d eau ou de l immerger dans l ...

Page 96: ...tteries et des piles L appareil fonctionne avec des piles AAA 1 5 V Retirez les piles usagées comme vous les avez installées Déposez les piles dans un point de collecte approprié 3 4 2 Élimination des appareils usagés À la fin de sa vie utile ce produit ne doit pas être jeté avec les déchets ménagers mais doit être apporté à un centre de collecte et de recyclage des équipements électriques et élec...

Page 97: ... uscita RF dBm 0 32 Lunghezza del cavo USB mm 980 1 Descrizione generale Il manuale ha lo scopo di aiutare nell uso sicuro e affidabile Il prodotto è progettato e fabbricato rigorosamente secondo le specifiche tecniche utilizzando la tecnologia e i componenti più recenti e mantenendo i più alti standard di qualità PRIMA DI PROCEDERE AL LAVORO BISOGNA ACCURATAMENTE LEGGERE E COMPRENDERE QUESTO MANU...

Page 98: ... possono differire in alcuni dettagli dall aspetto reale del prodotto Il manuale originale è la versione tedesca Le altre versioni linguistiche sono delle traduzioni dal tedesco 2 Sicurezza di utilizzo ATTENZIONE Leggere tutte le avvertenze relative alla sicurezza e tutte le istruzioni La mancata osservazione delle avvertenze e delle istruzioni può causare danni fisici o morte Il termine dispositi...

Page 99: ...tilizzare la macchina k L apparecchio non è un giocattolo I bambini non devono giocare con l apparecchio l Non utilizzare l apparecchio se l interruttore ON OFF non funziona bene non si accende e non si spegne m Tenere l apparecchio inutilizzata fuori dalla portata dei bambini e di chiunque non abbia familiarità con l apparecchio o con questo manuale Le apparecchiature elettriche sono pericolose n...

Page 100: ...olio bordi taglienti o parti in movimento I cavi danneggiati o aggrovigliati aumentano il rischio di scosse elettriche c Non utilizzare l alimentatore se il cavo è danneggiato o mostra chiari segni di usura Un cavo danneggiato deve essere sostituito da un elettricista qualificato o dal centro di assistenza del produttore d Per evitare scosse elettriche non immergere il cavo la spina o il dispositi...

Page 101: ...sata per raccogliere i dati meteorologici cioè la temperatura e l umidità L utente è responsabile di qualsiasi danno derivante da un uso improprio 3 1 Descrizione del dispositivo 3 1 1 Stazione principale 1 Display 2 Tasti funzione ...

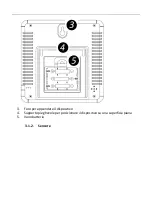
Page 102: ...3 Foro per appendere il dispositivo 4 Supporto pieghevole per posizionare il dispositivo su una superficie piana 5 Vano batteria 3 1 2 Sensore ...

Page 103: ... del canale di trasmissione del segnale alla stazione principale il set contiene 3 sensori ognuno di loro deve essere impostato su un canale diverso 1 2 e 3 in modo che la stazione possa ricevere il segnale dai tre sensori 5 Vano batteria In dotazione c è anche un cavo USB 3 1 3 Descrizione del display della stazione principale ...

Page 104: ...funzione rileva cambiamenti improvvisi nelle misurazioni dei parametri Un cambiamento nella registrazione delle misurazioni previste ha luogo quando la temperatura cambia di min 1o e l umidità di min 3 rispetto all ultima misurazione 4 Umidità interna 5 Indicatore del canale 2 6 Indicatore del canale 3 7 Orologio 8 Indicazione dell ora del giorno il formato 12 o 24 ore può essere selezionato nelle...

Page 105: ... 18 Temperatura interna 3 2 Predisposizione al lavoro POSIZIONAMENTO DELL APPARECCHIO L apparecchio deve essere posizionato in modo da garantire una buona circolazione dell aria Si consiglia di installare i sensori in luoghi diversi Tenere l apparecchio lontano da qualsiasi superficie calda Tenere sempre l apparecchio fuori dalla portata dei bambini e delle persone con funzioni mentali sensoriali ...

Page 106: ...mpeggerà di 3 colori arancione rosso e bianco consecutivamente per 3 secondi 5 All avvio il display adotterà un interfaccia di avvio contenente i dati di fabbrica Indicherà la temperatura e l umidità attuali della stanza in cui si trova dietro l icona IN 1 Il dispositivo inizierà la registrazione di 3 minuti del segnale RF e la ricezione dei canali 1 2 3 che è segnalato dall icona ...

Page 107: ...ire le batterie rispettando la polarità 9 Chiudere la camera 10 Il display mostrerà tutte le icone per 3 secondi 11 Una volta regolato il display indicherà la temperatura e l umidità attuali della stanza in cui si trova e il canale con cui trasmette il segnale 12 Utilizzare l interruttore sul retro per impostare l unità di misura della temperatura impostazione predefinita o C ...

Page 108: ...one attuale Una singola pressione di ognuno di questi pulsanti cambia il valore del parametro di 0 1o Per aumentare o diminuire il valore in modo significativo ad esempio di diversi gradi tenere premuto il pulsante il valore cambierà di 8o al secondo c Per confermare premere il pulsante TIME SET 12 24 4 Calibrazione dell umidità a Entrare nel menu di calibrazione e premere i pulsanti TIME SET 12 2...

Page 109: ...o modifiche significative al valore 4 Per confermare i valori e passare al parametro successivo premere il pulsante TIME SET 12 24 5 Dopo 8 secondi di inattività il dispositivo uscirà automaticamente dal menu delle impostazioni 4 3 4 Cambio di unità di temperatura 1 Premere il pulsante DOWN C F nella modalità di funzionamento standard 2 Verrà visualizzata una delle unità o C o o F 3 Premere nuovam...

Page 110: ...un momento 4 I seguenti parametri saranno visualizzati in sequenza limite superiore del valore della temperatura display retroilluminato in arancione limite inferiore del valore della temperatura display retroilluminato in rosso limite superiore del valore di umidità display retroilluminato in arancione limite inferiore del valore di umidità display retroilluminato in rosso uscita 5 Utilizzare i p...

Page 111: ...nto standard Il display mostrerà CH1 Premere il pulsante CHANNEL fino a quando il display visualizza nuovamente il messaggio corrispondente al canale desiderato ordine dei messaggi visualizzati CH1 CH2 CH3 IN CH1 b Premere il pulsante ALERT c Verrà visualizzata l opzione per attivare disattivare gli avvisi di misurazione d Utilizzare il pulsante ALERT per selezionare l opzione desiderata e Premere...

Page 112: ...aranno visualizzati 4 3 7 Visualizzazione dei valori minimi massimi 1 Premere il pulsante UP MAX MIN nella modalità di funzionamento standard 2 Verranno visualizzati i valori minimi e massimi registrati della temperatura e dell umidità 3 Per cancellare questi valori tenere premuto il pulsante UP MAX MIN 3 3 8 Ricerca del segnale del sensore ...

Page 113: ...53 secondi per il canale 3 ogni 56 secondi 3 3 9 Intervallo di misura Misura Gamma Precisione di misura Precisione di lettura Temperatura interna 0 50o C 0 40o C 1 5 0 1 Temperatura esterna 50 70o C 0 40o C 10 0o C 1 0 1 40 50o C 30 10o C 1 5 50 70o C 50 30o C 2 Umidità interna 20 99 40 80 5 1 30 40 80 90 8 20 30 90 99 10 Umidità esterna 20 99 40 80 5 1 30 40 80 90 8 20 30 90 99 10 Se la misurazio...

Page 114: ...buone condizioni di funzionamento e che non si siano verificati danni e Pulire con un panno non abrasivo f Non lasciare la batteria nel dispositivo quando non viene utilizzato per un lungo periodo g Non utilizzare oggetti appuntiti e o metallici ad esempio una spazzola metallica o una spatola metallica per la pulizia poiché potrebbero danneggiare la superficie del materiale dell apparecchio h Non ...

Page 115: ...eve essere portato in un punto di raccolta per il riciclaggio di apparecchiature elettriche ed elettroniche Ne informa il simbolo collocato sul prodotto sulle istruzioni per l uso o sull imballaggio Le materie plastiche utilizzate nel dispositivo sono adatte al riutilizzo secondo la loro etichettatura Potete dare un contributo importante alla protezione del nostro ambiente riutilizzando materiali ...

Page 116: ...s de medición de la temperatura o C o F Frecuencia MHz 433 Potencia de salida RF dBm 0 32 Longitud del cable USB mm 980 1 Descripción general Este manual tiene como objeto el uso seguro y fiable de la herramienta El producto ha sido desarrollado y fabricado siguiendo rigurosamente las prescripciones técnicas utilizando la tecnología y los componentes más avanzados y manteniendo el máximo nivel de ...

Page 117: ...que describe una situación particular señal de advertencia general El equipo con la clase de aislamiento III ADVERTENCIA Las imágenes de este manual tienen carácter meramente explicativo y los detalles de su producto pueden ser diferentes El manual original es la versión en idioma alemán Las versiones en otros idiomas son traducciones del alemán 2 Seguridad de uso ADVERTENCIA Leer todas las advert...

Page 118: ...s mentales sensoriales o intelectuales reducidas o con falta de experiencia y o conocimientos a menos que estén supervisadas por una persona responsable de su seguridad o que ésta les haya dado instrucciones cómo operar el equipo k El dispositivo no es un juguete Los niños deben ser supervisados para tener la seguridad de que no jueguen con el aparato l No utilice el dispositivo si el interruptor ...

Page 119: ...na toma de corriente b No utilice el cable de alimentación de forma incorrecta Nunca manipular el equipo ni sacar la clavija tirando del cable Mantener el cable alejado de las fuentes de calor aceites cantos cortantes o piezas móviles Los cables dañados o enredados aumentan el riesgo de descarga eléctrica c No utilice la fuente de alimentación si el cable está dañado o presenta signos evidentes de...

Page 120: ...tos relativos a tiempo es decir la temperatura y la humedad del aire En caso de cualquier daño producido por el uso distinto al uso previsto de la herramienta será responsable el usuario 3 1 Descripción del dispositivo 3 1 1 Estación principal 1 Pantalla 2 Botones de función ...

Page 121: ...3 Orificio en el soporte que permite colgar el equipo 4 Soporte plegable que permite colocar el equipo 5 Compartimento para baterías 3 1 2 Sensor ...

Page 122: ...ambiar el canal de emisión de la señal a la estación principal el conjunto incluye 3 sensores cada uno de ellos debe configurarse a otro canal 1 2 y 3 para que la estación pueda recibir la señal de los 3 sensores 5 Compartimento para baterías El conjunto incluye también el cable USB 3 1 3 Descripción de la pantalla de la estación principal ...

Page 123: ...mbios repentinos en la medición de los parámetros El cambio del registro de las mediciones previstas se produce cuando la temperatura ha variado mín 1o y la humedad mín 3 en relación a la última medición 4 Lectura de la medición de la humedad del aire dentro de la habitación 5 Indicador del canal 2 6 Indicador del canal 3 7 Reloj 8 Lectura de la franja del día en la configuración se puede elegir e...

Page 124: ...la medición de temperatura dentro de la habitación 3 2 Preparación para el trabajo LUGAR DE USO El dispositivo debe estar situado de manera que garantice una buena circulación de aire Se recomienda colocar los sensores en diferentes lugares Mantenga el equipo alejado de cualquier superficie caliente El dispositivo debe utilizarse siempre fuera del alcance de los niños y las personas con reducida c...

Page 125: ...rpadear en 3 colores consecutivamente naranja rojo y blanco durante 3 segundos 5 Después de la activación la pantalla adoptará el interfaz inicial que contiene configuración de fabrica Indicará la temperatura actual y la humedad del aire en la habitación donde se encuentra detrás del icono IN 1 El equipo empezará el registro de 3 minutos de la señal RF y la recepción de los canales 1 2 3 lo que in...

Page 126: ...s pilas asegurándose de que la polaridad 9 Cierre la cámara 10 Durante 3 segundos la pantalla mostrará todos los iconos 11 Una vez ajustado la pantalla indicará la temperatura actual y la humedad del aire en la habitación y el canal a través del cual se transmite la señal 12 Con el interruptor en la parte posterior se puede ajustar la unidad de medición de la temperatura por defecto o C ...

Page 127: ...N y DOWN C F Una sola pulsación de cada uno de estos botones causará una variación de 0 1o del valor de parámetro Para aumentar o disminuir significativamente el valor p ej en varios grados debe mantenerse pulsado dicho botón el valor cambiará 8º en un segundo c Para confirmar pulsar el botón TIME SET 12 24 4 Calibración de la humedad a Después de entrar en el menú de calibración pulsar el botón T...

Page 128: ...recomienda mantener pulsado el botón 4 Para confirmar los valores y pasar al siguiente parámetro pulsar el botón TIME SET 12 24 5 Después de 8 segundos de inactividad el equipo automáticamente saldrá de menú de ajustes 4 3 4 Cambio de la unidad de temperatura 1 En el modo de funcionamiento estándar pulsar el botón DOWN C F 2 Se mostrará una de las unidades o C o o F 3 Para elegir la unidad deseada...

Page 129: ...ite superior del valor de la temperatura iluminación de la pantalla en naranja limite inferior del valor de la temperatura iluminación de la pantalla en rojo limite superior del valor de la humedad iluminación de la pantalla en naranja limite inferior del valor de la humedad iluminación de la pantalla en rojo salida 5 Ajustar el valor de los límites usando los botones UP MAX MIN y DOWN C F Una sol...

Page 130: ...NNEL hasta que aparezca de nuevo en la pantalla un mensaje correspondiente al canal deseado orden de visualización de los mensajes CH1 CH2 CH3 IN CH1 b Pulsar el botón ALERT c Se mostrará la opción de activación desactivación de las advertencias relativas a las mediciones d Elegir la opción deseada usando el botón ALERT e Pulsar el botón CHANNEL para pasar al siguiente canal y de la misma manera a...

Page 131: ...lores mínimos máximos 1 En el modo de funcionamiento estándar pulsar el botón UP MAX MIN 2 Se mostrarán los valores mínimos y máximos recordados de la temperatura y la humedad 3 Para limpiar estos valores pulsar el botón UP MAX MIN 3 3 8 Búsqueda de la señal del sensor 1 Si la estación principal pierde la señal de unos de los sensores en la pantalla aparecerá un mensaje ...

Page 132: ...mediciones Medición Ámbito Exactitud de medición Precisión de la lectura Temperatura en el interior 0 50o C 0 40o C 1 5 0 1 Temperatura exterior 50 70o C 0 40o C 10 0o C 1 0 1 40 50o C 30 10o C 1 5 50 70o C 50 30o C 2 Humedad en el interior 20 99 40 80 5 1 30 40 80 90 8 20 30 90 99 10 Humedad en el exterior 20 99 40 80 5 1 30 40 80 90 8 20 30 90 99 10 Si la medición exceda dicho rango la pantalla ...

Page 133: ... de funcionamiento y de que no se ha producido ningún daño e Limpiar con un paño suave f No dejar las pilas en el dispositivo cuando no se va a utilizar durante un periodo prolongado g No utilizar objetos afilados y o metálicos por ejemplo un cepillo de alambre o una cuchara metálica para la limpieza ya que pueden dañar la superficie del material del equipo h No limpie el equipo con sustancias áci...

Page 134: ...unto de recogida para el reciclaje de aparatos eléctricos y electrónicos Lo informa el símbolo ubicado en el producto en las instrucciones de uso o en el embalaje Los materiales utilizados en este equipo son reciclables de acuerdo con su marcado Se contribuye de forma importante a la protección del medio ambiente reutilizando reciclando o eliminando de otra forma los equipos usados La administraci...

Page 135: ...dBm 0 32 USB kábel hossza mm 980 1 Általános leírás A használati utasítás célja a biztonságos és megbízható használat elősegítése A termék szigorúan a műszaki előírásoknak megfelelően a legújabb műszaki megoldások és alkatrészek felhasználásával a legmagasabb minőségi előírások betartásával lett tervezve és legyártva A MUNKA MEGKEZDÉSE ELŐTT ALAPOSAN ÉRTŐ OLVASÁSSAL TANULMÁNYOZZA A JELEN HASZNÁLAT...

Page 136: ...trációi szemléltető jellegűek és bizonyos részletekben eltérhetnek a tényleges terméktől A használati utasítás eredeti változata a német verzió A többi nyelvi verzió az eredeti német fordítása 2 Biztonságos üzemeltetés VIGYÁZAT Olvassa el az összes biztonsági figyelmeztetést és a teljes használati utasítást A figyelmeztetések és utasítások figyelmen kívül hagyása súlyos sérüléseket vagy halálos ba...

Page 137: ...ekkel nem rendelkező személyek kivéve ha egy a biztonságukért felelős személy felügyeli munkájukat vagy elmagyarázta hogy hogyan kell kezelni a készüléket k A készülék nem játék Nem szabad megengedni hogy gyermekek játszanak a készülékkel l Ne használja a készüléket ha a BE KI kapcsoló nem működik megfelelően nem kapcsol be és ki m Az épp használaton kívüli készüléket tartsa távol gyermekektől és ...

Page 138: ...oha ne használja a készülék felemelésére vagy a konnektorból való kihúzásra A kábelt tartsa távol hőtől olajtól éles szegélyektől vagy mozgó alkatrészektől A sérült vagy összegabalyodott vezetékek növelik az áramütés kockázatát c Tilos a készülék használata ha a tápkábel megsérült vagy kopási jelek észlelhetők A sérült tápkábelt szakképzett villanyszerelővel vagy a gyártó szervizével kell kicserél...

Page 139: ...rási adatok azaz a levegő hőmérsékleti és páratartalmi adatainak gyűjtésére szolgál A felhasználó felelős a nem rendeltetésszerű használatból eredő bármilyen károkért 3 1 A készülék leírása 3 1 1 Főállomás 1 Kijelző 2 Funkciógombok ...

Page 140: ...3 A készülék felfüggesztését lehetővé tévő akasztó 4 Kihajtható tartóelem amely lehetővé teszi a készülék felhelyezését 5 Elemtartó 3 1 2 Érzékelő ...

Page 141: ... Kapcsoló a főállomásra történő jelátvitel csatornájának megváltoztatásához a készlet 3 érzékelőt tartalmaz mindegyiket más csatornára kell állítani 1 2 és 3 hogy az állomás három érzékelő jelét tudja fogadni 5 Elemtartó A készlet USB kábelt is tartalmaz 3 1 3 A főállomás kijelzőjének leírása ...

Page 142: ...keli a paraméterek mérésének hirtelen változásait A tervezett mérések rögzítése akkor változik meg ha a hőmérséklet min 1 kal a páratartalom pedig min 3 kal változik az utolsó méréshez képest 4 A levegő páratartalmának leolvasása a helyiségben 5 2 csatornajelző 6 3 csatornajelző 7 Óra 8 Leolvasott eredmény nap közben a beállításokban kiválaszthatja a 12 órás vagy a 24 órás formátumot leírás lent 9...

Page 143: ...elyiség hőmérsékletének leolvasása 3 2 Beüzemelés előtt A KÉSZÜLÉK ELHELYEZÉSE A készüléket úgy kell elhelyezni hogy a jó légáramlás biztosítva legyen Javasoljuk hogy az érzékelőket különböző helyeken helyezze el Tartsa távol a készüléket bármilyen forró felülettől A készüléket mindig gyermekektől és csökkent szellemi érzékszervi és mentális funkciókkal rendelkező személyektől elzárva kell használ...

Page 144: ...sodpercig villogni kezd 3 színben narancs piros és fehér egymás után 5 A rendszerindítás után a kijelző a kezdeti felület gyári beállításait veszi alapul Megjeleníti az aktuális hőmérsékletet és a levegő páratartalmát abban a helyiségben amelyben található az IN ikon mögött 1 A készülék elindítja az RF jel 3 perces rögzítését és az 1 2 3 csatornák vételét amit a jelez ...

Page 145: ...beállítás után a kijelző mutatja a helyiség aktuális hőmérsékletét és páratartalmát valamint azt a csatornát amelyen keresztül a jelet továbbítja 12 A hátoldalon található kapcsolóval beállíthatja a hőmérséklet mértékegységét alapbeállítás o C 13 A kijelzőn villogó LED ikon jelzi hogy a jel továbbítása folyamatban van Az ikon 50 másodpercenként villog az 1 csatorna esetében 53 másodpercenként a 2 ...

Page 146: ... néhány fokkal történő növeléséhez vagy csökkentéséhez tartsa lenyomva a gombot az érték egy másodpercen belül 8o kal változik c A megerősítéshez nyomja meg a TIME SET 12 24 gombot 4 Nedvesség kalibrálása a A kalibrációs menübe lépés után nyomja meg a TIME SET 12 24 és az DOWN C F gombokat d Az UP MAX MIN és a DOWN C F gombokkal állítsa be az aktuális mérési értéket Ezen gombok mindegyikének egysz...

Page 147: ...raméterre lépéshez nyomja meg a TIME SET 12 24 gombot 5 8 másodperc inaktivitás után a készülék automatikusan kilép a beállítások menüből 4 3 4 A hőmérséklet mértékegységének megváltoztatása 1 A készülék normál üzemmódjában nyomja meg a DOWN C F gombot 2 Megjelenik az o C vagy o F mértékegységek egyike 3 Nyomja meg ismét a DOWN C F gombot a kívánt mértékegység kiválasztásához 4 Várjon egy ideig am...

Page 148: ...ágítás a hőmérsékleti érték alsó határa piros háttérvilágítás a páratartalom felső határa narancssárga háttérvilágítás a páratartalom alsó határa piros háttérvilágítás kimenet 5 Az UP MAX MIN és a DOWN C F gombokkal állítsa be a határértékeket Egyszeri megnyomással 0 1o vagy 1 Az érték jelentős változtatása érdekében javasolt a kívánt gombot lenyomva tartani másodpercenként 0 8o vagy 8 os változás...

Page 149: ...ot amíg a kívánt csatornának megfelelő üzenet újra meg nem jelenik a kijelzőn a megjelenített üzenetek sorrendje CH1 CH2 CH3 IN CH1 b Nyomja meg az ALERT gombot c Megjelenik a mérési riasztások be és kikapcsolásának lehetősége d Az ALERT gombbal válassza ki a kívánt opciót e Nyomja meg a CHANNEL gombot a következő csatornára lépéshez Az összes érzékelő riasztásának aktiválásához deaktiválásához sz...

Page 150: ...gjelenítése 1 A készülék normál üzemmódjában nyomja meg az UP MAX MIN gombot 2 A legalacsonyabb és legmagasabb tárolt hőmérséklet és páratartalom értékek jelennek meg 3 Ezen értékek törléséhez tartsa lenyomva az UP MAX MIN gombot 3 3 8 Az érzékelő jelének keresése 1 Ha a főállomás elveszíti az érzékelő jelét a kijelzőn jelenik meg 2 Ebben az esetben nyomja meg a CHANNEL gombot ...

Page 151: ...s Tartomány A mérés pontossága A leolvasás pontossága A helyiség hőmérséklete 0 50o C 0 40o C 1 5 0 1 Kültéri hőmérséklet 50 70o C 0 40o C 10 0o C 1 0 1 40 50o C 30 10o C 1 5 50 70o C 50 30o C 2 A helyiség belső hőmérséklete 20 99 40 80 5 1 30 40 80 90 8 20 30 90 99 10 Kültéri páratartalom 20 99 40 80 5 1 30 40 80 90 8 20 30 90 99 10 Ha a mérési érték meghaladja a megadott tartományt a kijelzőn a ...

Page 152: ...k e e A tisztításhoz puha rongyot vagy szivacsot kell használni f Ne hagyja az elemeket a készülékben ha hosszabb ideig nem használja g Ne használjon éles és vagy fém eszközöket pl drótkefét vagy fém spatulát a tisztításhoz mert azok sérülést okozhatnak a készülék felületét bevonó anyagon h Ne tisztítsa a készüléket maró anyagokkal orvosi tisztítószerekkel hígítókkal üzemanyaggal olajokkal vagy má...

Page 153: ...ahasznosításával foglalkozó gyűjtőhelyen kell leadni Ezt a terméken a használati útmutatóban vagy a csomagoláson található szimbólum is jelzi A készülékben használt anyagok a jelölésüknek megfelelően újrahasznosíthatóak Az újrafelhasználással anyagok újrahasznosításával vagy a használt eszközök más módon történő használatával jelentős mértékben hozzájárul környezetünk védelméhez A helyi hatóságokn...

Page 154: ...er beregnet til at hjælpe med sikker og pålidelig brug Dette produkt er designet og produceret strengt i henhold til tekniske indikationer ved hjælp af de nyeste teknologier og komponenter samt opretholdelse af de højeste kvalitetsstandarder LÆS BETJENINGSVEJLEDNINGEN OMHYGGELIGT INDEN DU STARTER MED AT ARBEJDE MED APPARATET For at sikre en lang og pålidelig drift af apparatet er det nødvendigt at...

Page 155: ...ra det faktiske produkt Den originale version af betjeningsvejledningen er på tysk De andre sprogversioner er oversættelser fra tysk 2 Brugssikkerhed OBS Læs alle sikkerhedsadvarsler og alle instruktioner Manglende overholdelse af advarslerne og instruktionerne kan resultere i alvorlig personskade eller død Udtrykket apparat eller produkt i advarslerne og betjeningsvejledningen refererer til VEJRS...

Page 156: ...apparatet hvis ON OFF kontakten ikke fungerer korrekt den kan ikke tænde eller slukke apparatet m Opbevar inaktive apparater uden for børns rækkevidde og personer der ikke kender enheden eller denne betjeningsvejledning Apparaterne er farlige i hænderne på uerfarne brugere n Hold apparatet i god teknisk stand o Opbevar apparatet utilgængeligt for børn p Reparation og vedligeholdelse af apparater b...

Page 157: ...egn på slid En beskadiget netledning bør udskiftes af en autoriseret elektriker eller producentens kundeservice d For at undgå elektrisk stød må netledningen stikket eller apparatet ikke nedsænkes i vand eller anden væske under opladning e Overskrid ikke den anbefalede elektriske spænding f Det anbefales at sensorerne holdes inden for 30 m fra basestationen hvilket sikrer den bedste signalmodtagel...

Page 158: ...3 1 Beskrivelse af apparatet 3 1 1 Hovedstation 1 Display 2 Funktionsknapper ...

Page 159: ...3 Hul til håndtag til ophængning af enheden 4 En udfoldelig støtte der giver dig mulighed for at sætte enheden op 5 Batterirum 3 1 2 Sensor ...

Page 160: ...kifter til ændring af kanalen for at sende signalet til hovedstationen sættet indeholder 3 sensorer hver af dem skal indstilles til en anden kanal 1 2 og 3 så stationen kan modtage signalet fra tre sensorer 5 Batterirum Sættet indeholder også et USB kabel 3 1 3 Beskrivelse af displayet på hovedstationen ...

Page 161: ...n registrerer pludselige ændringer i måling af parametre Registreringen af de påtænkte målinger ændres når temperaturen ændres med min 1o og luftfugtigheden med min 3 i forhold til sidste måling 4 Aflæsning af luftfugtigheden inde i rummet 5 Kanalindikator 2 6 Kanalindikator 3 7 Ur 8 Aflæsning af tid på dagen i indstillingerne kan du vælge 12 timers eller 24 timers format beskrivelse nedenfor 9 Læ...

Page 162: ...deni 18 Aflæsning af luftfugtigheden inde i rummet 3 2 Forberedelse til arbejde APPARATETS PLACERING Apparatet skal placeres på en måde der sikrer god luftcirkulation Det anbefales at placere sensorerne forskellige steder Hold apparatet væk fra varme overflader Brug altid apparatet uden for rækkevidde af børn og mennesker med nedsatte mentale sensoriske og mentale funktioner Det anbefales at føler...

Page 163: ... hinanden følgende farver orange rød og hvid i 3 sekunder 5 Efter opstart vil displayet antage den indledende grænseflade der indeholder fabriksdata Den vil vise den aktuelle temperatur og luftfugtighed i det rum hvor den er placeret bag IN ikonet 1 Enheden starter en 3 minutters optagelse af RF signalet og modtagelsen af kanalerne 1 2 3 hvilket er signaleret af ikonet ...

Page 164: ...under 11 Efter justering vil displayet vise den aktuelle temperatur og luftfugtighed i det rum hvor det er placeret og den kanal hvorigennem det sender signalet 12 Med kontakten på bagsiden kan du indstille enheden for temperaturmåling standardindstilling o C 13 Et blinkende LED ikon på displayet betyder at signalet transmitteres Ikonet blinker hvert 50 sekund for kanal 1 hvert 53 for kanal 2 og h...

Page 165: ...n værdi markant for eksempel med et par grader skal du holde knappen nede værdien ændres med 8o inden for et sekund c Tryk på TIME SET 12 24 knappen for at bekræfte 4 Fugtkalibrering a Når du er kommet ind i kalibreringsmenuen skal du trykke på knapperne TIME SET 12 24 og UP d Brug knapperne UP MAX MIN og DOWN C F til at indstille den aktuelle måleværdi Et enkelt tryk på hver af disse knapper vil ...

Page 166: ...T 12 24 5 Efter 8 sekunders inaktivitet forlader enheden automatisk indstillingsmenuen 4 3 4 Ændring af temperaturenhed 1 I enhedens standarddriftstilstand skal du trykke på knappen DOWN C F 2 En af enhederne o C eller o F vil blive vist 3 Tryk på knappen DOWN C F igen for at vælge den ønskede enhed 4 Vent et stykke tid indtil enheden automatisk forlader menuen 4 3 5 Skift tidsformat 1 I enhedens ...

Page 167: ...nedre grænse for fugtighedsværdien displayets baggrundslys i rødt udgang 5 Brug knapperne UP MAX MIN og DOWN C F til at justere grænseværdien Et enkelt tryk vil ændre 0 1o eller 1 For at indføre væsentlige ændringer i værdien anbefales det at holde den ønskede knap nede ændres med 0 8o eller 8 pr sekund 6 Når målingen overstiger den indstillede grænse vil enheden fremhæve den givne farve orange el...

Page 168: ...en c Du vil blive præsenteret for muligheden for at aktivere deaktivere målealarmerne d Brug ALERT knappen for at vælge den ønskede indstilling e Tryk på knappen CHANNEL for at gå til næste kanal og aktivere deaktivere alarmerne for alle sensorer på samme måde f For at aktivere deaktivere advarselsfunktionen for alle kanaler på samme tid ved at slette grænseværdierne skal du trykke på knappen ALER...

Page 169: ...rsignal vil displayet vise 2 I dette tilfælde skal du trykke på CHANNEL knappen 3 Kanalnummeret på den sensor hvis signal går tabt begynder at blinke på displayet 4 Hold CHANNEL knappen nede 5 Ikonet vises på displayet 6 Hvis sensorsignalet ikke modtages efter 3 minutter gentager enheden søgningen indtil den er vellykket hvert 50 sekund for kanal 1 hvert 53 sekund for kanal 2 hvert 56 sekund for k...

Page 170: ...baggrundsbelysningen 3 I strømsparetilstand bliver displayet tomt efter 8 sekunders inaktivitet Uden for energibesparende tilstand er displayet konstant oplyst 3 4 Rengøring og vedligeholdelse a Brug kun ikke ætsende midler til at rengøre overfladen b Opbevar apparatet på et køligt og tørt sted beskyttet mod fugt og direkte sollys c Det er forbudt at sprøjte apparatet med en vandstrøm eller nedsæn...

Page 171: ...yret med AAA 1 5V batterier Adskil brugte batterier fra apparatet på samme måde som ved deres samling Returner batterierne til det sted der er ansvarlig for bortskaffelsen af disse materialer 3 4 2 Bortskaffelse af brugte udstyr Dette produkt må ikke bortskaffes sammen med almindeligt husholdningsaffald ved slutningen af dets levetid men skal bringes til et indsamlingssted for genbrug af elektrisk...

Page 172: ...Verfügung stehenden Möglichkeiten der Rückgabe oder Sammlung von Altgeräten 1 RICHTLINIE 2002 96 EG DES EUROPÄISCHEN PARLAMENTS UND DES RATES ÜBER ELEKTRO UND ELEKTRONIK ALTGERÄTE 2 Gesetz über das Inverkehrbringen die Rücknahme und die umweltverträgliche Entsorgung von Elektro und Elektronikgeräten Elektro und Elektronikgerätegesetz ElektroG Umwelt und Entsorgungshinweise Utylizacja produktu Prod...

Reviews: