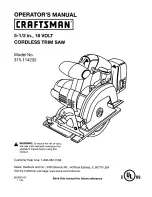
background image

Owner’s Manual

9

9. 

Angle Locking knob 

10. 

Spindle Lock

11. 

Brush Cap

12. 

Front Handle

13. 

Trigger Switch

14. 

Lock-off Button

15. 

Depth Locking Lever 

Check for damage to the tool, parts and accessories which may have occurred during transportation. 

Take some time to read this manual carefully and understand all the content prior to assembly and 

operation.

CAUTION! 

Always ensure that the tool is switched off and unplugged from the mains supply before assembly. 

Changing the Blade

1. 

Place the saw on a side of a flat surface.

2. 

Rotate the saw blade by hand while depressing the Spindle Lock Button until the blade is locked, 


Turn the blade clamp screw use the wrench provided in anti-clockwise direction. 

3. 

Remove the blade clamp screw, outer flange, and washer.

4. 

Lift the lower guard by using the lower guard lever and remove the blade. 

5. 

Clean the saw blade flanges, and then mount the new saw blade onto the spindle, which is 


against the inner flange. 

6. 

Make sure the saw teeth and arrow on the blade is to the same direction as the arrow on the 


lower guard.

7. 

Reinstall the outer flange, washer and tighten the blade clamp screw.

8. 

Make sure the saw blade can run freely by turning the blade by hand.

ASSEMBLY

                                                                                              Fig. 2 

Summary of Contents for SP-PT211

Page 1: ......

Page 2: ...IONS IN THIS MANUAL COULD RESULT IN PERSONAL INJURY PROPERTY DAMAGE AND OR VOIDING OF YOUR WARRANTY STEELE WILL NOT BE LIABLE FOR ANY DAMAGE BECAUSE OF FAILURE TO FOLLOW THESE INSTRUCTIONS GENERAL SAF...

Page 3: ...plug in any way Do not use any adapter plugs with earthed grounded power tools Unmodified plugs and matching outlets will reduce risk of electric shock 2 Avoid body contact with grounded surfaces such...

Page 4: ...left attached to a rotating part of the tool may result in personal injury 5 Do not overreach Keep proper footing and balance at all times Proper footing and balance enable better control of the tool...

Page 5: ...nual Use of unauthorized parts or failure to follow maintenance instructions may create a risk of electric shock or injury Warning Keep hands away from the cutting area and blade NEVER place your hand...

Page 6: ...onal injury NEVER hold the pieces for cutting in your hands or across your legs 9 Making a Pocket Cut into existing walls or other blind area is dangerous the protruding blade may cut live wires or ob...

Page 7: ...ist kickback forces Position your body to either side of the blade but not in line with the blade Kickback could cause the saw to jump backwards but kickback force can be controlled by the operator if...

Page 8: ...he operation of the lower guard spring If the guard and the spring are not operating properly they must be serviced before use Lower guard may operate sluggishly due to damaged parts gummy deposits or...

Page 9: ...f a flat surface 2 Rotate the saw blade by hand while depressing the Spindle Lock Button until the blade is locked Turn the blade clamp screw use the wrench provided in anti clockwise direction 3 Remo...

Page 10: ...ned 1 Connect the plug to the power supply 2 To start the tool depress the lock off button and pull the switch trigger 3 Release the trigger to turn the tool off Depth Adjustment 1 Loosen the depth ad...

Page 11: ...e on the workpiece For precise cutting always make a trial cut before carrying out operation Pocket Cut 1 Disconnect the plug from the power supply before making any adjustments Set the depth adjustme...

Page 12: ...pection or maintenance Regularly clean the tool s air vents with compressed dry air do not attempt to clean by inserting pointed objects through openings CAUTION Certain cleaning agents and solvents m...

Page 13: ...s Manual 13 Model SP PT211 M1Y 185X Voltage 120V 60Hz Rated Power 10 A Max Cutting Depth 90 2 1 2 65mm 45 1 3 4 43mm No Load Speed 5000 rpm Blade Size 7 3 x0 8 x24 teeth 185mm 20mm 24 teeth SPECIFICA...

Page 14: ...with regard to this limited warranty shall be final This warranty gives you specific legal rights and you may also have other rights which vary from state to state RESPONSIBILITY OF ORIGINAL PURCHASER...

Page 15: ...costs Expendable parts or accessories supplied with the product which are expected to become inoperative or unusable after a reasonable period of use Merchandise sold by STEELE which has been manufact...

Reviews: