Coding:
(...NS series only)
There are a maximum of 6 coding possibili-
ties, designated from
C1 to C6.
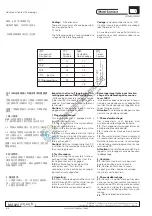
The following coding is recommended to
safeguard the interchangeability:
Codage:
(uniquement pour la série ...NS)
Il existe jusqu'à 6 possibilités de codage,
identifiées de C1 à C6.
En vue de garantir une parfaite interchan-
geabilité, nous vous recommandons le co-
dage suivant:
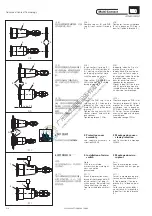
Important notice to Plugging and Un-
mating procedure of 16BV connectors:
Caution!
1. Plugging procedure:
1.1.
1.2.
1.3.
Caution!
3.1.
3.2.
- With coding connectors the plugs can on-
ly be inserted into sockets with the same
code no. (inscribed code is next to the whi-
te triangle).
A coded plug though, can be
plugged into an uncoded socket.
This plug connector is equipped with a
bayonet locking system.
the white marks on the male and fema-
le halves must be in line.
Push the two halves together until re-
sistance is met
Press in more deeply and twist to the
right. While twisting, relax the pressure so
that the latch engages automatically after
turning through 90°.
Rotation through more than 90°
in relation to the marked position initiates
the unmating process.
Press in more deeply and then twist to
the left through 90° until the white triangu-
lar marks are in line with each other.
Separate the male and female parts.
2. Test Procedure:
2.1.
2.2.
By twisting the connectors (without
pushing further together), test that the
locking mechanism is engaged.
By attempting to simply pull the
connectors apart, test that the
connection in this position can no longer
be mechanically separated.
3. Unmating:
Remarque importante pour l’embro-
chage et le débrochage des connec-
teurs 16BV:
Attention!
1. Phase d'embrochage:
1.1.
1.2.
1.3.
Attention!
2. Contrôle:
3. Phase de débrochage:
3.1.
3.2.
- Une broche codée ne pourra pas être con-
necteé à une douille avec un codage diffé-
rent (les No. de codage sont apposés à co-
té des triangles blancs)
Une broche codée peut se con-
necter à une douille non codée.
Ces connecteurs sont équipés d'un
système de verrouillage à baïonnette.
Il faut aligner les marquages blancs du
côté broche et du côté douille.
Connecter les deux parties jusqu’en
butée.
Pousser axialement tout en imprimant
un mouvement de rotation vers la droite.
Relâcher la pression axiale. Le verrouillage
s’enclenche automatiquement après une
rotation de 90°.
Une rotation de plus de 90° par
rapport au marquage amorce de nouveau
le débrochage.
Pousser l'une des deux parties dans
l'axe, tout en lui imprimant un mouvement
de rotation de 90° vers la gauche ou la droi-
te, de sorte à aligner les triangles blancs
(apposés sur les deux parties) sur un mê-
me axe.
Retirer la broche de la douille.
2.1.
Vérifier en tournant (sans pousser)
que le verrouillage est enclenché.
Vérifier en tirant que la liaison
ne peut plus être séparée mécanique-
ment dans cette position.
2.2.
Kodierung:
(Nur ...NS Typen)
Es gibt max. 6 Kodiermöglichkeiten, ge-
kennzeichnet mit C1 bis C6.
Folgende Kodierzuordnung wird zur Si-
cherstellung der Auswechselbarkeit emp-
fohlen:
Wichtige Hinweise zum Steck- und
Trennvorgang der Steckverbindung
16BV:
2.1.
2.2.
3.1.
3.2.
- bei kodierten Steckverbindungen sind
nur Stecker mit Buchsen steckbar, die die
gleiche Kodier-Nr. aufweisen. (Eingeprägt
unmittelbar beim weissen Dreieck).
Achtung!
Durch eine Drehbewegung (ohne Tie-
ferstecken) prüfen ob die Verriegelung im
Eingriff ist.
Durch Zug prüfen, ob die Verbindung
in dieser Position mechanisch nicht mehr
getrennt werden kann.
Die Steckverbindung axial tieferste-
cken, und gleichzeitig um 90° nach links
drehen, bis sich die weissen Markierun-
gen axial gegenüberstehen.
Stecker und Buchse trennen.
Ein kodierter Stecker kann aber
mit einer unkodierten Buchse gesteckt
werden.
Die Steckverbindung ist mit einer Bajo-
nettverriegelung ausgerüstet.
Weisse Markierungen von Stecker-
seite und Buchsenseite müssen axial ge-
genüberstehen.
Steckverbindung bis zum Anschlag zu-
sammenstecken
Mit axialem Druck tieferstecken und
gleichzeitig die Drehung nach rechts ein-
leiten. Während der Drehung den axialen
Druck wieder lösen, sodass nach 90° die
Verriegelung selbständig einrastet.
Bei einer Drehbewegung von
mehr als 90° wird der Trennvorgang wie-
der eingeleitet.
1. Steckvorgang:
1.1.
1.2.
1.3.
Vorsicht!
2. Prüfvorgang:
3. Trennvorgang:
4/4
Bezeichnung
Symbol
Kodier-Nr.
Farbe
Designation
Symbol
Coding-No.
Colour
Désignation
Symbole
No de codage
Couleur
Phase 1
L1
C1
Phase 2
L2
C2
Phase 3
L3
C3
Neutral/neutre
N
C4
Erde/ground/terre
PE
C5
-
-
C6
Durch Kunden festzulegen
T
o be defined by the customer
A définir par le client
MA023 (de_en_fr)
Änderungen vorbehalten / Subject to alterations / Modifications sous réserve
Copyright by Multi-Contact AG, Switzerland /
/ 07.2010 / Index g
Power
line
www.multi-contact.com
Advanced Contact Technology
编码:
(...
仅用于
NS
系列
)
᳔
6
⾡㓪ⷕˈৡ⿄Ң
C1
ࠄ
C6
。
ϟ߫㓪ⷕ㹿㤤⫼ҹᅝܼѦᤶ
名称
符号
编码
颜色
相
1
相
2
相
3
中线
接地
ৃ⬅ᅶ᠋ᣛᅮ
cn_en_fr
保留修改权利
ᇍѢ%9䖲఼ᦦܹᢨߎᑣⱘ䞡㽕ᦤ
⼎˖
ᏺ㓪ⷕⱘ䖲఼ᦦ༈া㛑ᦦܹᏺⳌৠ㓪ⷕ
োⱘᦦᑻᣛ⼎㓪ⷕⱑ㡆ϝ㾦ⱘᮕ䖍
⊼ᛣʽ
ᏺ㓪ⷕⱘᦦ༈ৃҹᦦܹϡᏺ㓪ⷕⱘ
ᦦᑻDŽ
ᦦܹᑣ˖
ℸᦦ༈䖲఼ᏺवᷧ䫕㋻㋏㒳DŽ
ᦦ༈ᦦᑻϞⱘⱑ㡆ᷛ䆄ᖙ乏ᇍ唤
ᇚᦦ༈ᦦᑻϔ䍋Ⳉ㟇ᅠܼ䌈ড়
㒻㓁䞠䖯ᑊেᮟ䕀DŽᮟ䕀䖛
Ёذℶᮑࡴय़ˈवᷧ䫕㋻㺙㕂ᮟ䕀㟇
ᑺᯊӮ㞾ࡼ䫕㋻ୂড়DŽ
⊼ᛣ
˖䕀䖛ᷛ䆄ԡ㕂䍙䖛ᑺᯊӮᓩ䍋ϡ㛑
䫕㋻ⱘᚙމDŽ
⌟䆩ᑣ˖
ᮟ䕀䖲఼ϡ㒻㓁䖯⹂䅸वᷧ䫕
㋻㋏㒳Ꮖ㒣䫕㋻ୂড়DŽ
ᇱ䆩ᢨᓔ䖲఼ˈ⹂䅸䖲఼ϡ㛑㹿
ᴎẄഄᢨᓔߚ⾏DŽ
ᢨߎᑣ˖
ᇚᦦ༈ܹϔѯˈৠᯊᎺᮟ䕀
ᑺˈⳈࠄⱑ㡆ϝ㾦ᔶᷛ䆄ᇍ唤DŽ
ᢨᓔᦦ༈ᦦᑻDŽ


