StarTech.com ST12MHDLAN Instruction Manual Download Page 12

Instruction Manual

9

3.  By default, each video device will have an IP address in the range of 169.254.x.x with 

a subnet mask of 255.255.0.0.

  Each transmitter and receiver must have an IP address in the same range, and have 

an identical subnet mask, as each other, and the tablet, smartphone or computer 

you have the software installed on.


For example:

 If your transmitter has an IP address of 

169.254.10.10

 with a subnet 

mask of 255.255.0.0.

  You must ensure the tablet, smartphone or computer you have the software 

installed on and each receiver has an IP address that starts with 

169.254.x.x 

(with a 

varying last two digits represented here by xx) and a subnet mask of 

255.255.0.0.


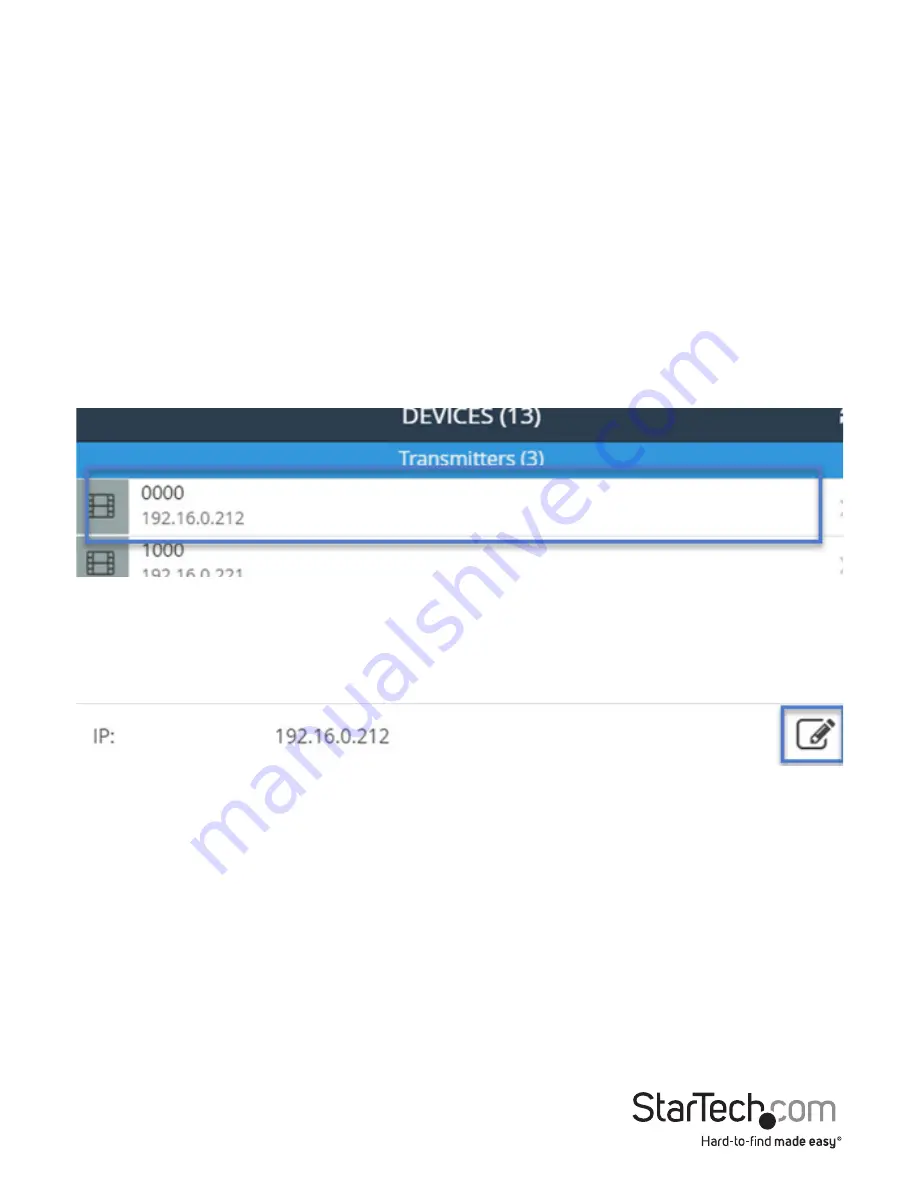
To adjust the IP address and subnet mask of your transmitter(s) and receiver(s):

     a.  Select the transmitter or receiver you’d like to adjust from the Devices tab.

     b.  Click the edit Icon listed in the IP address section.

     c.  Select 

Static IP

 and type an IP address and mask for the device. 

Summary of Contents for ST12MHDLAN

Page 1: ...w startech com ST12MHDLAN DE Bedienungsanleitung de startech com FR Guide de l utilisateur fr startech com ES Gu a del usuario es startech com IT Guida per l uso it startech com NL Gebruiksaanwijzing...

Page 2: ...FCC Rules Operation is subject to the following two conditions 1 This device may not cause harmful interference and 2 this device must accept any interference received including interference that may...

Page 3: ...Point to Point installation without Gigabit LAN network 5 Hardware Reset Procedure 6 Software Installation 7 Software operation 7 Connecting your transmitters and receivers to the software 7 Switching...

Page 4: ...tor Available AC electrical outlet for the Transmitter and each Receiver HDMI cable from for each display Gigabit Networking devices and cabling 2 x Foot Pad Set 2 x Power Adapters 1 x Instruction Man...

Page 5: ...n available AC electrical outlet 1 Determine where the local video source i e computer Blu ray Player will be located and set up the device 2 Determine where the remote display will be located and pla...

Page 6: ...y repeat steps for each additional Receiver Note The Dip Rotary Switch on the transmitter and each receiver connected to the network must be set in the same position for the devices to communicate 3 C...

Page 7: ...r to your network switch or router documentation to ensure IGMP snooping is supported and enabled 3 optional When adding additional Receiver Units ST12MHDLANRX Sold separately a run of Cat 5e 6 cable...

Page 8: ...rt on the Receiver Unit g Connect the provided Receiver Unit power supply Note The Dip Rotary Switch on the transmitter and Receiver connected must be set in the same position for the devices to commu...

Page 9: ...on the display a hardware reset can be performed on the Transmitter Unit or individual Receiver Units 1 Press the reset button for more than 3 seconds on the device using a pin point tool such as a ba...

Page 10: ...elow URL http www StarTech com ST12MHDLAN 2 Under the overview tab select the link for the store that corresponds with your device 3 Select the download or install option from store page 4 Your softwa...

Page 11: ...open on the Devices tab and will automatically search for transmitters and receivers on your network and list them within the Devices tab Note you can reinitiate the device search by selecting refres...

Page 12: ...address of 169 254 10 10 with a subnet mask of 255 255 0 0 You must ensure the tablet smartphone or computer you have the software installed on and each receiver has an IP address that starts with 169...

Page 13: ...Instruction Manual 10 Or Select DHCP and your network automatically assign an IP address and mask to for the device in the range of the rest of your network devices...

Page 14: ...beside them The transmitter that is currently selected for each receiver will be highlighted in yellow Note DHCP must be enabled on your network to automatically assign an IP address and mask in that...

Page 15: ...Instruction Manual 12 Note if the receiver is part of a video wall it will be indicated with a button that lists the wall configuration and the location of the receiver...

Page 16: ...be part of the video wall configuration Configuring your remote displays for a video wall application 1 Once the application is launched select the Walls tab 2 Select the icon to launch a wizard that...

Page 17: ...e of the video wall with the number of rows and columns you specified You ll need to use this example to specify which receivers are represented within your video wall configuration Select the receive...

Page 18: ...e show device names on screen switch This can be deactivated once you ve identified your displays 5 Optional If the displays in your video wall configuration have large bezels or empty space between t...

Page 19: ...lay ScreenY total width of each display DisplayX and total height of each display DisplayY Then click the Save button 6 The wizard is now complete and your created video wall configuration will appear...

Page 20: ...t the settings defined for each video wall configuration or delete your video wall configuration by clicking the arrow next to each video wall Advanced operation and help You can access the software m...

Page 21: ...arch automatically for devices over the network Target IP is an advanced setting that enables you to specify an IP address that the remote devices are set to in order for the software to identify them...

Page 22: ...ng Cat 5e UTP or better Audio Yes Rack Mountable Yes Industry Standards HDMI HDCP Daisy Chain Yes Transmitter Connectors 1x HDMI 19 pin 1x RJ 45 Receiver Connectors 1x HDMI 19 pin 1x RJ 45 Power Adapt...

Page 23: ...ned for repair or replacement with equivalent products at our discretion The warranty covers parts and labor costs only StarTech com does not warrant its products from defects or damages arising from...

Page 24: ...ts and we quickly deliver them wherever they need to go Just talk to one of our tech advisors or visit our website You ll be connected to the products you need in no time Visit www startech com for co...

Reviews: